![]() With the current supply difficulties, it is crucial to have a rigorous inventory management. We already showed you two tools based on Yoctopuce modules that we implemented, which take advantage of the DataMatrix 2D code labels found on most electronic component reels. Today, we are going to see how to manage items which do not have such a label.
With the current supply difficulties, it is crucial to have a rigorous inventory management. We already showed you two tools based on Yoctopuce modules that we implemented, which take advantage of the DataMatrix 2D code labels found on most electronic component reels. Today, we are going to see how to manage items which do not have such a label.
We won't keep it from you any longer: when you have tasted the practicality of a 2D code that directly includes all the useful information on a component package, you only want to have it everywhere. Today's aim is therefore to make a tool enabling us to easily add such a label to a component box lacking it.
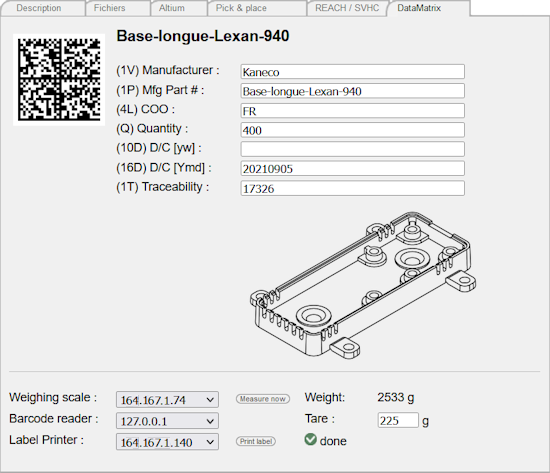
In order not to enter again all the information, we are going to use our component database, as all the components are in it already. Simply entering the component part number, by hand or with a barcode gun if available, retrieves the basic information.

Semi-automatic data entry interface
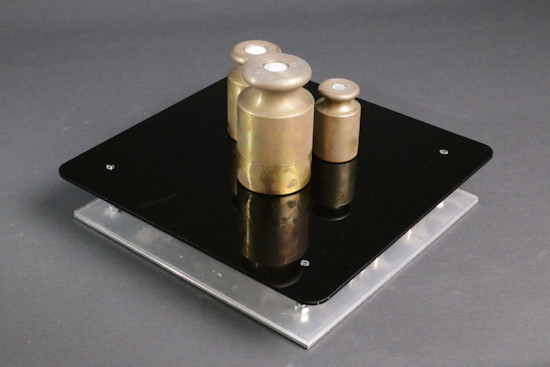
However, we must be certain that the specific information that we put on the labels is correct, especially the quantity. But we would also like to make sure that it's the correct product. The best solution to check this is to use a connected scale and to check if the measured weight is likely. We are thus going to reuse the scale presented a few months ago, built with a Yocto-Bridge and a simple load cell, of which the accuracy proves good enough to count components to the nearest unit:

The Yoctopuce scale
Our component database already includes the net weight per unit, as this is a useful piece of information for environmental certifications. We only need to add a packaging tare, as the products are almost always packaged in the same box, and very occasionally a unit packaging weight, if the raw weight of the packaged unit is greater than the final net weight, due to a packaging artefact.
With this information, we only need to:
- weight each box to be labeled on the scale
- check the number of expected units
- enter the tracking code
in order to create a DataMatrix label. But how to produce this DataMatrix label from our PHP back-end?
The generation of the DataMatrix code itself can be done quite easily in PHP, using the corresponding file retrieved from the TCPDF library (covered by LGPL license). All that remains is to draw the code on an image using the GD library, and add the textual information.
For the actual printing, we use many small Brother label printers at Yoctopuce. They are quite convenient. Those with a network connection like the QL1110NWB can be controlled directly via a TCP socket, without having to go through additional software or even through a driver. So we wrote some functions that allow our PHP back-end to send the GD image of the label directly to the printer. As we thought it might be useful to others, we made the code available to you here. The main function is printDataMatrixLabel: it takes two compulsory arguments: the printer IP address, and an array of MH10.8 fields to be included in the DataMatrix code, for example:
['code'=>'1V', 'desc'=>'Manufacturer', 'value'=>'EFP Industrie'],
['code'=>'1P', 'desc'=>'Mfg Part #', 'value'=>'EH2,5PANO'],
['code'=>'4L', 'desc'=>'COO', 'value'=>'FR'],
['code'=>'Q', 'desc'=>'Quantity', 'value'=>'1000'],
['code'=>'16D', 'desc'=>'D/C [Ymd]', 'value'=>'20220803']
]);
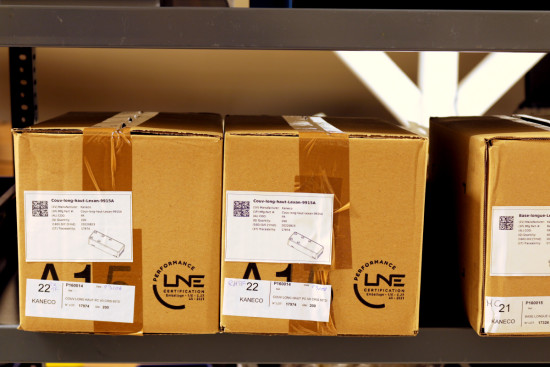
The function has an optional third argument: an image of the object in the box, to add it to the label. It's quite useful when product references all look alike...

And here is the result


