![]() For Advent, we were asked to decorate a "lighted window" as part of a local street animation. We decided to do this decoration as a shadow play. This offers us the opportunity to show you different methods to animate a window display with Yoctopuce modules, with a video demonstration.
For Advent, we were asked to decorate a "lighted window" as part of a local street animation. We decided to do this decoration as a shadow play. This offers us the opportunity to show you different methods to animate a window display with Yoctopuce modules, with a video demonstration.
For once, let's have a look at the final result first:
Actually that video was more difficult to shot than we anticipated. The scenes illuminate themselves as the train goes by. But the camera was just unable to record the fading transitions, so we had to sacrifice them for the video. Also, the scenes illumination appear much more uniform in real life. Long story short, that window play looks even nicer in real life.
That being said, lets see how we managed to build all this stuff...
The windmill and the wind turbines
The simplest way to create a windmill or a wind turbine is to build a small reduced model and to directly include a small low voltage motor, strongly reducted to turn slowly. The mill is made of two small cutout poplar boards, one for the rotor, the other one for the bed, and two small buttresses to make it stand up. The wind turbine is in 3D printed, which allows us to show a profile projection for a somewhat different rendering. The generator part is a small rounded box hiding the motor, while the pylon is a wood stick coated with rolled paper. The rotor itself is also printed in 3D.

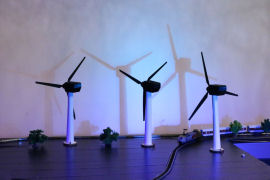

The windmill and the wind turbines
The windmill and the wind turbines are driven by a Yocto-Motor-DC which can make the motor turn very slowly.
The cable car
The cable car is also mostly a 3D creation. For the carrying cable to reproduce the natural curve of a true cable car, we didn't use a taut wire but two parallel semi-rigid piano strings. The assembly points in the stations at both ends are free to orient themselves depending on the natural curve of the piano strings. To set it up, we moved the lower station until we obtained curve of the carrying cable which was pleasing to the eye.
The car itself, made of cutout and glued Plexiglas plates, is carried by the two piano strings, but towed by a nylon string which goes around a servo winch. It is a model making servo-motor, with a run up to 4 turns. We can thus very easily and precisely position the cable car without taking care of end position detection issues.

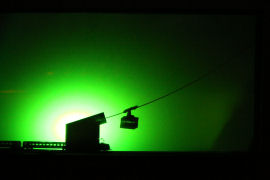
The cable car
The cable car is naturally driven by one of the 5 available channels on the Yocto-Servo.
The ship
The ship is a true shadow, cutout from a piece of black cardboard. It is kept vertical with a small wood structure, which slides on two metal tubes. Its moves are controlled as the cable car by a nylon string which winds itself on a servo winch, driven by a channel of the Yocto-Servo. A counterweight downstream from a pulley enables the ship to go in the other direction.
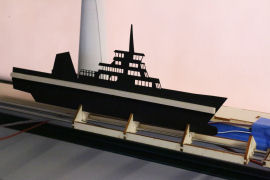
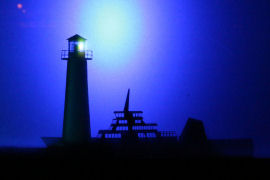
The ship
The lighthouse
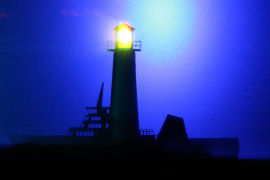
The lighthouse is probably the most tricky piece of the whole. To produce the light beam effect, we didn't find a better solution than actually rotate a Yocto-PowerColor. Built on a Plexiglas frame covered with paper, the top part of the lighthouse contains an axis with a slip ring which can bring the electric power of the four wires through the axis without twisting issues. The motor driving the rotation is hidden in the lighthouse tower. An axis brings the rotation movement to the top. The lantern room roof is printed in 3D, and the fence around it is made of soldered iron wires.

The lighthouse

The hot air balloon
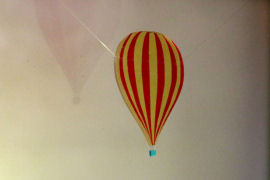
The hot air balloon is cut out in a Plexiglas plate. Tinted plastic sheets are glued to it to give it its color. To remain stable, it is carried by two nylon strings which diverge towards two pulleys in opposite ends of the window, before coming back to wind themselves both around the same servo winch.

The hot air balloon
The train
The train is a miniature Mńrklin train set, Z gauge. The loops at the end to turn around have a diameter of 42 cm only. The train is driven by a Yocto-Motor-DC. As the aim of the train is to guide the viewer from one scene to another, we must not only make the train go forward, but also keep track at anytime of its precise location, in order to switch on lights at the proper time. To do so, we put small infrared photo-transistors in the middle of the tracks about every 50 cm, and we put at the top of the window powerful infrared leds which flood the whole circuit. When lighted, the photo-transistors conduct electricity, while when the train hides them, they become blocking. By connecting each photo-transistor to a Yocto-Knob input, we can thus precisely detect when the train goes by to switch on lights. We use the same mechanism to trigger the railway crossing, with a Yocto-PowerRelay.
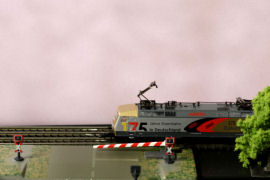

The train and the photo-transistors to detect passing trains
The lighting
The shadow play is possible because the windows are made of frosted glass. The lighting is simply performed by five Yocto-PowerColor, one for each window. We selected a hue for each window, and the module automatically manages progressive transitions between black and the selected hue. A finite state machine is behind light driving. The state machine controls the transitions between all the animations, going from one scene to another. If the train is not moving, the light sequence is based on timed delays. But the train passing on the sensors triggers an asynchronous transition from one lighting state to another.
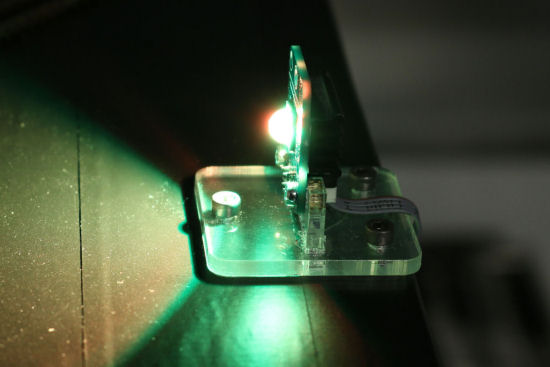
One of the lighting led, actually a Yocto-PowerColor
Conclusion
Here you are, you have got the main points. Everything was assembled against the sectional door of our premises, and driven remotely from a computer through two YoctoHub-Ethernet located on either side of the door. If you want to see the complete code driving the shadow play, implemented in Python as a state automaton, you can find the source code here.
And to finish up, here is a short video from behind the scenes...


