![]() One of the limitations of Yocto-Visualization is that only sensors are supported. But what if you want to monitor an experiment driven by Yoctopuce actuators and to have the result displayed with Yocto-Visualization without having to run several applications at the same time? Some time ago, we described how to integrate your own web page into Yocto-Visualization (for web). So why not simply create a web page that drives Yoctopuce actuators and then integrate it into Yocto-Visualization (for web). If you know how to code in JavaScript, it looks pretty trivial. Except that it's more subtle than it sounds.
One of the limitations of Yocto-Visualization is that only sensors are supported. But what if you want to monitor an experiment driven by Yoctopuce actuators and to have the result displayed with Yocto-Visualization without having to run several applications at the same time? Some time ago, we described how to integrate your own web page into Yocto-Visualization (for web). So why not simply create a web page that drives Yoctopuce actuators and then integrate it into Yocto-Visualization (for web). If you know how to code in JavaScript, it looks pretty trivial. Except that it's more subtle than it sounds.
Let's take a very simple example and let's imagine a YoctoHub-Ethernet to which a Yocto-Volt is connected to monitor the voltage at a circuit terminals, and a Yocto-PowerRelay-V3 to cut the circuit's power supply.

Our experiment to be monitored and driven from a web page
So we want to write a web page that displays the voltage curve while providing an interface for stopping the relay. To make life easier, we'll assign the logical name "ONOFF" to the relay function of the Yocto-PowerRelay-V3.
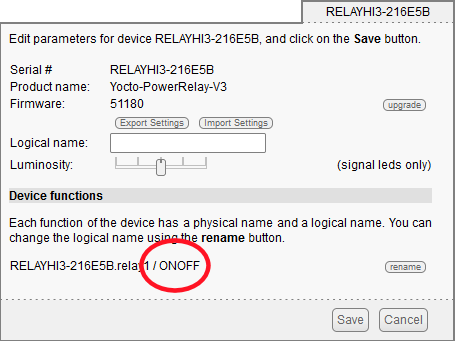
Let's assign a logical name to the relay
Preparation
We'll need the YRelay class to drive the relay. Even though the logic of our web page is written in JavaScript, we need the YRelay class defined in the yocto_relay.js file located in the dist\esm directory of the Typescript library. This is important because we want to write code that is compatible with Yocto-Visualization (for web), which is written in TypeScript.
Once you've obtained this "yocto_relay.js", you need to locate the line
at the beginning of the file, and replace it with:
Here, we want to use the same YAPI static class as Yocto-Visualization (for web). However, the fact that Yocto-Visualization (for web) is distributed in the form of a monolithic file means we're forced to do this little trick. Once the modification has been made, we recommend G-Zipping the file and copying the result to the Hub's file system. To do this, you can use the command-line API. For example, if we assume that your Hub's IP address is 192.168.1.42, the command is:
yfiles -r 192.168.1.42 any upload yocto_relay.js.gz file:yocto_relay.js.gz
Compression to a .gz file is not mandatory. You can copy the yocto_relay.js file as is, but this will significantly lengthen your application's loading times.
Code, HTML part
To keep the code simple and concise, we've reduced the interface to its simplest form:
- A div to contain a Yocto-Visualization (for web) display;
- A drop-down to control the relay.
<HTML lang='en-US'>
<HEAD>
<title> Yocto-Visualization</title>
<style>
DIV.container
{display:inline-block;
position:relative;
background-color:#f8f8f8";
}
</style>
<HEAD>
<BODY>
<p>
Yocto-Visualization + Yocto-Relay control demo
<div id="YV4Wcontainer" class="container" style="width:400px;height:300px"></div>
<br>
Relay state:
<select id="ONOFFswitch" disabled>
<option value="0">OFF</option>
<option value="1">ON</option>
</select>
</p>
</BODY>
</HTML>
Code, Javascript part
Imports
We need the YAPI and YErrorMsg classes found in the yv4web-full.min.js file. We also need the YRelay class found in the yocto_relay.js file that we've just copied to the hub. Whether the file is compressed or not, the .js extension must be used in the import:
import {YRelay} from "./yocto_relay.js";
Initialization
Initialization is a little different from what we're used to when using the Yoctopuce API. Here, we simply initialize the API with YAPI.InitAPI without calling YAPI.RegisterHub. In fact, we're relying on Yocto-Visualization (for web) to do this for us, with the correct hub. The rest of the initialization consists of finding a relay with the "ONOFF" logical name and adding callbacks to manage the selection change in the interface drop-down and the relay change of state.
let input = document.getElementById("ONOFFswitch");
let errmsg = new YErrorMsg();
async function init()
{
if (await YAPI.InitAPI(YAPI.DETECT_NONE,errmsg) == YAPI.SUCCESS)
{ relay = YRelay.FindRelay("ONOFF");
input.addEventListener('change', inputChanged)
relay.registerValueCallback(relayStateChanged)
} else document.write(errmsg.msg);
}
init();
Callbacks
The two main callbacks take only three lines.
- The first one is called when the user changes the drop-down value to make the relay change state. If this doesn't work, it's probably because the relay is offline and the drop-down is disabled.
- The second is called when the relay changes state, it updates the drop-down accordingly. Note that the relay may have been switched by an application other than ours, so it's worth trying to maintain a minimum of consistency.
{ if (await relay.isOnline())
{ await relay.set_state(event.target.value==0?YRelay.STATE_A:YRelay.STATE_B);
} else input.disabled =true;
}
async function relayStateChanged(relay)
{ let tmp = (await relay.get_state()) == YRelay.STATE_A ? 0:1;
input.disabled =false;
if (input.value!=tmp) input.value=tmp;
}
Initial state
Obviously, we'd like to know the initial state of the relay at the start of the application. The problem is that Yocto-Visualization probably hasn't yet had time to make the correct RegisterHub when the init( ) function is executed. The classic way to handle this kind of case would be to use YAPI.RegisterDeviceArrivalCallback() to detect when the relay arrives and find out what state it's in. But this isn't possible because it's a global function and is already used by Yocto-Visualization (for web). As a result, we're forced to fall back on a poling method that's not very elegant and, above all, not very scalable. Using isOnline(), this function checks whether the relay is present and detects whether it has just arrived, then updates the interface accordingly.
{ let previousyDisabled = input.disabled;
input.disabled = !(await relay.isOnline());
if ((!input.disabled) && (previousyDisabled))
input.value = (await relay.get_state()) == YRelay.STATE_A ? 0:1;
setTimeout(testRelay,1000);
}
async function init()
{ if (await YAPI.InitAPI(YAPI.DETECT_NONE,errmsg) == YAPI.SUCCESS)
{ relay = YRelay.FindRelay("ONOFF");
input.disabled = !(await relay.isOnline());
input.addEventListener('change', inputChanged)
relay.registerValueCallback(relayStateChanged)
setTimeout(testRelay,100);
} else document.write(errmsg.msg);
}
Now that we've covered all the programming, you can download the complete code here. It's now time to install the page on this Hub.
Installation
If you haven't already done so, check that node.js is installed on your machine, then download Yocto-visualization (for web) from our tools page. Unzip it wherever you like. Go to the root of the archive and type
npm run installer
to launch the installer.
Alternatively, you can run the installer directly from the YoctoHub configuration window, but this takes considerably longer, as the Hub has to download the installer from www.yoctopuce.com.
When the installer prompts you to use a "container HTML file", choose the file we've just written.
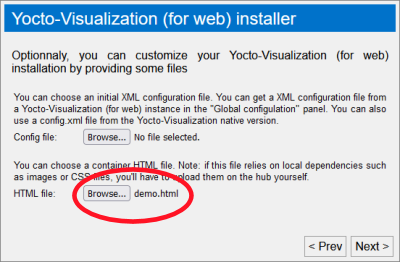
Provide the web page to the installer
We chose to work with the yv4web-full.min.js file, which corresponds to the installer's default configuration, i.e. non-minimized and read+write. If you wish to change this option, you'll need to adapt the page code according to the table below.
| yv4web-full.js | Non-minimized version, read/write |
| yv4web-full.min.js | Minimized version, read/write |
| yv4web-readonly.js | Non-minimized version, read only |
| yv4web-readonly.min.js | Minimized version, read only |
Once installation is complete, you can access the page displaying the empty DIV container, the drop-down and the Yocto-Visualiation (for web) home panel.
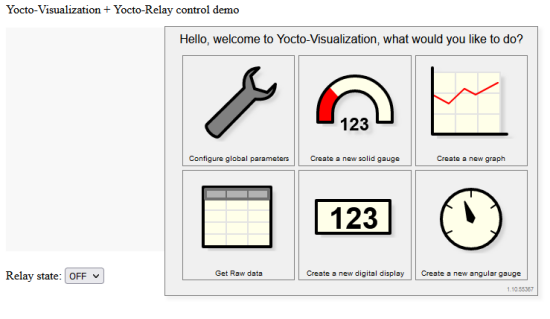
Almost there
Final configuration
All that's left to do is to create a graph using the Yocto-Volt as its source, then force it to go into the "YV4Wcontainer" div in relative size with position 0,0 and size 100x100%.
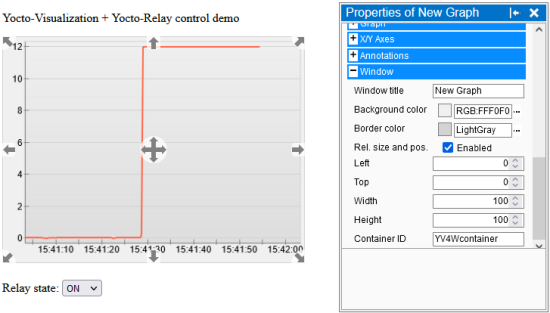
Configuring the graph to nest in the YV4Wcontainer id div
That's it!
Once the configuration has been saved, the application runs as expected. We see the voltage rise to 12V each time we switch on the relay, and fall to zero when we do the reverse operation. This is the perfect opportunity to note that the used power supply takes almost 2 seconds to return the voltage to zero in the absence of any significant load.
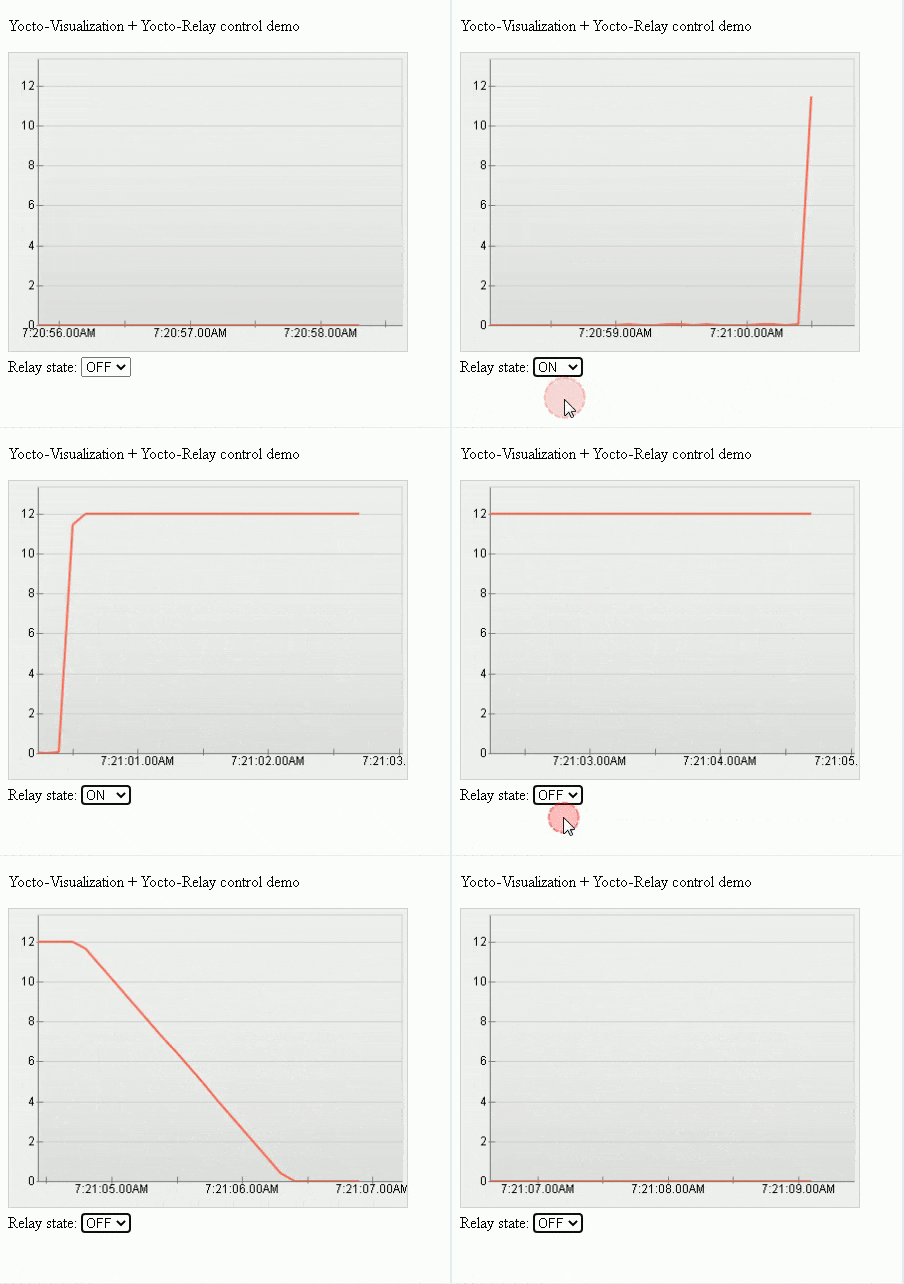
Here you go, it's working
Note that if you wish to apply modifications to the web page that controls the application without losing the Yocto-Visualization configuration, you need to download default.html.gz, unzip the file, edit it, and possibly compress it again before putting it back on the hub. We advise you to use scripts based on the command line API to automate this. One final note: if there is an .html.gz version and an .html version of the same file on the hub, the .html version is used.
If you want to know more about Yocto-Visualization (for web), here is a list of useful links.
- Yocto-Visualization (for web) presentation.
- How to use the native version.
- Comparison of web and native versions.
- Integrating your own web page into Yocto-Visualization (for web).
- Integrating Yocto-Visualization (for web) into your own web page.
- Adding series in Yocto-Visualization (for web).
- Web page, Yocto-Visualization, and actuators.


