 Ever since we moved into our new premises, we've been doing our utmost to keep the floor housing all our production machines and component stock at a reasonable level of humidity. For severe peaks in humidity, typically in Summer after a storm, we use a dehumidifier, but for mild cases, we simply open the windows. But you still need to do it at the right time...
From experience, we can say that regulating humidity levels by ventilating when the outside air is drier than the inside is infinitely more effective than a dehumidifier, while consuming no energy. On the other hand, you really need to do it at the right time, because it's effective in both ways: you can easily cause humidity levels to soar by opening the windows when the difference in humidity levels is unfavorable to you. We've noticed that there's often a small window of opportunity early in the morning, but it's not always easy to aim just right.
A few years ago, based on this principle, we built a fully automatic system to regulate humidity in the cellar of a private home. This system is still in operation today, and gives complete satisfaction. Unfortunately, we can't really afford to cut holes in the walls and windows of our premises to install cables, sensors, and fans. So we're going to continue ventilating the old-fashioned way, but rather than doing it by feel, we're going to measure the humidity of the outside air. Hence the need to build yet another weather station.
A new weather station
This isn't the first time we've built an autonomous weather station, but this time we're using equipment that has been explicitly designed for the purpose. In particular, the V75 battery and a solar panel from Voltaic Systems. The electronics is housed in a waterproof aluminum case. Humidity is measured by a Yocto-Meteo-V2 whose sensor is deported outside. The whole system is controlled by a YoctoHub-Wireless-n, which sends the measurements to a VirtualHub (for web) server via a WiFi network. The idea is to configure the hub so that it wakes up at regular intervals, takes its measures, sends the results to the server, and goes back to sleep immediately, thus minimizing the station's average power consumption.
Additionally, a Mini-Battery-Supervisor inserted between the battery pack and the hub enables the hub's configuration to be modified without having to dismantle the box, even if the battery pack is empty. Finally, a switch can be used to force the Hub to switch on and stay awake during in situ configuration operations.

Installation diagram
Construction
To house all this, we chose to use a waterproof aluminum case. As luck would have it, we found a case just big enough to hold the battery, the YoctoHub, and a few sensors.

The different parts of the weather station
We tried to design the station in such a way that it would be easy to maintain. Everything is screwed in place, and the electronics, installed directly under the cover, are easily accessible.

Layout of the various parts
The V75 battery is clamped to the bottom of the casing, while the electronics are mounted on an acrylic glass plate fastened over the battery with spacers. The solar panel is attached to an acrylic glass spacer, which in turn is attached to a printed block with a sloping face. Finally, this block is attached to the bottom of the case.

Solar panel mounting
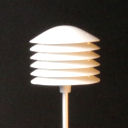
The sensor is located in a small pagoda printed with an SLS printer. We've been wondering for some time how resin-printed parts behave once they've been painted and installed outdoors, so this is a good opportunity to put it to the test. The pagoda is attached to the case by means of an aluminum tube, suitably bent using a small manual bender. All holes in the housing, including those for the screws, are sealed with liquid insulator. This substance, once dry, provides a good seal and can be easily cleaned in the event of dismantling.


The station in real life
Installation
For installation, we kept things simple and pragmatic: the station simply hangs on a shutter, which meant we didn't have to go invade the neighbor's backyard with a ladder to bore holes in a wall at an uncomfortable height.

The solar station in operation
Configuration
The YoctoHub-Wireless-n inside the box has been configured to wake up every 5 minutes, connect to a VirtualHub (for web), send its data, and go back to sleep. You can find out how to do this in another post on this blog. Based on our V75 battery tests, the system should consume around 50mW. Even without sunlight, the 71Wh battery should be able to power the system for a good fifty days, so we imagine that with our 6W solar panel and a little sunlight, our new weather station should be able to operate indefinitely.
Visualization
The advantage of posting data on a VirtualHub (for web) instance is that you can then use Yocto-Viusalization (for web) to visualize it. You can even arrange for the results to be displayed on an arbitrary web page:
Conclusion
We've managed to build an autonomous solar weather station and its man-machine interface without having to write a single line of code, which is quite rare with projects based on Yoctopuce modules. It remains to be seen how long our station will last outdoors, but if we take into account the outdoor installations we've already made, we think we're in for a few years' peace of mind. Finally, note that we used a YoctoHub-Wireless-n for communication, but we could just as easily have used a YoctoHub-GSM-4G - the principle is exactly the same.

