![]() Someone asked us recently if it is possible to drive a Canon EOS camera using a Yocto-Relay and information found on this site. We answered yes, of course, but not without a serious temptation to give it a try. Follow the guide, and don't miss the demo !
Someone asked us recently if it is possible to drive a Canon EOS camera using a Yocto-Relay and information found on this site. We answered yes, of course, but not without a serious temptation to give it a try. Follow the guide, and don't miss the demo !
First, note that driving a EOS camera shutter can be accomplished using a purely software solution. Indeed, Canon distributes a SDK for EOS cameras. But apparently it is only available for Windows, and you need to register by Canon to get it, which may takes several days. It is simpler to make a fake remote control that you will connect into the ad-hoc connector on the camera.
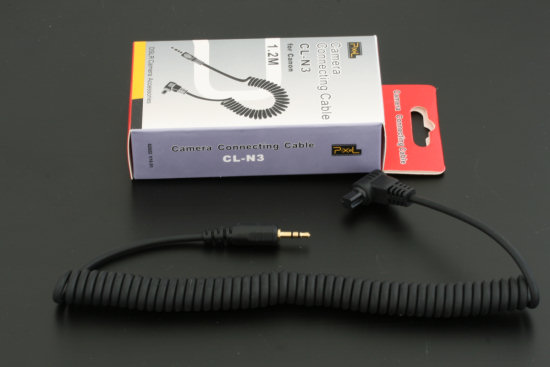
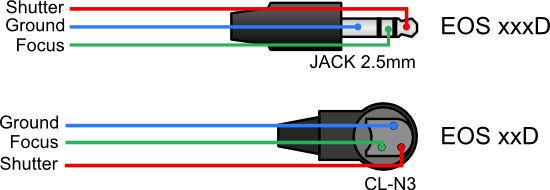
This connector changes from one model to the other: a simple 2.5mm audio Jack for cameras with a name comprising three digits like the EOS 500D, and a CL-N3 connector for cameras with a name comprising two digits like the EOS 30D. The easiest way to get a CL-N3 connector is to buy standard cable, and to cut it. The Jack can be easily found at any electronics store.

To get a CL-N3 connector, buy a standard cable and cut it.
Both connectors work according to the same principle. There are three contacts: one of them is the ground, and the two others map to the focus and to the shutter. To trigger a picture, you just need to connect the shutter wire to the ground. Same thing for to trigger the focus. This is of course very easy to automate with a Yocto-Relay. To play safe, we have added a small 200Ω resistor to reduce the current that may flow through the wires when we connect them. It is probably useless, but given the price of this camera, we better be safe than sorry.

To take a picture, you just need to connect the ground and the shutter wire

Connection with a Yocto-Relay. Note the two 200 Ohm resistors added to be safe.
Test bench
OK, now that we have a USB-driven camera, what can we use it for ? We chose to make a little experiment to test the precision of our devices: is it possible to take a picture of a toy car at the exact time when it hits a pile of plastic bricks ? The idea is to measure the speed of the car, and to compute from there the time where the impact will take place, to trigger the picture at the right time.
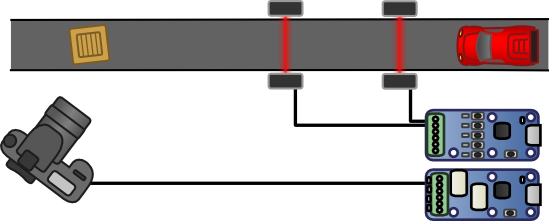
To compute the speed of the car, we make two light barriers using LEDs, photo-transistors and Yocto-Knob. The conductivity of the photo-transistors varies depending on the light they receive, and this change is easily detected by the Yocto-Knob. We have already used this principle in the anemometer and the wind vane.

The camera is controled by the Yocto-Relay and the light barriers are controled by the Yocto-Knob

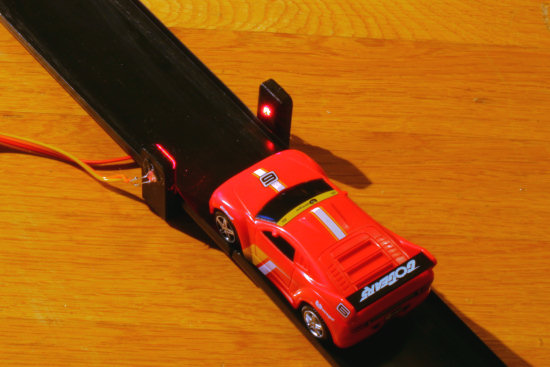
One of the light barriers
We just need to measure the time needed by the car to go from one light barrier to the other to deduce the car speed. This time can easily be obtained: when the car crosses the second light barrier, we ask to the Yocto-Knob the exact millisecond at which each of the two channel changed state for the last time, and we substract the values. We can then compute the car speed based on the distance between the two barriers, and from there deduce the time until it comes to the obstacle, in front of the camera. Once this is known, we just have to ask to the relay to trigger the shutter at theright time using function delayedPulse. One detail to be taken into account: the camera has a small lag before it can actually trigger the shutter (65ms for an EOS 30D). Here is the complete C++ code:
#include "yocto_api.h"
#include "yocto_relay.h"
#include "yocto_anbutton.h"
using namespace std;
// some ugly global variables
typedef enum {READY,LIGHT1,LIGHT2} STATES;
static STATES state = READY;
static u64 timeReference =0;
static u64 shutterTime;
static YAnButton* LightBarrier1;
static YAnButton* LightBarrier2;
double duration;
double speed;
// distance between the light barriers
#define BARRIERDIST 30.0
// distance between the 1st light barrier and the camera
#define CAMERADIST 70.0
// called when the 1st barrier is crossed
static void LightBarrier11CallBack(YAnButton *fct, const string& value)
{ int ivalue = atoi(value.c_str());
if (ivalue<200) return;
if (state!=READY) return;
state = LIGHT1;
timeReference = YAPI::GetTickCount();
}
// called when the 2nd barrier is crossed
static void LightBarrier12CallBack(YAnButton *fct, const string& value)
{ int ivalue = atoi(value.c_str());
if (ivalue<200) return;
if (state!=LIGHT1) return;
// the car has crossed the second barrier
// lets make some speed calculation
int last1 = LightBarrier1->get_lastTimeReleased();
int last2 = fct->get_lastTimeReleased();
duration =last2-last1;
speed = BARRIERDIST / duration;
shutterTime = timeReference + (u64)(CAMERADIST / speed);
state = LIGHT2;
}
int main(int argc, const char *argv[])
{
string errmsg;
// API init
if (YAPI::RegisterHub("usb", errmsg) != YAPI::SUCCESS) {
cout << "RegisterHub error : " << errmsg<<endl;
return 1;
}
// find the relay connected to the camera shutter
YRelay* shutter = YRelay::FindRelay("shutter");
// find the anButton entry connected to the 1st barrier
LightBarrier1 = YAnButton::FindAnButton("lightBarrier1");
// and sets a callback which will be called each time the
// measured value changes significantly
LightBarrier1->registerValueCallback(LightBarrier11CallBack);
// find the anButton entry connected to the 2nd barrier
LightBarrier2 = YAnButton::FindAnButton("lightBarrier2");
LightBarrier2->registerValueCallback(LightBarrier12CallBack);
// let's roll!
while (true) {
YAPI::Sleep(1, errmsg);
u64 now = YAPI::GetTickCount();
switch(state) {
case LIGHT1:
// 2nd barrier was never crossed, let's reset
if(now > timeReference+5000)
{ state = READY;
cout << "Timeout, reset" << endl;
}
break;
case LIGHT2:
// 2nd barrier has been crossed: setup the relay with the
// right delay (note: the EOS 30D has a 65ms shutter lag)
shutter->delayedPulse(shutterTime-now-65, 200);
state = READY;
break;
}
}
}
Theory is over, let's go for a run:
Looks like we are going to have fun with our computer-driven camera :-)


