![]() Irrigation controllers are very convenient to avoid the garden watering chore, but they sometimes create disasters. As times goes by, and with changes in temperature, pipes tend to unbend and sometimes to separate at the joints, creating local inundations which can be devastating the vegetable patch, for example. Let's see how to detect leaks as quickly as possible...
Irrigation controllers are very convenient to avoid the garden watering chore, but they sometimes create disasters. As times goes by, and with changes in temperature, pipes tend to unbend and sometimes to separate at the joints, creating local inundations which can be devastating the vegetable patch, for example. Let's see how to detect leaks as quickly as possible...
To detect link breaks, we are going to use the fact that to distribute water until the end of the watering pipe, water pressure is willingly rather high. It's the holes and the nozzles along the pipe that limit the flow.Therefore, when there is a water leak, there is an important raise in the water flow at the source, because the flow isn't limited anymore. We only need to put a water flow meter upstream of the circuit, right after the water supply vane.

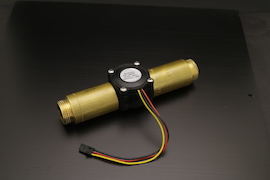
A water flow meter with G3/4 ends
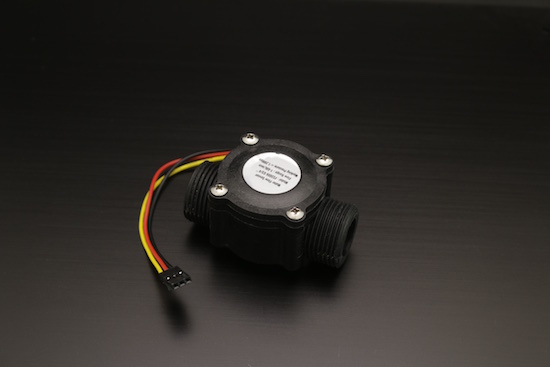
A water flow meter with G3/4 ends, bought for $15
Most flow meters are based on a Hall effect sensor and send a pulse for each measured water unit. The best Yoctopuce module to interface a water flow meter is therefore the Yocto-PWM-Rx. It can measure and record on its flash memory the pulse frequency at any time, and therefore the water flow. You can use this to raise an alarm in case of unexpected overflow. As a bonus, it can also add the number of received pulses, and therefore estimate the total volume of water distributed in the area.
Connections
The water flow meter that we selected works with a voltage from 4.5V. The simplest is therefore to power it directly from the 5V power supply of the Yocto-PWM-Rx. Note that as the Yocto-PWM-Rx is an isolated module, we could also have connected it on an external power supply, without risk.
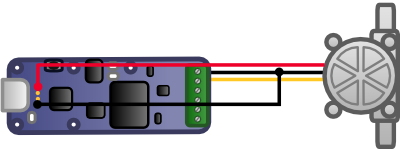
Connecting the water flow meter to the Yocto-PWM-Rx
If you want to read the water flow meter by USB, you don't need anything else. But as it isn't very convenient to use USB in the garden, we decided to add Wifi connectivity, with a YoctoHub-Wireless-g to which we directly connect a Yocto-PWM-Rx:

Water flow meter connected to the Wifi network
Last small issue: the YoctoHub-Wireless-g requires a 5V power supply. We could put a small USB power supply and pull an electric wire to the YoctoHub, but this adds some work. The solution that we propose is to power the system directly from the 24VAC powering the sprinkler solenoid, right nearby. Indeed, when the solenoid is closed, measuring the flow isn't really useful. At the same time, we take the opportunity to add a Yocto-LatchedRelay serially on the solenoid power supply, in order to close the solenoid if a leak is detected.

Diagram of the complete installation
24VAC to 5VDC converter
We didn't find with our usual providers a compact, ready-to-use solution to convert 24VAC into 5VDC. We therefore offer you a simple and effective in-house solution, built with only four cheap components that you can easily find on the Internet and solder together:
- a bi-directional 40V TVS diode, to protect us against overvoltages often generated by solenoids
- a rectifying bridge, to transform alternative current into chopped voltage
- a 1000uF 100V capacitor, to smooth the input voltage
- a 7-42V to 5V DC/DC converter, to lower the voltage
Note that all input components have to be sized for 40V, because 24VAC RMS means 34V peak-to-peak, and 10% tolerance must be added. Here is the connection diagram, and a way to make this converter within reach of everyone:

24VAC to 5VDC converter
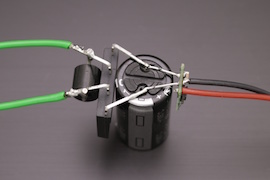
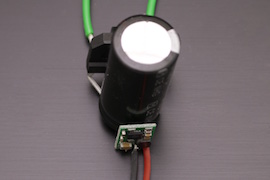
Implementing the 24VAC to 5VDC converter without printed circuit board
Implementation example
When you have all the pieces, you need only to put them together in a protective enclosure. Irrigation installations often offer surprise showers, so we'd rather put everything in a watertight enclosure. We usually use metallic enclosures, not for solidity but because they have the advantage of naturally dissipating heat through their walls. So here is the result:
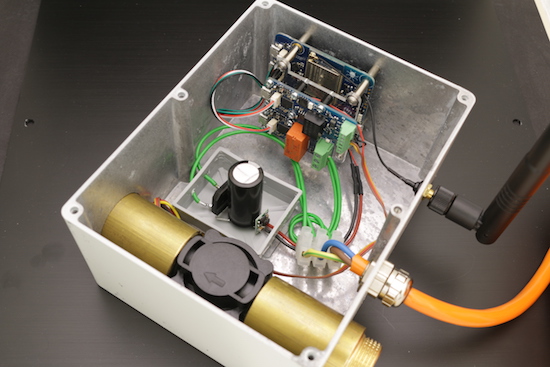
Implementing a wireless water flow meter powered in 24VAC
Configuration and first tests
Before connecting your YoctoHub-Wireless-g to its autonomous 24VAC power supply, take care to connect it by USB on a computer and to use the VirtualHub to configure the wireless network. Note its IP address. Check also that your YoctoHub actually sees the Yocto-PWM-Rx. You should then be able to connect yourself with a web browser directly on the YoctoHub-Wireless-g and from there configure the Yocto-PWM-Rx so that the main value returned is the pulse frequency.
When you have connected it to the water circuit, the simplest way to test the installation is to use the Yocto-Visualization application: if you add the IP address of your YoctoHub in the network configuration, you can quickly display in a graph the average and maximal observed frequency of the pulses emitted by the water flow meter. Here is for example what we obtain first when everything runs smoothly, and then when a leak is created by willingly removing a cap at the end of a pipe:
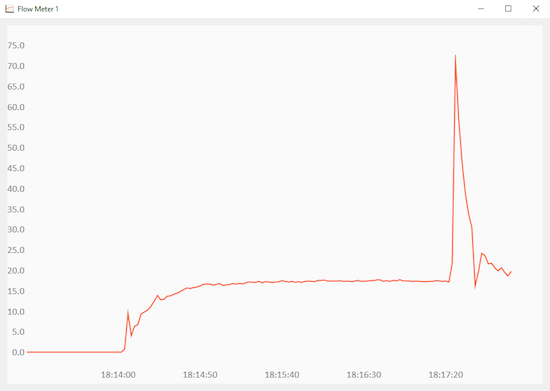
Normal flow, then after a cap is removed
This tool is convenient for tests, but you can go on using it on the long term: even if the program stops, the Yoctopuce modules still stores measures in its internal flash memory, and you can therefore visualize them with the application as soon as it is on again.
Programming the solenoid to shut down automatically
Last step, we are going to connect the system to a small program which can warn you by e-mail and/or shut down the solenoid if there is a problem. One very flexible possibility is to configure in the YoctoHub a WebSocket callback to a node.js server which controls the installation. The server can constantly monitor the water flow as soon as the system is under voltage, and drive the relay if need be. It can also retrieve the water flow measures to consult them offline.
As a basis, we are going to use the WebSocket server example presented a few weeks ago in this blog. You can find detailed explanations there, but in short this server provides a WebSocket entry point to allow the YoctoHub connection, and a standard HTTP entry point that the user can use to control the system thanks to a simple web browser.
When the YoctoHub is connecting, we immediately look for the pulse counter ad the relay driving the solenoid thanks to logical names assigned withe the VirtualHub. In this way, we can differentiates solenoids, if we need to manage several irrigation controllers:
flow1 = YPwmInput.FindPwmInputInContext(yctx, 'flow1');
flow1.vane = YRelay.FindRelayInContext(yctx, 'relay1');
await flow1.set_reportFrequency("30/m");
await flow1.registerTimedReportCallback(flowCallback);
Every two seconds, a new value is sent to the flowCallback function. We record the measure and close the solenoid in case the value is above the threshold:
{
// enregistre la dernière mesure en mémoire
let utcTime = await measure.get_endTimeUTC();
let freqAvg = await measure.get_averageValue();
let freqMax = await measure.get_maxValue();
Data.push({ "time": utcTime, "avg" : freqAvg, "max": freqMax });
// vide périodiquement les mesures les plus anciennes
if(Data.size > 10000) {
Data = Data.slice(1000);
}
// ferme la vanne en cas de dépassement
if(freqAvg > 30.0) {
flowSensor.vane.set_state(YRelay.STATE_B);
}
}
For visualization with the HTTP interface, we chose to use the HighStock library, which is very convenient and efficient. The complete code of the HTML interface is somewhat dense, so we won't publish it in this post, but you can find the complete program on GitHub. Here is the final result:

Control web interface for the irrigation controller
Conclusion
Obviously, there are a thousand possible variants for this project, depending on gardens, programming preferences, and longings. You could for example also add a humidity sensor in the ground and shut down the solenoid when watering isn't necessary... Actually, do you really need this old irrigation controller which doesn't even have a network socket?


