![]() After Yoctopuce moved into larger premises, it didn't take long for old demons to wake up in some of us. There was a time when, for some members of the team, driving like crazy with remote control cars equipped with cameras was a great way to take a break from work. It's also a very good excuse to test the RFbeam microWave GmbH K-LD7 radar :-)
After Yoctopuce moved into larger premises, it didn't take long for old demons to wake up in some of us. There was a time when, for some members of the team, driving like crazy with remote control cars equipped with cameras was a great way to take a break from work. It's also a very good excuse to test the RFbeam microWave GmbH K-LD7 radar :-)
The idea is thus to drive in FPV with a remote controlled car and to measure the speed of the car with a small radar.
The K-LD7 radar
The RFbeam K-LD7 radar is the big brother of the K-LD2 which we tested last year. It measures about 40x25x7mm, which enables us to mount it quite easily almost anywhere, but it is clearly designed to be mounted on a motherboard: it has only two headers instead of a proper mounting system.
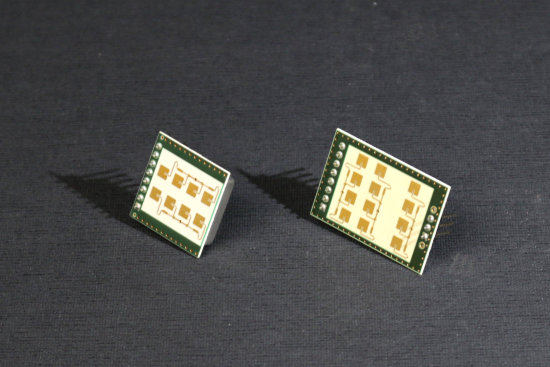
The K-LD2 on the left, the K-LD7 on the right
It can follow several objects at the same time and internally compute not only their speed but also their position as angular coordinates.
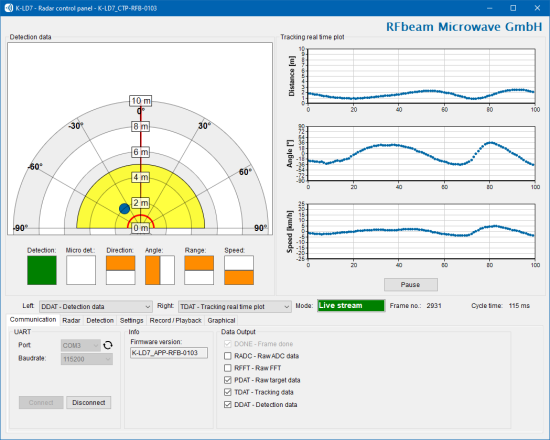
The K-LD2 can compute the speed and the position of one or several objects
It has a TTL serial output which we can easily interface with a Yocto-Serial. You can buy the radar module as a stand alone or with a small development kit including a small board with fixation holes and a standard header to which you can connect the serial adapter provided in the kit or a Yocto-Serial.
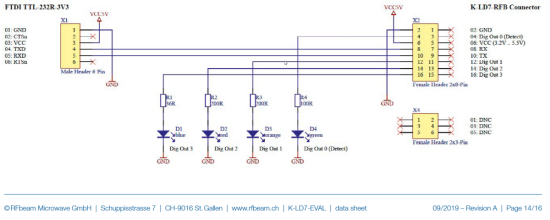
Note, the TX/RX inversion is already done
Note that if you take the time to carefully study the board schematic in the development kit documentation, you notice that TX and RX are already inverted. There is therefore no need to make this inversion between the board and the Yocto-Serial and to loose one hour of one's life to try to understand why it doesn't work.
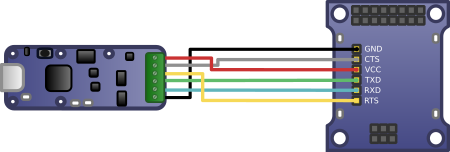
Connecting to a Yocto-Serial. We cabled CTS and RTS just for fun: they aren't used
Commands are not at all the same as for the K-LD2. They are presented in the form of a frame which includes a header of 4 ASCII characters indicating the command, followed by an integer indicating the size in bytes of all the parameters, followed by the parameters encoded in binary. The radar answers have a similar structure. The documentation explaining these commands is rather well written.
Assembly-wise, we didn't do too much, we simply fixed the radar at the end of a small articulated arm mounted on a magnetic base, which makes it possible to fix it on any metallic piece of furniture, and to transform the said piece of furniture into a gantry under which we must drive the car.
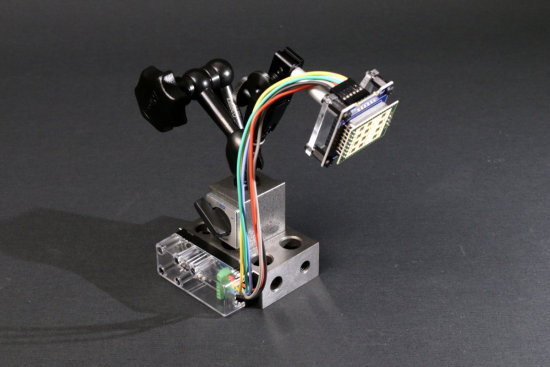
A magnetic base, an articulated arm, and the trick is done
We though about two applications for this radar:
- Computing the car speed at a specific point, some kind of drag race
- Computing lap time while timing the elapsed times between two occurrences of the car passing by. Note this will only work for one car: the radar can detect and follow several targets at once, but it cannot differentiate them
The display
We wanted to be able to see with the car's camera the data computed by the radar. So we mounted on acrylic glass plates 4 Neopixel 8x8 panels, two Yocto-Color-V2, and a YoctoHub-Ethernet. We ended up with a 32x8 pixel screen, driven through the network and powered by PoE that we can set almost anywhere on the race track. Preferably at a location where we don't go too fast, so we have time to read it.
![]()
![]()
Our display based on Yocto-Color, YoctoHub-Ethernet, and Neopixel panels.
The system is driven by quick and dirty python script. If you are interested in having a look at it, just send an email to Yoctopuce support.
The car
The car is an old HPI racing Micro-RS4 frame, slightly modified in order to use lithium-polymer batteries and a brushless motor. It was once equipped with a small analog camera which we probably broke a while ago. So we used a more modern, digital model.
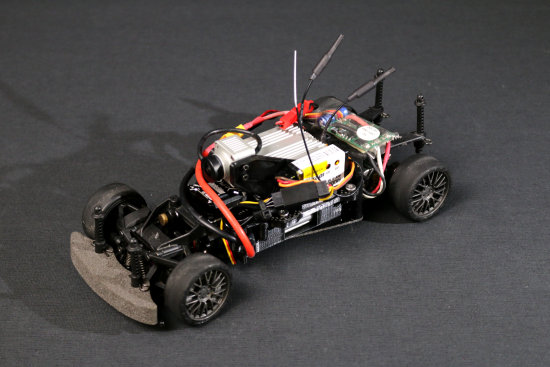
A slightly modified Micro-RS4 frame
We lost smashed the car's bodyshell a long time ago, so we improvised to make sure our device looks more like a car than like a big pile of electronics on wheels:
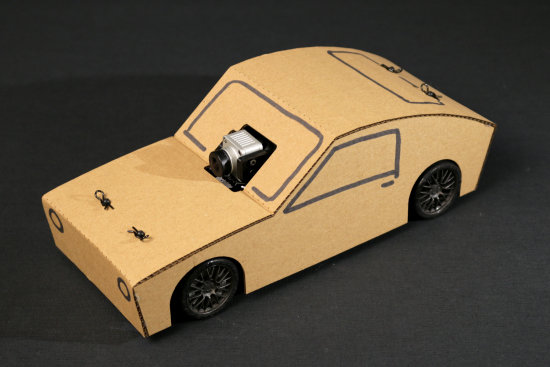
A cheap bodshell, easy to replace :-)
When we moved into our new premises, we made sure that the furniture is perched on feet or wheels of at least 12cm so that a robot vacuum cleaner can pass under it easily. So the car can pass under all the furniture, with a tunnel effect as an added bonus :-)
Does it work?
It works rather well. The radar generally has no trouble seeing the car pass although it is roughly the size of a shoe. But sometimes, when we drive very fast, the radar misses the car if it is not properly aligned. We made a little video to show you how much fun it is even if we didn't dare to go too fast to avoid breaking the car before the video was done:
If we remembered perfectly well how much fun it is to drive like a madman in FPV with an overpowered remote control car, we had on the other hand somewhat forgotten how easily a furniture leg can tear off a wheel when you drive at more than 5m/s on a slippery floor, fortunately HPI still sells some spare parts :-)


