 Someone asked us this week if it was possible to use a Yocto-Knob to detect a contact made by bare fingers, as done by the famous Makey Makey. The answer is yes, of course, but we will not leave it at that... (don't miss the video at the end of the post !)
Makey Makey principle is very simple. It works like a keyboard with only a few keys, but YOU provide the keys. You can use almost anything to make the keys, as long as what you use conducts at least a tiny bit of electricity, so that when you press the object, you close the contact. Have a look at the video on Makey Makey web site, it is really well done.
Of course, it is quite useless in the real world. But the idea is nice, and it opens the question of the range of resistance that you can detect with a Yocto-Knob. The documentation of Yocto-Knob mentions the use of potentiometers up to 100 KOhm, because above this value the readings would not stay quite linear. But to detect an open/closed state, a 10 MOhm resistance (as human skin for instance) is actually enough.

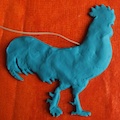
This is what we want to create
The goal of today is to make animals with Play-Doh, that will make a sound when a child touches them. For this, we will use:
- An old PC speaker
- A Yocto-Knob
- A Micro-USB-Hub
- A tiny ARM PC from Gumstix: the Waysmall Silverlode
- Flat cable... and Play-Doh
This will be for us an opportunity to test this tiny PC, similar to the MK802 but officially delivered with a supported Ubuntu Linaro distribution.

A Yocto-Knob on a Micro-USB-Hub, a Gumstix and an old speaker...
Why did we use a Gumstix instead of a Raspberry Pi? First because the Raspberry is too big to fit in the speaker enclosure. But also because we wanted to give it a try: the Gumstix is more powerful and much more expensive that the Pi, so we had to know if for this price we could have a better USB support than on the Pi (e.g. without power supply problems and missing packets with USB 1.1 devices). We'll tell you the answer at the end of the post...
The code
To keep it simple, since this is an ARM machine, we have written the code in Python. Command line media players are readily available, using a simple apt-get install command. So the following lines of code will be enough to play a sound as soon as a contact is closed:
from yocto_api import *
from yocto_anbutton import *
sounds={1:"cock.mp3", 2:"cow.wav", 3:"horse.wav", 4:"lion.mp3", 5:"sheep.wav"}
# Function invoked every time the contact changes
def buttonChanged(fct,value):
isPressed = (int(value) < 500);
wasPressed = fct.get_userData();
if(isPressed != wasPressed):
fct.set_userData(isPressed)
if(isPressed):
sound = sounds[int(fct.get_functionId()[-1:])]
sndtype = os.path.splitext(sound)[1]
player = ("mpg123" if sndtype==".mp3" else "aplay")
os.system(player+" "+sound+" &")
# Sets up Yoctopuce API on USB
errmsg=YRefParam()
if YAPI.RegisterHub("usb", errmsg)!= YAPI.SUCCESS:
sys.exit("Init error: "+errmsg.value)
# Enumerates buttons and registers callback function
button = YAnButton.FirstAnButton()
if button is None:
sys.exit("no Yocto-Knob found!")
while button is not None:
button.registerValueCallback(buttonChanged)
button = button.nextAnButton()
# Handles events forever
print('Hit Ctrl-C to Stop ')
while True:
YAPI.Sleep(500, errmsg)
Before starting this program, you must tell the Yocto-Knob what value you consider as contact closed versus contact open. For this, simply start the VirtualHub, and click on the configure link next to your Yocto-Knob. For each analog input, click on the start calibration link, then close the contact (with the fingers) and open it again. This is enough for the device to learn the range of resistance that you plan to use. Click on stop calibration, process to next input, and press Save at the end.

The Yocto-Knob calibration interface
This configuration step is very easy and makes it possible for you to always use standardized values between 0 and 1000 in your code, regardless of the exact resistance range that you need to use.
Even better
Another good thing with this calibration method: you can push it further and do even better than the Makey Makey examples. Did you notice that on all Makey Makey videos, the user has to keep in one hand (usually a bit hidden...) the "common" cable ? It makes sense: as the Makey Makey works by detecting closed contacts, the user must somehow touch two contacts to close the loop: the common and the button. The problem is, if you want to use that concept with a 2 year old child, he will not keep the wire in the hand. Don't even think about using a ring band instead, he would throw everything apart...
With the Yocto-Knob, we can push the limits of the calibration even further to detect the few millivolts that everyone transmits naturally when located in a building. To do this, simply connect the common cable of the Yocto-Knob to the body of a radiator or of any connected metal appliance. Theoretically you could even use the 3rd pin of a wall socket, but since this stuff is going to be in front of children that would be a very bad example..

Connecting the Yocto-Knob common to the building ground
Here is the overall connection scheme:

Final scheme of the project
Now, if you rerun the calibration process touching just one wire at a time (not touching the common wire this time), you will notice that the Yocto-Knob does detect your touch. Of course, what you see is no more a closed contact, but an AC voltage of a few millivolts, that you transmit to the device through your finger without knowing it. We will therefore have to make a slight change to the code, to avoid restarting the player every time the AC voltage alternates (50 Hz):
def buttonChanged(fct,value):
isPressed = (int(value) < 980);
wasPressed = fct.get_userData();
if(isPressed != wasPressed):
fct.set_userData(isPressed)
if(isPressed):
if(datetime.datetime.today() - prevtime < timedelta(seconds=1)):
return
prevtime = datetime.datetime.today()
// play sound as before
And here is the result:
Conclusion
As promised, here comes our first opinion of the Gumstix Waysmall Silverlod: Not bad actually, although we were hoping for something even better.
Compared to the MK802, three big advantages: the well-supported Linux distribution, the reliable Ethernet connection and the serial console over USB, which saves you from searching for an HDMI display for debugging.
One drawback of using a Linux machine for this kind of application: when there is no network (which is our case once the project is in its box), the host needs at lest five minutes to start up, due to repeated time-outs. The only way to avoid this is to disable network in the configuration, but then when you need to make a fix, it becomes painful...
Compared to the Raspberry Pi, USB support is indeed much more reliable. But there is a caveat: the USB Host port can ONLY do USB 2.0. Which means it is not really compliant to USB specs: if you connect directly a USB 1.1 device (such as a keyboard, mouse or Yoctopuce sensor) it will not work. This is why we had to bring in a Micro-USB-Hub to make this project work.
Apart from this, no special issue. The Gumstix remains of course a small ARM machine, far from the power of a real PC, but it does work for this kind of project.

