 A few months ago, the Raspberry Pi foundation announced a new Raspberry model: the Pi Zero. This new model evolved from model A, but is smaller and most importantly cheaper. This week, we received this new Raspberry Pi Zero. To test it, we decided to build an HDMI multimeter by connecting our USB sensors to the Raspberry Pi Zero.
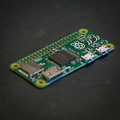
The Raspberry Pi Zero
This new model is especially talked about for its very aggressive price: $5. But to offer such a low price, they had to drastically reduce the connectors. Here is what's available:
- A power supply port (micro B)
- A USB Host port (micro B)
- A micro HDMI port
- A microSD port
Other ports (GPIO, audio, and so on) are available but the connectors are not included, and to use them you need to resort to your soldering iron. Moreover, the Raspberry Pi Zero has neither a network card nor a Bluetooth connection.
The USB port
The very first version of the Raspberry suffered from an implementation which had lots of room for improvement: the USB port provided only 100mA and the chip lost USB packets. What about this new version?
The first good news is that the USB port is able to correctly power the connected devices. We connected a USB hub (without external power supply), a keyboard, a mouse, a USB stick, and a Yocto-Meteo on the single USB port of the Raspberry, and everything worked perfectly. However, this doesn't mean that you can connect anything on the USB port. In our test, each device consumed less than 100mA. If you connect 4 Yocto-PowerColor, you have to imperatively power the USB hub.

The Raspberry Pi Zero can power a USB hub and 4 other USB modules
Another good news is that, like with the Raspberry Pi 2 and the Pi B+, USB traffic is reliable and there is no loss of USB packets.
Use example
To test the Raspberry Pi Zero, we built an "HDMI multimeter". The aim is simply to display on the HDMI output the current value of any Yoctopuce sensor connected on the USB port.
We need the following hardware:
- A Raspberry Pi Zero (or any other Raspberry Pi)
- A Yocto-Watt (or any other Yoctopuce sensor)
- A USB OTG cable to connect the Yocto-Watt to the Raspberry Pi
- A micro USB power supply (for example: a smart phone charger)

With a USB OTG cable, we can connect any Yoctopuce module to the Pi Zero
The application is a actually a simple HTML page with a few lines of JavaScript. However, for the web page to be able to access the USB port, you must also run the VirtualHub. The JavaScript code doesn't present any real difficulty and is available here.
Running the VirtualHub in a terminal and opening the HTML page with a browser is very easy. It allows you to check that everything is properly connected. The difficulty resides in installing this application on the Raspberry, and especially in configuring the Raspberry Pi so that it automatically displays this HTML page when it has started. This issue is far from trivial, especially with a Raspberry Pi which has only one USB port and no network card...
Here is our solution: first, to simplify the installation, we connect the Raspberry Pi on the Internet. A solution is to use a USB network card and to connect it to the Raspberry Pi Zero. But if you have a Raspberry Pi 2 on hand, there is a simpler solution: move the microSD card on the Raspberry Pi 2 while you configure everything.
In this way, you have not only a network card, but also 4 USB ports where you can directly connect a keyboard and a mouse. When your system is working, reconnect the microSD card on the Raspberry Pi Zero and that's it.
It's a 4 step installation process:
- Downloading and installing the VirtualHub
- Downloading and installing the application
- Installing the Midori browser
- Configuring the startup scripts
Downloading and installing the VirtualHub
You can download the VirtualHub from our web site. The .zip file contains a README.txt file explaining how to automatically run the VirtualHub at startup for each platform.
For the Raspberry Pi, you can perform everything (downloading and installing) from a terminal with the following commands:
cd /home/pi/vhub
wget http://www.yoctopuce.com/EN/downloads/VirtualHub.linux.22835.zip
unzip VirtualHub.linux.22835.zip
sudo chmod +x armhf/VirtualHub
sudo cp armhf/VirtualHub /usr/sbin
sudo cp startup_script/yVirtualHub /etc/init.d/
sudo chmod +x /etc/init.d/yVirtualHub
sudo update-rc.d yVirtualHub defaults
sudo reboot
Downloading and installing the application
For the application, you only need to download the .zip file containing the HTML page and the Yoctopuce JavaScript library.
You can automate this operation with the following commands:
wget http://www.yoctopuce.com/FR/interactive/hdmi_multimeter/hdmi_multimeter.zip
unzip hdmi_multimeter.zip
Installing the Midori browser
We decided to use the Midori browser because it has a full screen mode displaying only the content of the web page. You can use other web browsers, as explained in the https://github.com/elalemanyo/raspberry-pi-kiosk-screen page.
To run Midori at startup, you must also install matchbox (a window manager) and unclutter (a package enabling you to hide the mouse pointer when idle).
The following commands install Midori and the necessary packages:
sudo apt-get update && sudo apt-get upgrade -y sudo apt-get install midori x11-xserver-utils matchbox unclutter
Configuring startup scripts
For Midori to run correctly at startup, you must create a small shell script which starts unclutter and matchbox before displaying the HTML page in Midori. It's this shell script that the X server automatically launches after booting.
Here is the content of the /home/pi/fullscreen.sh shell script:
matchbox-window-manager &
midori -e Fullscreen -a file:///home/pi/hdmi_multimeter/index.html
Don't forget to add execution privileges to this shell script. You can do it with the chmod command:
Finally, you must modify the /home/pi/.config/lxsession/LXDE-pi/autostart file so that it looks like this:
@xset -dpms
@xset s noblank
@/home/pi/fullscreen.sh
When you have performed all these steps, the application should launch automatically at the end of the Raspberry Pi startup. Then, you only have to put back the microSD card in the Raspberry Pi Zero to obtain an ultra compact system.
| Demo time | ||
Conclusion
The Raspberry Pi Zero is a very limited machine (no network card and few ports) but if you only need to add some logic to a system, this machine is very good. Moreover, it works very well with our USB modules :-)

