This week, we will spend less time hacking and more time on the programming API, in particular on the use of USB modules from C++. The goal is to enhance our old mailbox in order to get a notification when the postman has come, in order to stay in the warm and get the mail as soon as it is here. Since this post is a bit longer than usual, if you feel lazy, feel free to skip straight to the end of the post and look at the video demo.
In order to detect the state of the mailbox, we first put a long USB cable from our office to the mailbox. We use an active USB cable that we found in a nearby shop, actually made of a regular USB cable but with an embedded 1-port hub to amplify the signal at the end.
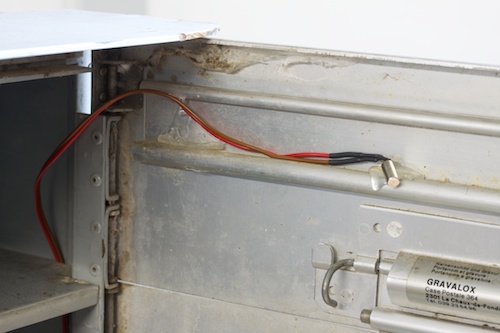
Once USB is available in the mailbox, we just need a Yocto-Knob to detect when a letter is inserted, as well as when the mailbox is opened to retrieve the mail. To detect the opening of the mailbox, we reuse a small contact switch that was sitting around, and glue it so as to be pressed when the mailbox door is closed, and free when the mailbox door is open to retrieve mail.

The contact switch used to detect the opening, simply glued
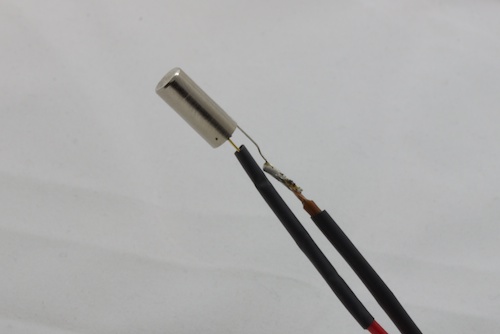
To detect the postman, we use a tilt sensor (ball switch). A tilt sensor is actually a simple contact, activated by a small ball that can move within the switch. It is a simple, efficient and cheap mean to detect a move (it is the thing that was always used in old movies to trigger bombs :-) ). By positioning the tilt sensor properly, it is possible to easily detect the swinging movement of the mailbox gate when the postman inserts mail. The tilt sensor is glued to the mailbox as well.

The tilt sensor (ball switch) used to detect new mail

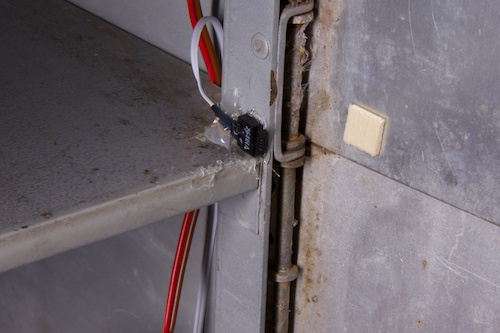
The tilt sensor is simply glued on the swinging gate
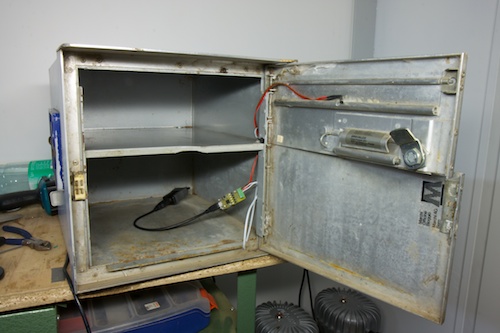
Regarding connections, it is as simple as screwing the wires of both switches to the Yocto-Knob. A single module can handle up to 5 contact switches or potentiometers.

An old mailbox, revisited by Yoctopuce
In our office, we will simply put on the wall the same Yocto-Color that we used last week for the halloween pumpkin, this time to signal with color light when mail has arrived.
Now comes the software part. We have used C++ this time to show an example in this language, but it could have been done in Javascript, PHP, Shell script, or Delphi as well. If your favorite language is not in this list, don't worry, we intend to make the list longer very quickly.
For a start, we include the headers to access the three classes needed in our example.
#include "yocto_api.h"
#include "yocto_colorled.h"
#include "yocto_anbutton.h"
Then we need to initialize the API, telling it that we intend to detect USB modules directly connected to the host. We could also use modules connected to a remote host, but we will keep it simple for now.
yAPI::initAPI(Y_DETECT_USB, errmsg);
Next, we instantiate four objects for the four functions that we will use (tilt sensor, contact switch, and two leds). In order to identify the functions, we use a string in the form "SERIAL_NUMBER.FUNCTION_ID" (eg. "YBUTTON1-9999.anButton5" to access the function "anButton5" on the module whose serial number is "YBUTTON1-99999"). We could also have given a logical name to the modules and/or to the functions first, then use the logical name instead of having to remember the serial number, but let's keep that for another article...
YAnButton *postmanSensor = yFindAnButton("YBUTTON1-99999.anButton5");
YAnButton *collectSensor = yFindAnButton("YBUTTON1-99999.anButton4");
YColorLed *led1 = yFindColorLed("YRGBLED1-001A8.colorLed1");
YColorLed *led2 = yFindColorLed("YRGBLED1-001A8.colorLed2");
Then we initialize our modules: we just have to set the two leds to green.
led2->set_rgbColor(RGB_GREEN);
It is best to verify first if the mailbox is well connected to the PC (free advice of the day: before searching your code for a bug, check that the cable is connected...)
cout << "The mailbox sensors are not connected" << endl;
return 1;
}
There is no need to monitor precisely all state changes on the switches to keep track of the "state" of the mailbox, since the module itself keeps track of that for us. We only have to compare the time of the last change on each contact switch, and to check which one is the most recent. Just take care of the inverted logic on the door switch (switch pressed == door closed).
unsigned lastCollect = collectSensor->get_lastTimeReleased();
The rest of the code is a first-year programming exercise: when the most recent event is an opening of the door, someone went for mail. If the swinging gate of the mailbox moved last, the postman was there and we need to get out in the cold.
Here is the complete code.
#include <iostream>
// includes
#include "yocto_api.h"
#include "yocto_colorled.h"
#include "yocto_anbutton.h"
using namespace std;
#define RGB_GREEN 0x00FF00
#define RGB_RED 0xFF0000
int main(int argc, const char * argv[])
{
string errmsg;
yAPI::initAPI(Y_DETECT_USB, errmsg);
YAnButton *postmanSensor = yFindAnButton("YBUTTON1-99999.anButton5");
YAnButton *collectSensor = yFindAnButton("YBUTTON1-99999.anButton4");
YColorLed *led1 = yFindColorLed("YRGBLED1-001A8.colorLed1");
YColorLed *led2 = yFindColorLed("YRGBLED1-001A8.colorLed2");
led1->set_rgbColor(RGB_GREEN);
led2->set_rgbColor(RGB_GREEN);
if (!postmanSensor->isOnline() || !collectSensor->isOnline()) {
cout << "The mailbox sensors are not connected" << endl;
return 1;
}
unsigned lastPostman = postmanSensor->get_lastTimePressed();
unsigned lastCollect = collectSensor->get_lastTimeReleased();
while(1) {
unsigned newPostman = postmanSensor->get_lastTimePressed();
if(lastPostman != newPostman){
lastPostman = newPostman;
cout << "Postman Deteected"<< endl;
led1->set_rgbColor(RGB_RED);
led2->set_rgbColor(RGB_RED);
}
unsigned newCollect = collectSensor->get_lastTimeReleased();
if(lastCollect != newCollect){
lastCollect = newCollect;
cout << "Collect Detected"<< endl;
led1->set_rgbColor(RGB_GREEN);
led2->set_rgbColor(RGB_GREEN);
}
Sleep(300);
}
return 0;
}
If you are afraid that these explanations are not enough to build your own project, don't worry: the full API documentation is almost ready. You can also put a comment or send us a mail...
And here is eventually the demo video, as promised.


