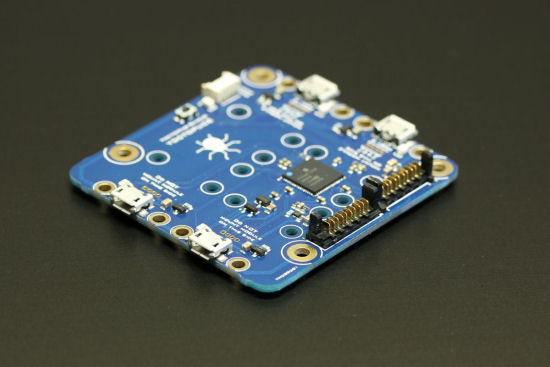
![]() Today is a great day. After a year of waiting, the YoctoHub-Shield is available. We are somewhat ashamed to have made you languish for so long, but we think that the result was worth it. Let's have a closer look at it, if you don't mind.
Today is a great day. After a year of waiting, the YoctoHub-Shield is available. We are somewhat ashamed to have made you languish for so long, but we think that the result was worth it. Let's have a closer look at it, if you don't mind.
For those of you who haven't followed the story from the start, the YoctoHub-Shield enables you to add four ports to a Yoctopuce hub. The YoctoHub-Ethernet and the YoctoHub-Wireless have only three ports each, and this can be quite frustrating. Now, you are going to be able to let yourself go and build Christmas trees:-)

The YoctoHub-Shield
Usage
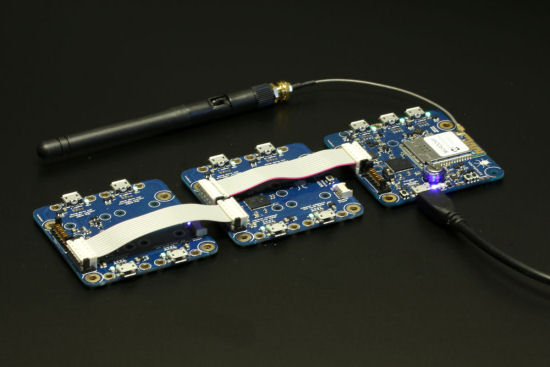
Using the YoctoHub-Shield is so simple that you don't even need to download the user's guide. Simply connect it to your hub with the provided ribbon cable, that's it. Your hub has four additional ports. No configuration, no need to even disconnect the hub: it's plug-and-play. However, the first time, you'll probably need to update the firmware of modules that are already in your possession.

Connect it, it's ready!
The shield ports are equivalent to the ports of the master hub. They are plug-and-play and you can drive them remotely. Connect a Yoctopuce module to one of them and the module is immediately recognized by the master hub.

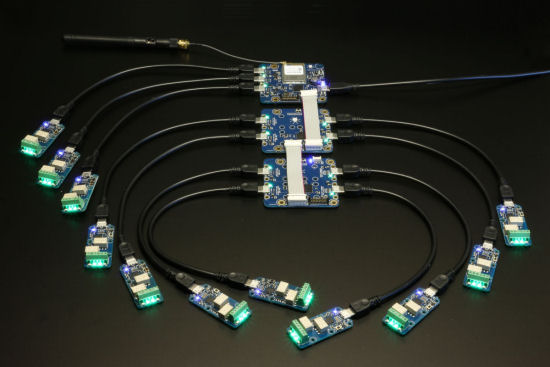
Get ready for an orgy of Yoctopuce modules
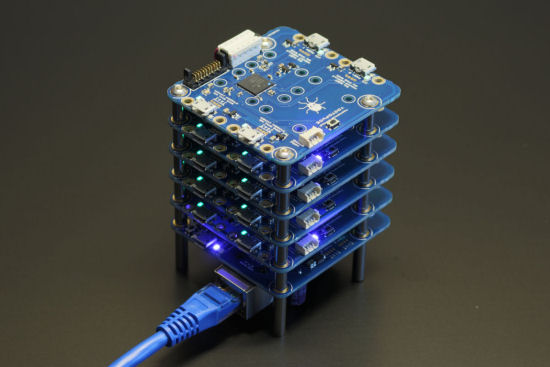
You can chain up to 10 shields one after the other. This allows you to connect up to 43 Yoctopuce modules to the same network access point. You don't have to place the shields in a single line, you can stack them and obtain a very compact über-hub.

You can stack the shields
Limitations
Despite appearances, the YoctoHub-Shield is not some kind of magic artefact. You are not going to be able to do everything with it, it is important that you understand its limitations.
Power consumption
You can assemble a hub able to manage about forty Yoctopuce modules, it's a fact. But don't forget that a YoctoHub-Ethernet or a YoctoHub-Wireless can provide only 2 amps total, that is for itself, for the shields, and for the modules. If you connect 43 relays on the same hub and that you make them all commute, you'll go over the limit and the hub will go into protection mode. Nevertheless, your energy budget shouldn't be to hard to compute: each Yoctopuce module can report its own consumption at anytime.
Network resources
With the YoctoHub-Shield, it's tempting to have several projects running at the same time on the same shield stack. You must however know that a Yoctopuce hub is able to manage only 8 connections in parallel. An application using the Yoctopuce API to access a hub needs 2 connections, the first one for the set/get functions, and the second one to manage callbacks and plug-and-play events. Therefore, you can have up to 4 applications talking to a hub at the same time. If you try with more, you will need to handle many connection errors.
CPU resources
Rather logically, the more modules you put on a YoctoHub-Shield stack, the slower goes the whole. The severity of the phenomenon depends on the capacity of each module to generate data. A relay generates almost nothing, while a Yocto-3D generates an important and continuous flow of data. Don't put 43 Yocto-3D on the same hub, you would only have troubles :-)
Length of the connections
To work correctly, the total length of the bus connecting the shields to the hub must not go over 75cm. As well, avoid putting a Yoctopuce module too far from its hub or shield: 1m is really a maximum. If you intended to use the same hub to stuff your house with sensors, well, bad luck!
Conclusion
Thanks to the YoctoHub-Shield, you can add a large number of ports to a Yoctopuce hub in a few seconds. Your projects can get bigger and, if you stay reasonable, no doubt that you will be able to achieve great things!


