 When you simply want to display a physical measure with a Yoctopuce module, there are several solutions: You can write your own program to display the sensor data, or use the embedded data logger with our command line API to export the data. But there is an even simpler solution: configuring a YoctoHub to post the values in the cloud. We natively support Xively and Emoncms, and this week we explain how to configure a YoctoHub to use these services.
These two web services enable you to record measured values and to represent them in a graph. Obviously, this solution works only if you use a YoctoHub (or a VirtualHub) to connect the USB environmental sensors or the USB electrical sensors to a local network (wired or wireless).
These services have several advantages with regards to a "home made" solution:
- You don't need to know how to program to use these tools
- You don't need a computer to record the data anymore. Everything is saved in the "cloud"
- You can view the graphs from anywhere, because you don't connect yourself to the Yoctopuce modules but to the web service. As long as you have Internet access, your data are available
- You don't need to change your DSL router configuration to access the sensor when you are away from home.
- You don't need to master HTML, JavaScript, or CSS to have a web page displaying correctly on any screen (computer, smartphone, TV, ...)
However, some of these advantages are double-edged: if your Internet connection goes down, data are not recorded anymore. There are few customization options for the web page (in particular on Xively). And the data are saved on the server of a company, which can go bankrupt, change the price of its services, or transmit these data to the dark side of the force. So, note that Emoncms is open source: it is therefore possible to set up your own server and thus to have full control on the data.
In this example, we are going to show you how to monitor the temperature, humidity and the CO2 rate in a child's bedroom. This is typically a scenario that lends itself well to this kind of services: no need to spend an evening coding an application and the data are not critical.
For hardware, we are going to use a YoctoHub-Wireless-g on which we connect a Yocto-Meteo and a Yocto-CO2. When configured, we only need to power the YoctoHub-Wireless-g with a phone charger.
Network configuration
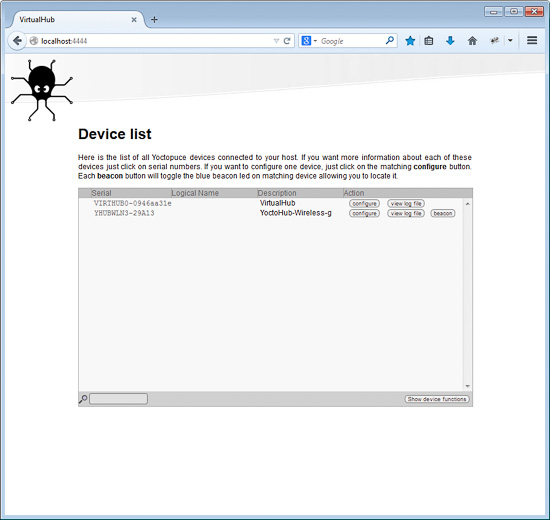
The first step is to correctly parameter the YoctoHub-Wireless-g for it to connect itself to the existing Wifi network. The easiest method is to connect the control USB port of the YoctoHub-Wireless-g to a computer and to run the VirtualHub. The VirtualHub is a application (available for Windows, Mac OS X, and Linux) which starts a web server available on the 4444 port. To access the VirtualHub web interface, open a browser at the http://localhost:4444 address.

The VirtualHub interface lists the modules connected by USB on the machine
The configure button of the YoctoHub-Wireless-g opens the module configuration panel, and the Network Configuration section displays the current configuration of the YoctoHub-Wireless-g. The edit button enables you to run the Wifi connection wizard. When the wizard has run, the module applies the configuration and, after a few second, the network state and the IP address of the module are updated. Do not forget to save the configuration by clicking the save button. Otherwise, the previous parameters will be restored when the YoctoHub-Wireless-g will be started next.
The last step is to check that you have access to the YoctoHub-Wireless-g with the local network. To do so, enter the IP address of the YoctoHub-Wireless-g in a web browser. You can now stop the VirtualHub and connect both the Yocto-Meteo and the Yocto-CO2 to the YoctoHub. These two modules must appear in the YoctoHub-Wireless-g web interface.
And for the YoctoHub to post the values of all the connected sensors on a web service (Xively or Emoncms), you must access the HTTP Callback configuration wizard. It is located in the Outgoing callback section of the YoctoHub configuration page.
Xively configuration
Here is a screencast of the configuration process:
The HTTP Callback configuration wizard requires the Xively Feed Id and API Key. To retrieve them, you must log yourself on Xively and create a Device (DEVELOP menu, click on Add Device). On the Device page, the Feed Id is in the top right corner of the page, and the API Key is in the right column.
When you have entered these two parameters, you must imperatively test that the callback works properly, with the test button. When everything is working, the test page must display:
[Connection closed]
If an error message is displayed, you have probably made an error when copying the Feed Id or the API Key.
The last parameter of the wizard allows you to define the interval at which the data must be sent to Xively. You might be tempted to update the data every second but, depending on your package, Xively can ignore some values if you go above your quota. With a free account, there is no advantage to sending data more than once a minute. When you have finished going through the wizard, do not forget to save your new configuration with the save button.
If you go back to the Xively site, the Device that you have just created must now display seven channels, representing the seven functions that the YoctoHub posts on Xively (3 for the Yocto-Meteo , 1 for the Yocto-CO2, and 3 for the YoctoHub-Wireless-g). Xively displays at the top right a "Feed URL" to directly access the graph.
Emoncms configuration
Here is a screencast of the full configuration process:
For Emoncms, the HTTP callback configuration wizard only requires the API key with Emoncms write privileges ("WriteAPI Key"). You can find this key in the "My account" page or by clicking on the "Input API Help" link (top right) of the "input" page.
When you have copied this key in the YoctoHub wizard, you must imperatively test that the callback works properly, with the test button. When everything is working, the test page must display:
ok [Connection closed]
If an error message is displayed, you have probably made an error when copying the API Key.
The last parameter of the wizard allows you to define the interval at which the data must be sent to Emoncms. Unlike Xively, Emoncms does not put limitations on the quantity of data that you can upload. When you have finished going through the wizard, do not forget to save your new configuration with the save button.

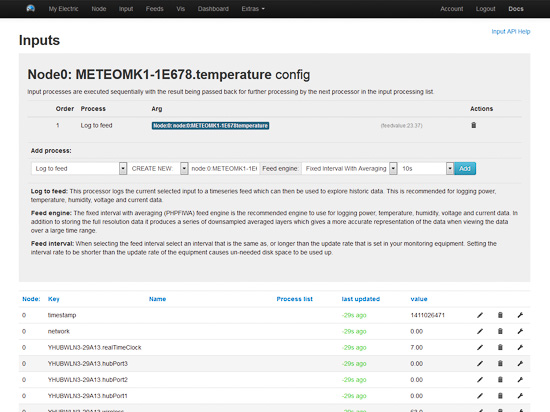
Emoncms feed configuration interface
If you go back on the Emoncms site, the input page must display the eleven inputs that the YoctoHub posts (3 for the Yocto-Meteo , 1 for the Yocto-CO2, and 7 for the YoctoHub-Wireless-g). Emoncms uses the concepts of input and feed. An input is a raw data source and a feed is a flow of recorded data. To use the values posted by the YoctoHub, you must assign to each input a feed to which the new values are added. To do so, click on the spanner icon of the inputs you are interested in (temperature, humidity, and CO2) and assign them an output feed. Default parameters are quite alright to simply display a graph, but you can also perform mathematical or logical operations on the input before adding the value to the feed.

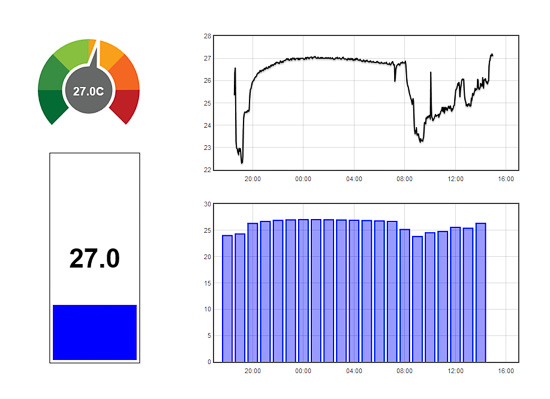
Emoncms supports numerous graph and widget types
The last step consists in "drawing" your dashboard with the embedded editor. Emoncms supports numerous graph and widget types. For each graph, you must simply specify the feed that must be used. You can design a much more personal page than on Xively.
When you have created your dashboard, it is available with the http://emoncms.org/user_name/dashboard_alias URL. For example, the "demo" dashboard of the "yoctopuce_demo" user can be reached with the http://emoncms.org/yoctopuce_demo/demo URL.
Notes...
If you do not have a YoctoHub, it is possible to use instead the VirtualHub on a PC (or a Mac). Indeed the VirtualHub provides the same Outgoing callback feature. Therefore, all Yoctopuce devices connected by USB on a computer running a Virtual hub could be used in a cloud service as well.
Note that there are several other web services that offer similar features and that you can already use with your YoctoHubs (for instance Valarm and ThingSpeak). We will cover them in future blog post.


