![]() From the start, sensors and actuators produced by Yoctopuce are USB devices. But you can enhance them with network connectivity very easily thanks to the YoctoHubs. As part of our "Yoctopuce for beginners" series, we are going to have a look at these YoctoHubs and discuss their advantages and disadvantages.
From the start, sensors and actuators produced by Yoctopuce are USB devices. But you can enhance them with network connectivity very easily thanks to the YoctoHubs. As part of our "Yoctopuce for beginners" series, we are going to have a look at these YoctoHubs and discuss their advantages and disadvantages.
If you want to make Yoctopuce devices available on a network, the first idea that comes to mind is to use a mini-computer, of the Raspberry Pi type, to connect to it your Yoctopuce modules, and to run on it a VirtualHub. No doubt, it works, they were even designed for this. But there is an even simpler and more efficient way.
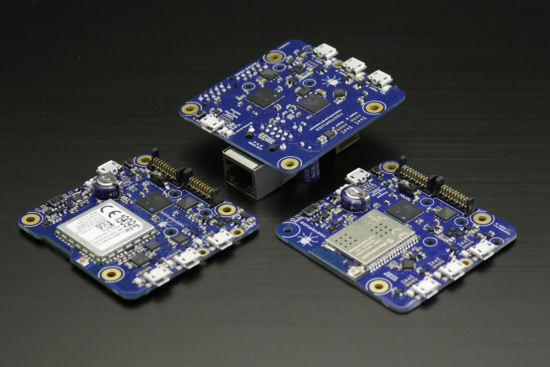
The YoctoHubs
The YoctoHubs and their advantages
The YoctoHubs are the equivalent of computers running a VirtualHub: they share the same interface and offer the same features as a VirtualHub. But, in the opposite to a standard computer, they don't have an operating system: they are automatons based on a much simpler processor than minimally required for any mini-computer. There are many advantages to this architecture:
- No maintenance: no OS to regularly update/patch
- Little greedy: as they are based on small processors, they consume only 100 to 150mA on average
- Ease of use: These hubs are very easy to install. You only need to connect them and they work... Usually, you have to configure the network parameters only.
- Reliability: These hubs are so simple that they rarely crash. In the worst case, if they detect a problem, they can reboot discreetly in less than a second. In the opposite to classic solutions based on an OS and a file system, they resist well to a sudden power failure.
General presentation
All our hubs are of the same size. They come in the form of a 60x58mm PCB. On one side, there is a micro-B USB socket for configuration and power supply, on the other side three slave ports, in the micro-B format as well. You can power them with any 5V source. For example, a simple USB charger or even a USB battery will do. If you want to be sure to avoid problems, select a power source that can provide 2A, knowing that in most cases, a system based on a Yoctopuce Hub can do with much less. Slave ports power the modules directly and are plug-and-play: you can disconnect a module of a powered hub and connect another module as easily as you would on a regular computer.
Connections
The YoctoHubs are designed to be used with simple micro-B/micro-B USB cables. But you can also use smaller cables which enable you to assemble more compact systems. You can even fix a module directly on the hub thanks to a system of screws, spacers and connectors.

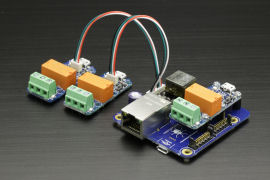
Connections: USB cables vs. 1.27mm cables
Configuration
As all Yocto-modules, YoctoHubs are USB modules. Therefore you can at any time connect them by USB to a computer to configure them with the VirtualHub, or with the help of the command line API. This means that to configure the network parameters of a YoctoHub for the first time, you only need to connect it by USB to a computer. Naturally, as with all the Yoctopuce modules, you don't need any driver.
Typical applications
The two typical applications of the YoctoHubs are:
Remote mini-systems
If you need to remotely access an actuator or a sensor but you don't wish to install a full computer, a YoctoHub provides a fast and compact solution.
Internet of Things
The YoctoHubs are perfect to install actuators or sensors driven from a Cloud type system. Thanks to the embedded callback system, each hub can contact a server at a regular interval, send its data to it, and receive the list of actions to be performed.
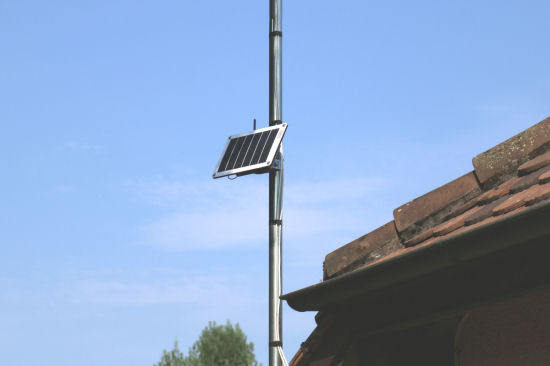
Building a Wifi temperature sensor, putting it on a roof, and powering it with a solar panel? Dead easy.
The YoctoHub models
There are essentially three types of YoctoHubs, corresponding to the three types of network connectivity: Ethernet, Wifi, and GSM. They all have the basic features of the VirtualHub: consultation and configuration of the connected modules, firmware updates, callbacks on several Cloud systems. But each has its own specificity.
The YoctoHub-Ethernet
The YoctoHub-Ethernet allows you to make a Yoctopuce module available through a wired network. All you have to do is to connect the modules on one side, the network and power cables on the other side. If you network is equipped with Power over Ethernet (PoE), you don't even need a distinct power cable: the YoctoHub-Ethernet can be powered by PoE. In real life, this means that you can install a YoctoHub-Ethernet quite far from a power socket: you simply need a long enough UTP cable.
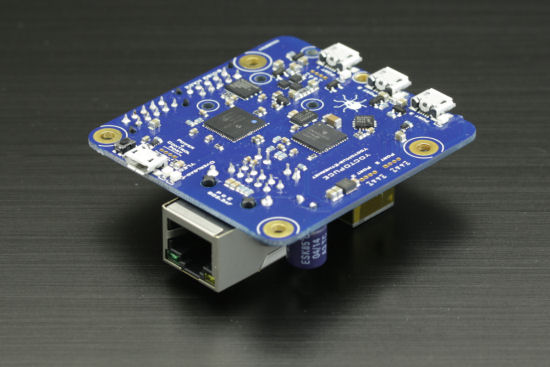
The YoctoHub Ethernet
The YoctoHub-Wireless
The YoctoHub-Wireless-g and its variants provide a Wifi connectivity to your Yoctopuce modules. It has an interesting feature if you plan on building a system powered by batteries: it can go to sleep by itself and wake up at regular intervals. While sleeping, the YoctoHub-Wireless-g consumption becomes negligible: about fifteen µA. You can therefore build systems that turn on by themselves, perform their measures, send them on a server, and go back to sleep as soon as it is done. All with a ridiculously low average consumption.
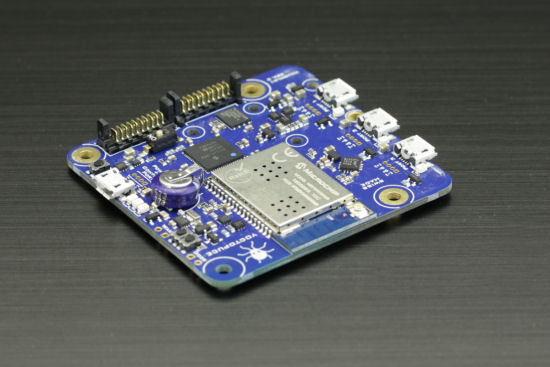
The YoctoHub-Wireless
The YoctoHub-GSM
The YoctoHub-GSM is more or less the equivalent of the YoctoHub-Wireless with a GSM network, which enables you to create autonomous systems able to work in the middle of nowhere. Beware however, in terms of connectivity a GSM network is not the exact equivalent of a Wifi network. It is very difficult to obtain a GSM data subscription with a public IP address allowing incoming connections. Therefore, even is the YoctoHub-GSM can manage incoming connections, most of the time you will have to make do with the callback system. There are three flavors of the YoctoHub-GSM:
- The YoctoHub-GSM-2G working in 2G, everywhere in the world.
- The YoctoHub-GSM-3G-EU working in 3G, in Europe, the Middle-East, Africa, Asia, and in the Pacific.
- The YoctoHub-GSM-3G-NA working in 3G, in North America, Latin America, and the Caribbeans
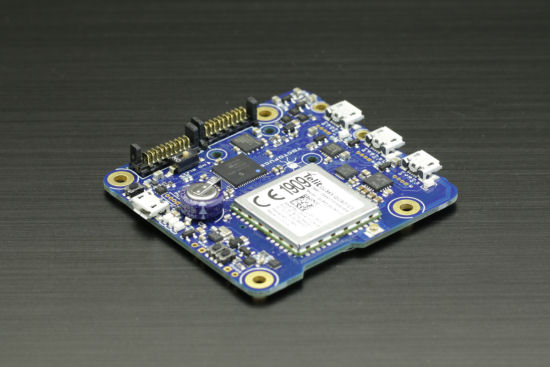
The YoctoHub-GSM
The YoctoHub-Shield
The YoctoHub-Shield is not a hub per say: it's an extension allowing you to add 4 ports to a YoctoHub. In fact, you can connect up to 10 to these YoctoHub-Shields on any YoctoHub. Beware, the power consumption of a system based on a YoctoHub is limited to 2A, nothing guaranties that you can power 43 modules at the same time: some module consume more than others.
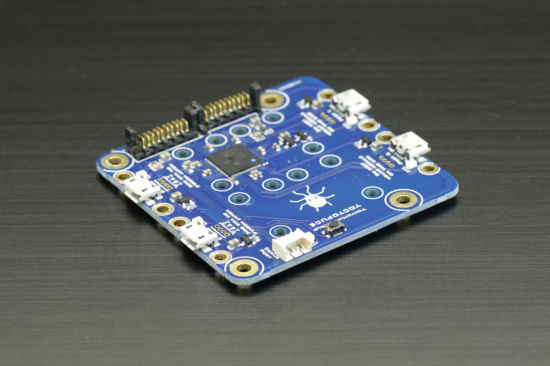
The YoctoHub-Shield
Yes, but...
Despite appearances, YoctoHubs are not magical. Compared to a solution based on a mini-computer + VirtualHub, a YoctoHub provides numerous advantages but there are also a few limitations that you must be aware of if you want to avoid some disappointments.
- A YoctoHub is not a real computer, you cannot run your own software on it
- Even if they use USB connectors, the slave ports of a YoctoHub are not true USB ports, they use a protocol simpler than USB. Therefore, a YoctoHub can drive only Yoctopuce modules. In other words, you cannot drive a standard USB device from a YoctoHub. For the same reason, you cannot expand the number of slave ports with a standard USB hub.
- The energy budget of a YoctoHub is limited to 2A for its own consumption and the consumption of all the modules that are connected to it. If the total consumption goes over this limit, the Hub switches to protection mode.
- No SSL support, the YoctoHub processor is not powerful enough for it. However, it supports HTTP digest authentication.
In short...
The YoctoHubs are a rather ideal solution if you need something simple and little greedy to drive Yoctopuce modules remotely. In terms of Yoctopuce features, they are equivalent to a computer running a VirtualHub. We could even say that they are a hardware version of the VirtualHub. :-)


