![]() This week, we show you how to build a bar lamp based on RGB LEDs. It's easy and you will end up with something almost as pretty as those you may find in your favorite appliance store. Moreover, each LEDs can be controlled individually, which is not a common feature among design lamps.
This week, we show you how to build a bar lamp based on RGB LEDs. It's easy and you will end up with something almost as pretty as those you may find in your favorite appliance store. Moreover, each LEDs can be controlled individually, which is not a common feature among design lamps.
Material
The main idea is to use an aluminum U section profile, put a NEOPIXEL RGB led strip inside and fill it with a substance behaving as a light diffuser.

![]()
Material
We chose a 30 LED/meter strip. We could have used one with a higher LED density, but the consumption would be higher as well. At full power, each one of theses RGB LEDs can draw up to 60mA.
Construction
The first thing to think of is the attachment system. We have chosen to make two screws sticking out of the bar. That way, we keep many possibilities for the attachment system. So we have drilled two holes, beveled them, and then glued two countersunk screw inside with epoxy glue.


The attachment system.

Here we use a threaded hook
Making sure that the screw / aluminum interface is water proof might prove a useful precaution later on. For aesthetics purposes, we have 3D-printed two plugs for the bar ends. One of them has a hole for the LEDs command wire. To make them look better, we have slightly sanded them and rubbed them with an acetone-soaked rag.


The LED strip is sold in a kind of silicon tube. The tube can be removed with regular pointy scissors. Make sure you don't damage the LED ribbon while doing it.


The idea is to stick the LED strip inside the aluminium profile, however there are many bare contacts under the LED strip. Aluminum oxyde is a very bad conductor, but we didn't want to take any risk, that's why we have covered each contact with adhesive tape.

Led strip contact isolation
Then we have soldered the command wire to the LED strip. Be attentive: there is only one right way to do this. The right end is the one with the Din marking, not the one with Dout. If there already is a connector attached to the other end of the command wire, then make sure that the wire goes through the plug with a hole before soldering it. Once the wire was soldered we stuck the strip in the profile with regular double sided adhesive tape.


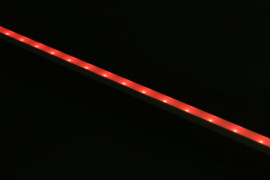
Once the LED strip is installed, it's the last chance to check if everything still works. The LED are driven with the very same system we used for the ping-pong balls lamp: one Yocto-Color-V2 and one Yocto-Light-V2 are connected to a YoctoHub-Ethernet. The Yocto-Light is used to measure the ambient light and adjust the lamp luminosity. The YoctoHub-Ethernet allows the system to be controlled from Internet.

LED test
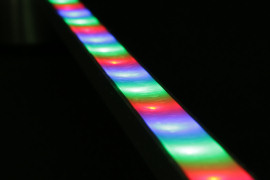
We could have stopped here and call it a day. But almost all LED based lamps have the same problem: they are made of point source lights, which makes them look like miniature Luna Parks. We have tried different matters to improve light diffusing, and we settled on silicon. The kind one may find in any DIY store. Make sure you choose the transparent sort, which actually, is translucent. Before using it with we covered the profile with masking tape, silicon is a very messy stuff.

Protection with masking tape
Once the profile is filled with silicon, simply smooth it with a spatula. This kind of silicon is designed to cure in open air, it actually takes quite a long time for it to cure at core. However, at the silicon surface, a fine cured film will appear quite fast. That's why you have to work fast. Once the film is settled, there is not point using the spatula any more, it will only make things worse.


The profile if filled with silicon

Lets wait dor it to cure
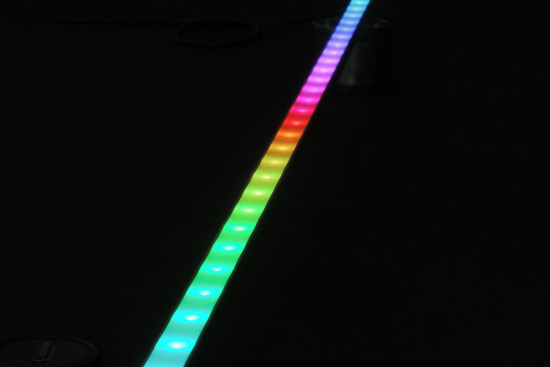
We have waited for two days to make sure the silicon was fully cured and then we removed the masking tape. Then we connected a Yocto-Color-V2 to our new toy and we had a luminous bar able the display many light effects.


One last thing: because the way it is built, this device is even water proof.

