![]() Yoctopuce devices are well suited to quickly setup small custom automation solutions. This week, we had one more occasion of verifying this, as we were updating our component inventory system to improve its capabilities.
Yoctopuce devices are well suited to quickly setup small custom automation solutions. This week, we had one more occasion of verifying this, as we were updating our component inventory system to improve its capabilities.
The project goal
Given the ever increasing difficulty to source components, we had - as most electronic manufacturers - to significantly increase our component stock for the past six months. But increasing stock level is also a risk for some components with a limited shelf life. It is therefore important to make sure that we always use the oldest components, before they reach their maximum shelf life.
Monitoring our stocks is not quite enough. As many components are no more available from distributor's stock at the time of placing the order, we also have to monitor pending orders, as distributors and manufacturers are frequently unable to meet the delivery date announced when the order was placed. We have therefore decided to setup a system where all component reels are processed through an incoming scan and outgoing scan, in order to be able to precisely trace each individual reel.
Luckily, distributors and component manufacturers now print on their labels a DataMatrix 2D code that provides key information about the components: the manufacturer part number, the quantity, the production date code. Our goal is therefore to put in place a system that makes it possible to very quickly scan the 2D code of incoming and outgoing reels, and to archive their image. In order to accomplish this, we have selected a dedicated industrial ethernet camera with built-in 2D barcode decoding, as we suspected this would be far more efficient than a system based on a traditional camera and an external decoding made in the PC.

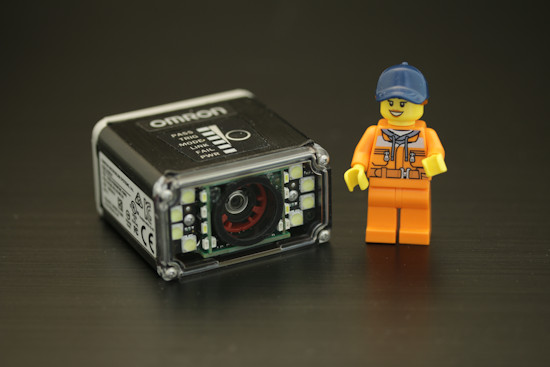
The tiny OMRON MicroHAWK V430-F camera
The challenge
As the scan of incoming and outgoing components is not a day-long activity, we don't want to keep the camera scanning continuously: this would be useless and would quickly kill the exposure LEDs. We simply want to automatically trigger the camera shot and analysis when a component reel is brought in front of the camera.
In a typical conveyor-based environment, this type of trigger is implemented using a light barrier. The camera even has a dedicated input signal to handle such trigger. However in our case, as the component reel is carried in the operator hand, we would like to make sure the reel is hold steadily before triggering, in order to keep a good picture for archiving. And once the code detection is successful, we want to update the stock inventory with the detected result and archive the image.
The solution
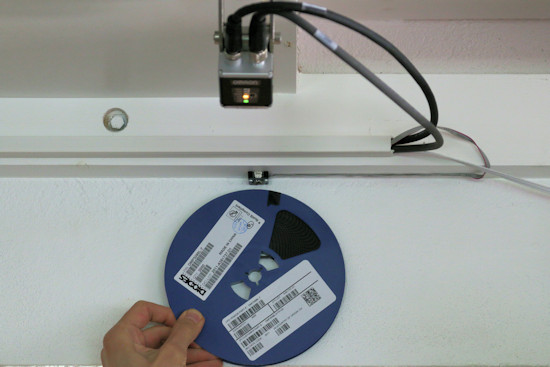
Our solution is therefore to install the V430-F camera in front of one the the last unused piece of wall in our garage, and to install a Yocto-RangeFinder parallel to the wall so as to detect any object present in the camera field of view. When the zone in front of the camera is empty, the measured distance corresponds to the quasi-tangential reflection of the sensor on the wall, at around 80mm. But when a reel is put in that area, the sensor detects the object, which is then at only 20 or 30mm. The control software, written in TypeScript, waits for this measured distance to stay stable, typically for a few tenths of a second, and then triggers the snapshot and the analysis of the image by the camera.
The control software checks that the DataMatrix code corresponds to a valid component reel, and if this is indeed the case, it will archive detailed information and load the full image from the camera for archiving.

Our component reel scanner setup
To keep the setup clean, everything is Ethernet-based: the camera can be fully driven over its network interface, and the Yocto-RangeFinder is mounted on a YoctoHub-Ethernet, with the sensing part separate and mounted next to the camera. For visual and auditive feedback, we have used another nearby YoctoHub-Ethernet with a display and a buzzer.
Implementation details
In order to react as quickly as possible, the Yocto-RangeFinder is configured for instantaneous measurements (zero capture timeframe). We use however the high-precision mode, to reduce measurement noise as much as possible. The software receives measurements using a 10Hz callback and keeps a rolling list of the five last values, that are used to compute a sliding average and standard deviation. In this way, we get a very reactive measurement value, reliable enough, as well as an estimation of the stability of the object in front of the camera.
{
// Keep last 5 measures
lastMeasures.push(value.get_averageValue());
let n: number = lastMeasures.length;
if(n < 5) return;
let sum: number = 0;
let sumsq: number = 0;
for(let i = 0; i < n; i++) {
sum += lastMeasures[i];
sumsq += lastMeasures[i] * lastMeasures[i];
}
let avg = sum / n;
let stddev = Math.sqrt(sumsq / n - avg*avg);
// console.log('Average: ' + avg + ', std dev: ' + stddev);
lastMeasures.splice(0, 1);
if(avg < THRESHOLD_DISTANCE_MM && stddev < 1) {
camera.triggerCapture();
} else if(avg < THRESHOLD_DISTANCE_MM || stddev > 1) {
camera.setTargetPattern(true);
} else if(avg > THRESHOLD_DISTANCE_MM && stddev < 1) {
camera.setTargetPattern(false);
}
}
In order to drive the OMRON MicroHAWK V430-F camera using TypeScript with node.js, we simply use a TCP socket to send the same documented commands that also work on the serial line. We wrote a small TypeScript class for this purpose, that can for instance activate the blue target as soon as an object is detected but not yet stabilized, and clear the target when the picture is done. To retrieve the last image analyzed by the camera, we use the same URL as used by the OMRON camera configuration Web UI.
If you want to have a look at the full source code, you can have a look at the project on GitHub.

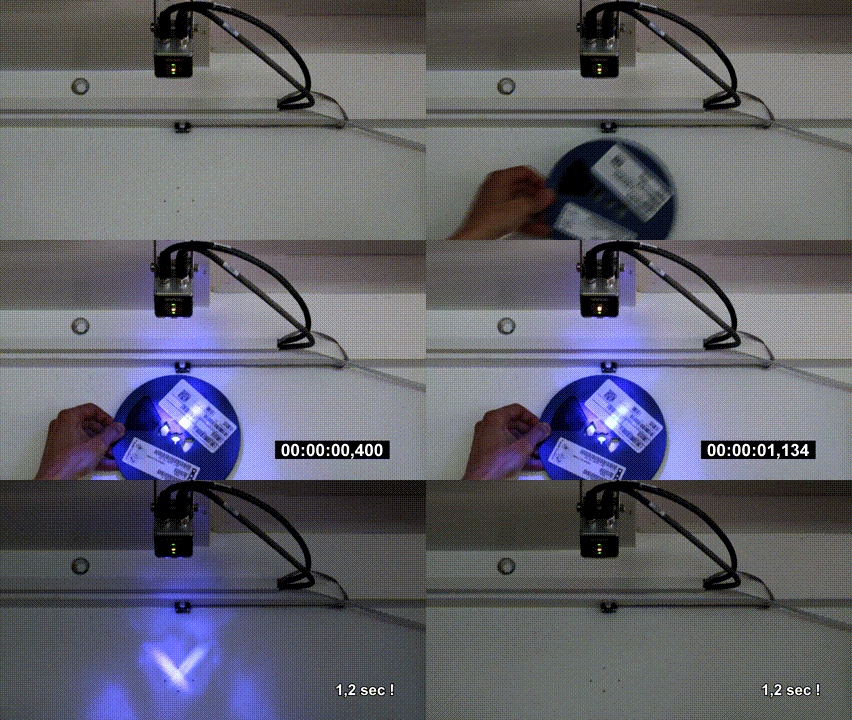
The system reacts quickly, as needed
Conclusion
The Yocto-RangeFinder and the YoctoHub-Ethernet have made it possible to easily integrate the OMRON camera to perfectly fit our needs. We will most probably continue to improve this system over the next months, so don't hesitate to contact us if you are interested to develop a similar solution of your own using Yoctopuce devices.


