![]() Having successfully operated WaveShare's LCD1602-RGB display with a Yocto-I2C, we wondered if we could use the Yocto-I2C's built-in job system to read values from an I2C sensor and display them directly on the display without the intervention of a USB host. In theory, it's feasible; in practice, it's rather complicated, but interesting.
Having successfully operated WaveShare's LCD1602-RGB display with a Yocto-I2C, we wondered if we could use the Yocto-I2C's built-in job system to read values from an I2C sensor and display them directly on the display without the intervention of a USB host. In theory, it's feasible; in practice, it's rather complicated, but interesting.
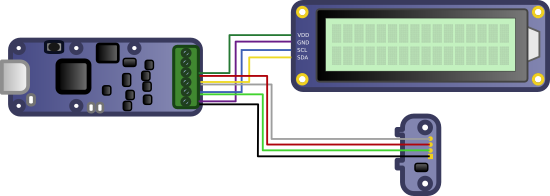
To perform the experiment, we took the MCP9804 sensor from an old Yocto-Temperature lying around and connected it in parallel with the display.

The connections
So we'd like to create a job that:
- Reads the temperature measured by the MCP9804 sensor.
- Maps this value to GenericSensor1 on the Yocto-I2C.
- Displays the value on the screen.
- Changes the screen color according to a predefined temperature threshold.
The code
Knowing that the variables of a single job are common to all the tasks of that job, we're going to create a small state machine controlled by the $state variable. Each task corresponds to a distinct state, and they all start with an assert to check that the $state variable has the expected value.
State 0: Initialization
Check that the $state variable is not set, and as a precaution, empty the Yocto-I2C buffer with the reset instruction.
assert: !isset($state) reset
Next, we initialize a few constants: the color of the screen when the temperature is low, the color of the screen when the temperature is high, and the threshold that defines the limit between the two colors.
compute: $ColorLow=0x00FF00 compute: $ColorHi=0xFF0000 compute: $ColorTheshold=25
Then we initialize the screen as explained in the previous post and take the opportunity to write "Temperature" to coordinates (0,0) and "░C" to coordinates (14,1). For each I2C command, we check that the screen has responded correctly with an expect command.
writeVar: {S}C00000{P}{S}C008FF{P} expect: 60:{A}{A}{A} 60:{A}{A}{A} writeLine: {S}7C8028{P}{S}7C800C{P}{S}7C8014{P}{S}7C8080{P}{S}7C4054656D7065726174757265{P} expect: 3E:{A}{A}{A} 3E:{A}{A}{A} 3E:{A}{A}{A} 3E:{A}{A}{A}{A}{A}{A}{A}{A}{A}{A}{A}{A}{A}{A}{A}{A}{A}{A}{A}{A} writeLine: {S}7C80CE{P}{S}7C40DF43{P} expect": 3E:{A}{A}{A} 3E:{A}{A}{A}{A}}
Finally, we update the $state variable with value 1.
State 1: Sensor reading
To read the MCP9804 sensor, set the sensor register pointer to address 5 and read two bytes in the form of a 16-bit integer (WORD), which we store in the $TRAW variable.
assert: $state==1 writeLine: {S}3E05{R}3Fxx{A}xx{N}{P} expect: 1F:{A}{A} 1F:{A}($TRAW:WORD)
The absolute temperature value is encoded in 16ths of a degree Celsius on bits 11..0 of $TRAW. The sign is stored in bit 12. A variable $SIGN is calculated, containing, depending on the sign bit, the ASCII code for "-" or space. The 13 least significant bits are filtered, and if the result is greater than 0x0fff, we're dealing with a negative number, so we perform the sign extension with the $TRAW-0x2000 operation.
compute: $SIGN=0x20+(($TRAW&0x1000)>>12)*13 compute: $TRAW=($TRAW & 0x1FFF) compute: $state=2 assert: $TRAW > 0x0FFF compute: $TRAW = $TRAW-0x2000
State 2: Temperature assignment to genericsensor1
Nothing extraordinary here, except that you have to divide $TRAW by 16, since we're talking about sixteenths of a degree.
assert: $state==2 compute: $1 = $TRAW/16 compute: $state=3
State 3: Temperature display
This is the big part of the job, we'd like the temperature to be displayed in a slightly pretty way. In other words:
- Bottom right of the screen just to the left of the "░C" characters
- Justified on the right
- No unnecessary zeros on the left
- The sign just to the left of the first digit
Where is what in the display
The problem is that Yocto-I2C jobs offer no control structure such as for or while loops or if..then..else. All that's available is the assert command, which stops the current job if the expression given as a parameter is false.
Since the sensor measures temperatures between -40 and +125░C, we know that we'll need a maximum of 4 digits. After computing the $T variable as floor(fabs($TRAW/1.6)), i.e. the absolute value of the temperature in tenths of degrees Celsius, we can calculate the ASCII code of each digit using the following formulas:
| Digit0 | 48+floor(10*frac($T /10)) |
| Digit1 | 48+floor(10*frac( floor($T/10)/10)) |
| Digit2 | 48+floor(10*frac( floor($T/100)/10)) |
| Digit3 | 48+floor(10*frac( floor($T/1000)/10)) |
We know that Digit0, Digit1 and the decimal point are displayed no matter what, so we can write fairly linear code. We also take this opportunity to store the address of the next digit in the $PADADDR variable, as we'll need it later.
assert: $state==3 compute: $T = floor(fabs($TRAW)/1.6) compute: $DIGIT0 = 48+ floor(10*frac($T /10)) writeVar: {S}7C80CD{P}{S}7C40($DIGIT0:BYTE){P} expect: 3E:{A}{A}{A} 3E:{A}{A}{A} writeLine: {S}7C80CC{P}{S}7C402E{P} expect: 3E:{A}{A}{A} 3E:{A}{A}{A} compute: $DIGIT1 = 48+ floor(10*frac( floor($T/10) /10)) compute: $PADADDR=0xCA writeVar: {S}7C80CB{P}{S}7C40($DIGIT1:BYTE){P} expect: 3E:{A}{A}{A} 3E:{A}{A}{A} compute: $state=4
If $T is not greater than 99 (9.9░C) we abort the task, otherwise we display digit 2 and assign 0xC9 to $PADADDR
assert: $T>99 compute: $DIGIT2 = 48+ floor(10*frac( floor($T/100) /10)) compute: $PADADDR=0xC9 writeVar: {S}7C80CA{P}{S}7C40($DIGIT2:BYTE){P} expect: 3E:{A}{A}{A} 3E:{A}{A}{A}
Same principle for digit 3
assert: $T>999 compute: $DIGIT3 = 48+ floor(10*frac( floor($T/1000) /10)) compute: $PADADDR=0xC8 writeVar: {S}7C80C9{P}{S}7C40($DIGIT3:BYTE){P} expect: 3E:{A}{A}{A} 3E:{A}{A}{A}
State 4: Padding
The next step is to complete the remaining digits. This is important for displaying the sign and, above all, for deleting any digits from previous measurements, e.g. if the temperature changes from 10.0 to 9.9 ░C.
We therefore write the $SIGN variable computed in state 1 to address $PADADDR. We then set the value of $SIGN to 0x20 (ASCII code for space), decrement the $PADADDR pointer and stop the task if $PADADDR hasn't reached 0xC8.
assert: $state==4 compute: $state=5 writeVar: {S}7C80($PADADDR:BYTE){P}{S}7C40($SIGN:BYTE){P} expect: 3E:{A}{A}{A} 3E:{A}{A}{A} compute: $SIGN=0x20 compute: $PADADDR=$PADADDR-1 assert: $PADADDR>0xC8
Repeat twice more to make sure all digits are overwritten
writeVar: {S}7C80($PADADDR:BYTE){P}{S}7C40($SIGN:BYTE){P} expect: 3E:{A}{A}{A} 3E:{A}{A}{A} compute: $PADADDR=$PADADDR-1 assert: $PADADDR>0xC8 writeVar: {S}7C80($PADADDR:BYTE){P}{S}7C40($SIGN:BYTE){P} expect: 3E:{A}{A}{A} 3E:{A}{A}{A}
State 5: Compute backlight color
Compared with the temperature display, computing the backlight color as a function of the $ColorTheshold variable, which we defined in task 0, is fairly simple, but we still have to do it in two steps (still no if..then..else). We assign a $color variable to $ColorLow if $T is smaller than $ColorTheshold*10, and $ColorHi otherwise.
assert: $state==5 compute: $state=6 compute: $color=$ColorLow assert: $T>$ColorTheshold*10 compute: $color=$ColorHi
Step 6: Assign color
Nothing extraordinary: we extract the Red, Green and Blue components from the $color variable and send them to the screen's LED controller in a single I2C request.
assert: $state==6 compute: $R=($color >>16) &0xff compute: $G=($color >>8) &0xff compute: $B= $color & 0xff writeVar: {S}C082($B:BYTE)($G:BYTE)($R:BYTE){P} expect: 60:{A}{A}{A}{A}{A} compute: $state=1
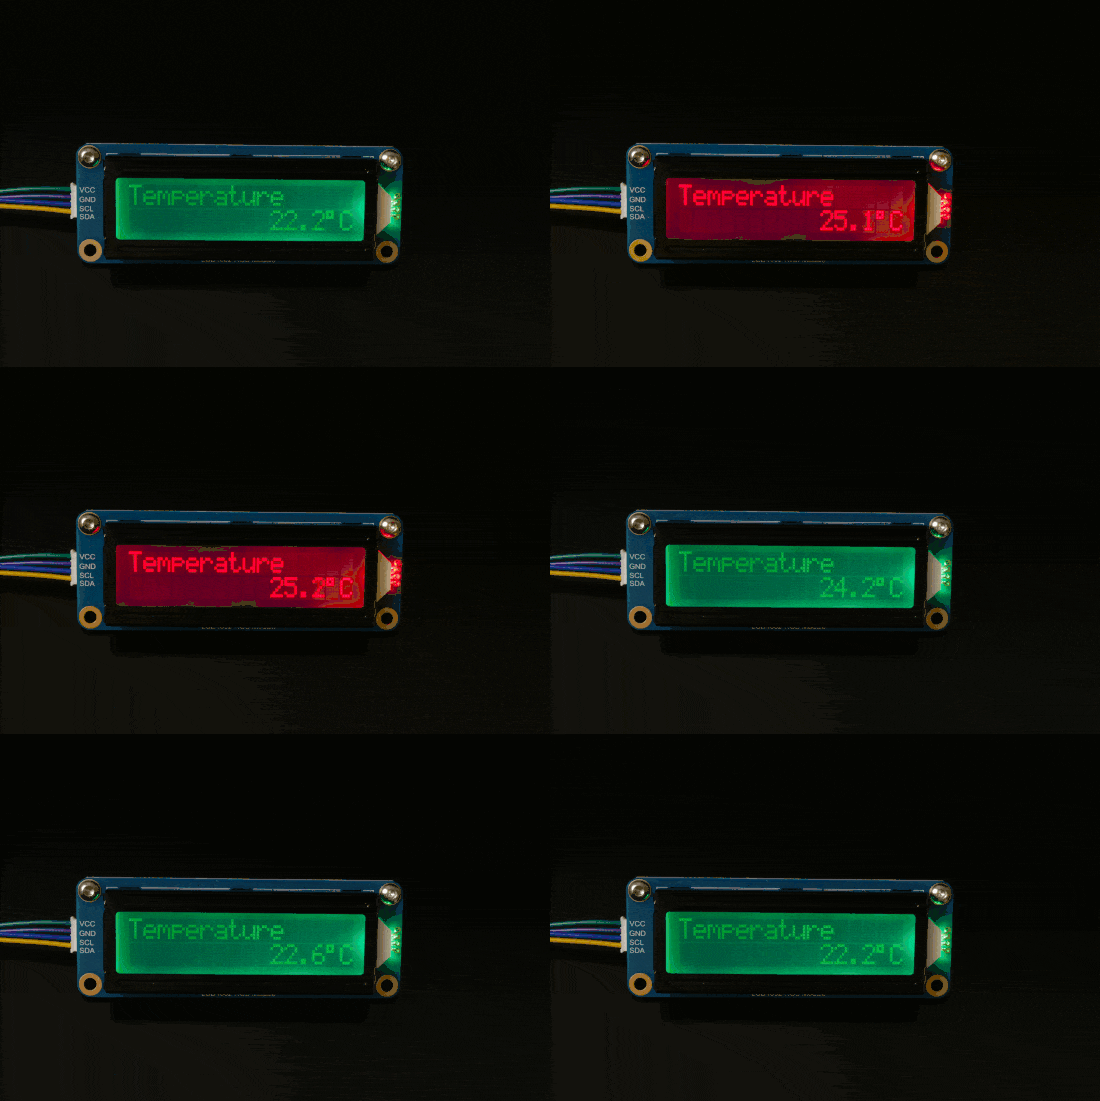
And now we have the temperature displayed on our screen and the backlight which changes from green to red when the temperature exceeds the value of 25░C defined by the variable $ColorTheshold.

It works!
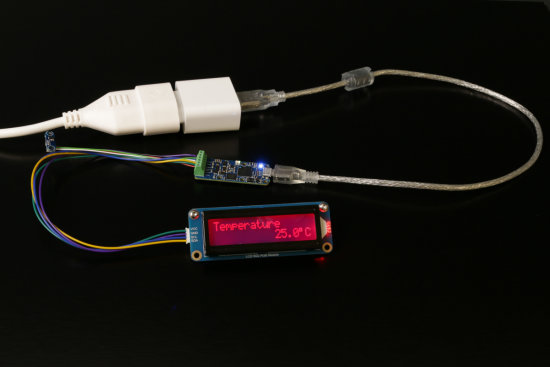
And if we define our job as the Yocto-I2C "startup job", we end up with a truly independent temperature display: you can power it with a simple USB charger and it'll still work.

It also works with a simple USB charger
Conclusion
Obviously, this job is more an exercise in style than anything really useful. But it shows that, despite its limitations, the Yocto-I2C job system can do some pretty advanced things. We could have cheated and created a new instruction to transform a number into a sequence of ASCII codes, but with the various options to take into account the most common display formats, this would have taken up a lot of space in the Yocto-I2C firmware for a rather specific use. Finally, if you'd like to try it out for yourself, you can download the job here.


