 A classic example of home automation is to remotely manage the heating system of a second home. In Switzerland, many chalets are equipped with heating systems which are managed by a device connected directly on the phone line. Most of these devices work only on an analog line. If you suppress the phone line or switch it to IP telephony, you must change the device. This week, we are going to see how to replace one of these devices with Yoctopuce modules.
The device that we are replacing is an Axiophone of the Legrand brand. This device does not control the heating system directly, but it switches a 230V output which is used to commute a power relay that supplies all the electric heaters. Concretely, Axiophone is a 230 Volt, 5 Ampere relay managed by an answering machine.
To replace the Axiophone, we are going to use:
- A Yocto-LatchedRelay
- A YoctoHub-GSM-2G
- A Yocto-Meteo
- A Yocto-MaxiDisplay
- A 5V power supply
The Yocto-LatchedRelay is used to switch the power supply of the electric heaters, the YoctoHub-GSM-2G takes care of Internet connectivity. The Yocto-Meteo and the Yocto-MaxiDisplay are not compulsory but they respectively allow you to know the temperature and the humidity inside the chalet and to display the state of the system.
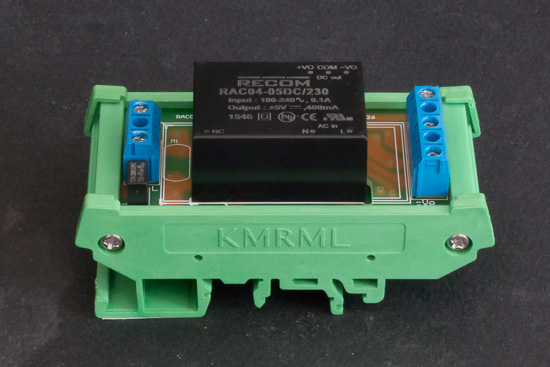
Replacing a device in the electric panel is both an advantage and a disadvantage. The advantage is that the electronics is protected. The disadvantage is that space is limited and that everything works in 230V AC. In our case, we have only 16cm of DIN rail available. The first step was therefore to find a 5V power supply that we could mount in a clean way on a DIN rail. The most compact that we could find is the Recom RAC-DIN-Rail which allows you to mount their power supply module on a DIN rail. The RAC04-05DC/230 module is perfect for us as it provides 5V DC from any voltage between 80 and 265V AC.

The power supply is composed of a RAC04-05DC/230 module and of a RAC-DIN-Rail mounting board, both from Recom
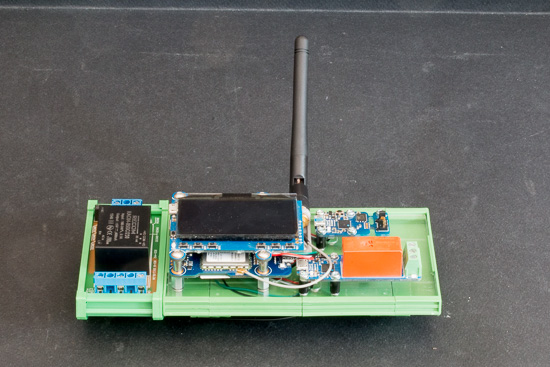
To mount the Yoctopuce modules, we used the "mini series 72mm" fixings of CamdenBoss, which are designed to mount electronic boards of a 72mm width on a DIN rail. Yoctopuce modules being quite smaller, we cut a 2mm acrylic glass pane to the correct size and mounted the modules on it. The Yoctopuce modules are mounted with spacers and 1.27-1.27-11 cables. To obtain a more professional look, you should create a board to replace the acrylic glass pane. It's quite easy, as we showed it in this post.

The Yoctopuce modules mounted on the DIN rail
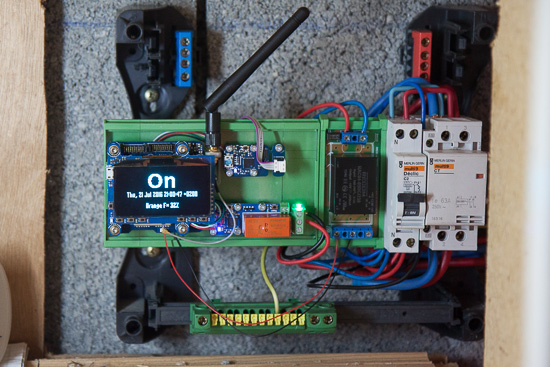
What's left is only to mount everything on the DIN rail, wire the power supply and the output of the Yocto-LatchedRelay. The temperature sensor of the Yocto-Meteo is moved outside of the electric panel to provide a more pertinent measure.

The system mounted in the electric panel
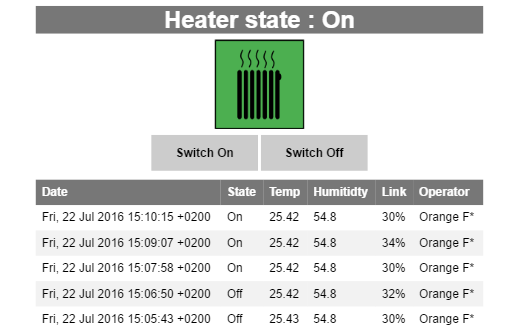
Our new system doesn't work exactly as the Axiophone did. Instead of having to call the answering machine of the Axiophone and to type the commands with the phone numeric keypad, the user has to open a web page. This web page displays the state of the Yocto-LatchedRelay and allows you to turn on or off the heating system. The YoctoHub connects itself at a regular interval on this web page thanks to an HTTP callback and switches the Yocto-LatchedRelay output if required.

The system connects itself at a regular interval on the server
The code is written in PHP and is available on GitHub. This code is very basic and doesn't manage authentication, but it allows you to test that the system works correctly.

The Web interface to control the heating system
In this post, we used a YoctoHub-GSM-2G as the phone line is going to be disconnected. But in case of switching to IP telephony, it would be best to use a YoctoHub-Ethernet or a YoctoHub-Wireless-g and to connect them to the local network. Finally, as always when working with 230V, pay close attention to what you do because a connection mistake can be deadly not only to Yoctopuce modules but also to yourself.


