 Although the proliferation of connected devices in businesses, homes, and public spaces poses a growing security risk, traditional tools for mitigating this risk remain little known and are often misused. So today, we're offering a crash course on the basic concepts you'll need to ensure that your Yoctopuce-based system doesn't contribute to the proliferation of dangerous connected devices. Spoiler: you're going to have to learn how to manage certificates...
Background
Most attacks on computer systems are carried out remotely, without physical access to the target machine: not only is it less dangerous for the attacker to carry out their crime from another country, but the wider their geographic scope, the more likely they are to find poorly protected systems. This discussion will therefore focus on the surface of vulnerability that can be exploited remotely: access via a computer network.
Let's start by identifying the communication channels that might be found in an IoT system based on Yoctopuce modules. Generally, only a subset of the elements below is present, depending on the application, but depicting them all in the same diagram allows us to generalize the explanation to most scenarios.
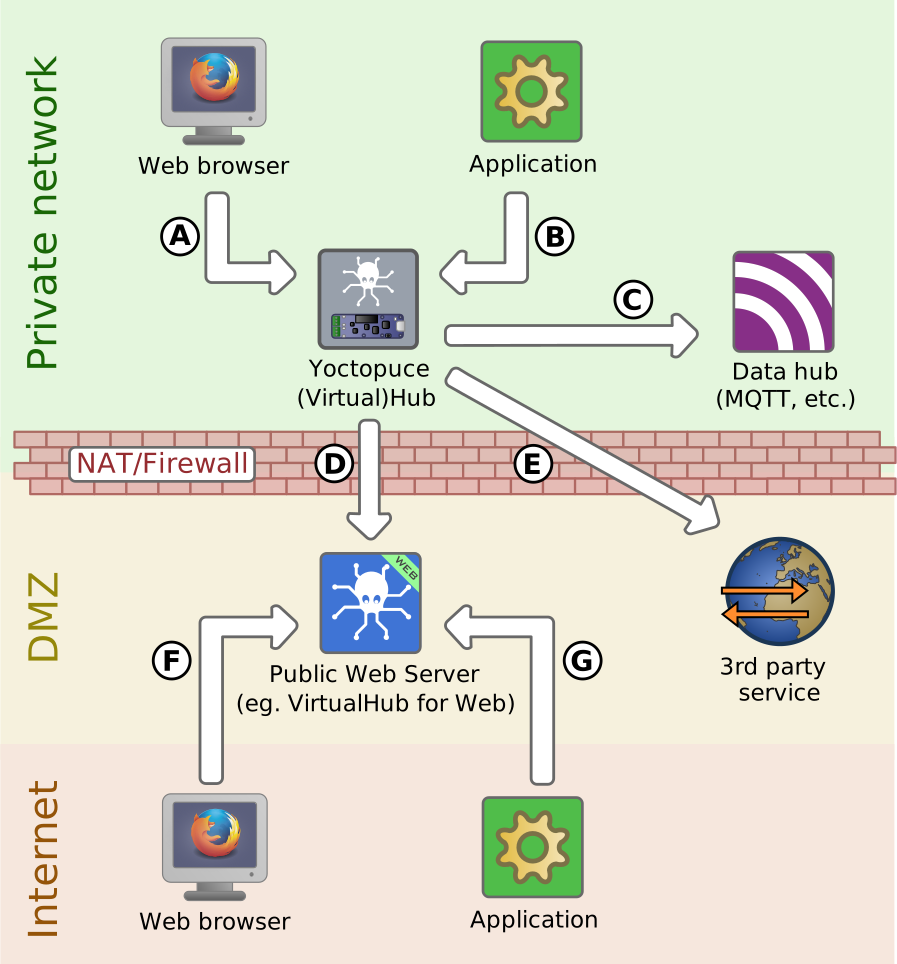
Communication channels that might be found in an IoT system based on Yoctopuce modules
This diagram distinguishes several environments, which are generally treated very differently:
- The organization's private network, to which only authorized users normally have access, and which is protected by a firewall and/or a NAT filter;
- The DMZ, which hosts servers accessible via the Internet and is therefore at the greatest risk. The companyi must nevertheless be able to exchange information with these servers at all times;
- The rest of the Internet, which includes most users - both the good and the bad.
If IT security were flawless, and if all legitimate users of the system were honest and cautious, this division into zones would be sufficient to protect the organization against malicious actors from outside through simple user authentication.
Why use cryptography
Unfortunately, nothing is that simple. A shared Wi-Fi network makes it easy for a third party to eavesdrop on other users' communications. Legitimate users can fall victim to a phishing message and unwittingly grant a third party access to the company's private network or to a critical server. A security vulnerability can allow a malicious actor to bypass a security barrier (when the system isn't simply protected by a trivial password). Therefore, additional protective measures must be taken to anticipate the presence of intruders.
Cyberattacks generally proceed in stages: a poorly protected entry point into a less critical system allows the attacker to gain a foothold; from there, the attacker can obtain information that enables them to escalate their privileges. Defense, therefore, consists of hiding sensitive information. This is the purpose of TLS, which is used in particular by the HTTPS protocol so that the browser can notify us whether access to a machine is secure or poses a risk. So, how do you use it correctly?
Principles of TLS
Without delving into the details of the cryptographic operations on which TLS is based, a TLS-secured connection offers the following benefits:
- Communication is end-to-end encrypted and can therefore only be read by the two communicating parties.
- The machine receiving the connection has proven its authenticity through a certificate, which acts as an identity card.
- Optionally, the machine initiating the connection can also prove its identity using a certificate.
In principle, if the primary goal is to protect secrets (passwords, and so on), encryption is the most important benefit. It is also the simplest to implement: there are mathematical algorithms that allow both parties to remotely agree on a shared encryption key without having to explicitly exchange it, thereby ensuring confidential communication.
However, encryption only provides protection as long as no one manages to impersonate the recipient machine. In fact, if a malicious actor (or a virus) manages to surreptitiously modify a machine's DNS configuration, or to set up a malicious DHCP server with different DNS settings, unsuspecting users may unwittingly hand over their login credentials to another server, and encryption will not help to prevent this. This is why server authentication via a certificate is important for maintaining system security, even though it is more complicated to implement.
The third aspect, authenticating the machine initiating the connection via a certificate (mTLS), is rarely used, as it is generally preferred to identify the user themselves using one or more secrets they personally hold, rather than using a cryptographic key stored on their machine.
How does a TLS certificate work?
A TLS certificate for a web server is a small public file that primarily contains:
- a textual description of the certificate's legal owner
- a description of the web server for which it can be used
- a public key to be used to verify transactions signed by this certificate
- the certificate's validity period
- the identification of the authority that guarantees the certificate's authenticity
It is closely linked to another small file that must remain confidential: the private key for this certificate.
When establishing a secure connection via TLS, the server signs the exchange with its private key, allowing the client to verify that it is indeed communicating with the legitimate server associated with the certificate: the client can verify the signature using the public key contained in the certificate. But this proves the server's authenticity only to the extent that we can be sure the certificate itself is authentic: a malicious actor could easily create a valid but fraudulent certificate to pass off their fake server as the real one.
So the real challenge in securing a connection to a server isn't just issuing it a certificate; it's providing clients with a way to verify that the TLS certificate is legitimate. The proper way to take care of it depends on the type of environment and the level of risk you need to guard against.
The naive method and the correct solution
The simplest method would be to send the server's TLS certificate to the client in advance, ideally via a separate transmission channel. For example, one could store a copy in the client software, or in the case of a web browser, save the TLS certificate upon the first connection and use it for all subsequent connections.
Unfortunately, this solution is not sustainable, as server TLS certificates always have a very limited validity period. To prevent the theft of a private key from compromising an identity indefinitely, the maximum validity period allowed by browsers for a public web server's TLS certificate is currently 200 days, and it will be reduced to 100 days in March 2027 and to 47 days in March 2029. Every TLS client therefore needs a method to verify whether a previously unknown TLS certificate is authentic.
This problem is solved by creating chains of trust: the client can trust an unknown TLS certificate if it is signed by another parent certificate that the client trusts. Trust in this parent certificate can itself be established by the fact that it is signed by a trusted parent certificate at a higher level; this is referred to as an intermediate certificate. Ultimately, the client's trust rests on a root certificate, which, through its signature, bears responsibility for an entire lineage of TLS certificates used by various servers. However, since the root certificate is used only to sign other certificates, and not to establish TLS connections, it does not need to be directly exposed to the Internet. Its private key is therefore at much lower risk. Root certificates can thus have much longer validity periods, measured in years.
Let's see how to put this into practice by going through, case by case, the interactions illustrated in the diagram at the top of this post.
Practical Implementation for Public Servers (DMZ zone)
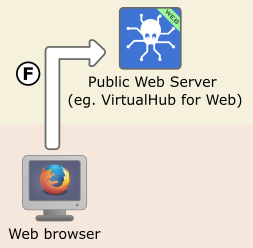 For the Public Web Server's TLS certificate to be recognized by any user's browser (interaction F in the diagram), it must be signed by an organization whose root certificate is included in all browsers. Each browser includes about a hundred different root certificates, the official list of which is published on ccadb.org, so there are plenty of options. But before opting for a commercial solution, you should know that the largest TLS certificate issuer is a nonprofit organization called Let's Encrypt, which has done a great deal of work to make TLS certificates more accessible by offering free distribution through a fully automated issuance and verification mechanism called ACME. These TLS certificates can also be renewed automatically, which is very important given the increasingly frequent renewal cycles required by browsers.
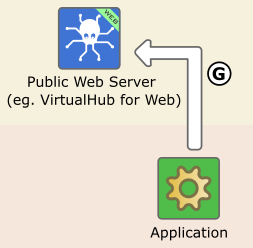 In order for an application based on the Yoctopuce API to connect securely to the Public Web Server (interaction G in the diagram), you must also provide the application with the root certificate that validates the Public Web Server's TLS certificate. The root certificate is unlikely to change in the short term, but sooner or later the certificate authority may renew it, so you must provide a mechanism for updating your application.
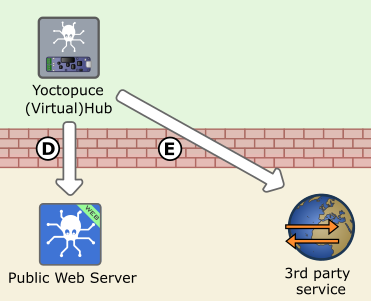 The same applies to the Yoctopuce (Virtual)Hub, which connects from the corporate network to the Public Web Server (interaction D) and to a Third-Party Public Server (interaction E): for a secure connection, it needs to know the root certificate. The current version of VirtualHub-V2 allows you to pass this certificate via the command line, but to make things easier for you, starting with the next version, we'll include a set of up-to-date root certificates, as well as a mechanism to update them manually if you wish - just like in web browsers.
Practical implementation on a private network
On a private network, the situation is different: you generally won't work with an external certificate authority, but the network administrator will create his own root certificate and will be able to issue his own TLS certificates. In a large organization, this is often done using a commercial tool, such as the Microsoft AD CS solution included with Windows Server. For a small organization, it is also possible to manage its own certificate authority with just a few command-line commands. You will find more detailed information on this topic in the following section.
To install in VirtualHub-V2 your newly created TLS certificate, starting with the next version, you'll be able to use either a button on the web interface, or the Yoctopuce programming API, or the command-line library, all of which will now offer an updateHubCertificate function. This will make it easier for you to automate certificate updates.
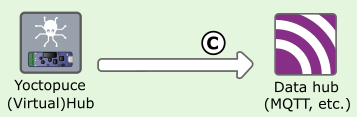 Similarly, to ensure your VirtualHub-V2 can securely connect to all your other private servers - such as an MQTT or InfluxDB server (C interaction on the diagram) - you can add your root certificate to VirtualHub-V2, either via the web interface (manage certificates), the Yoctopuce programming library, or the command-line library, using the addTrustedCertificate function.
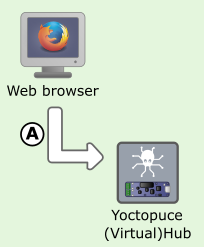 For your own root certificate to be recognized in your organization's web browsers (Interaction A), it must be installed on all your users' computers. In the case of a company with a deployment service, this can be done remotely, but for a smaller organization, you'll simply need to distribute the company_rootcert.crt file containing the root certificate to all users, along with instructions on how to install it. If you're using a Chromium-based browser (Edge, Chrome, Opera, and so on), simply install it in the machine's root certificate store, for example with the following command on Windows (which will require elevated privileges):
certutil -f -addstore "Root" "company_rootcert.crt"
And the next time the browser starts, the certificate will be recognized. If you're using Firefox, or if you don't want to install the certificate system-wide on your computer, open your browser's settings, locate the certificate manager, and add the certificate to the trusted root certificates. This is also the procedure to follow if you want to add the certificate to a cell phone.
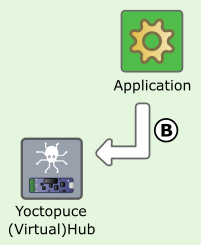 Of course, you can easily integrate your own root certificate into your applications using the Yoctopuce library (Interaction B). In this specific case, you have the advantage of controlling both the distribution of the application and the timing of any certificate changes, so the transition is much easier to manage: if the root certificate changes, simply add the new certificate to the application (alongside the old one) a little in advance, so that functionality isn't affected when you install on the server the first certificate signed by your new root certificate.
How to Set up a Mini Certificate Authority using OpenSSL
The most common way to create a mini certificate authority is to use the OpenSSL tool. Originally developed for Unix, OpenSSL is now also available for Windows on the official OpenSSL GitHub repository, which will allow us to provide guidance that applies to Windows, Linux, and macOS alike.
A few paragraphs won't be enough to explain all the intricacies of OpenSSL: these configuration examples are intended solely to get you started, helping you avoid the most common beginner mistakes. For more details, refer to the OpenSSL documentation.
1. Create your organization's root certificate
The first step is to define the desired characteristics of your root certificate in a text file rootcert.conf. In our example, this involves specifying that it is intended to directly sign TLS certificates, without intermediate certificates, and limiting its use to machines on the private network. This way, if the private key were ever stolen, you would not compromise secure access to other machines.
keyUsage = critical, keyCertSign, cRLSign
subjectKeyIdentifier = hash
nameConstraints = @limitations
[ limitations ]
permitted;IP.0 = 192.168.0.0/255.255.0.0
permitted;IP.1 = 10.0.0.0/255.0.0.0
excluded;IP.0 = 0:0:0:0:0:0:0:0/0:0:0:0:0:0:0:0 # not for IPv6
permitted;DNS.0 = .internal # not for public domain names
permitted;email.0 = invalid # not for e-mail
You can then create your root certificate using the following commands:
-aes-256-cbc -out root.key
openssl x509 -new -key root.key -subj "/O=MyCompany/CN=Root CA"
-days 3650 -extfile rootcert.conf -out root.crt
When you run the first command, you'll need to choose a password that will be used to encrypt your private key, for security purposes. Choose it carefully, and do not lose it: you'll need it every time you use your root certificate. Even with this password, keep the private key (the root.key file) secure.
The type of key (P-256 elliptic curve) that we recommend you use was not chosen at random: it has been universally recognized for 15 years, offers protection equivalent to RSA-3072, but allows for much faster calculations, which is important on embedded systems such as Yoctopuce hubs.
2. Create TLS certificates for servers
Now that you have a root certificate, you are your own certificate authority and can generate your own TLS certificates. To do this, the first step is once again to define, in a small configuration file host.conf, the permissions granted to the certificates that will be created:
keyUsage = critical, digitalSignature
extendedKeyUsage = serverAuth
subjectKeyIdentifier = hash
authorityKeyIdentifier = keyid:always
subjectAltName = IP:${ENV::IP}
The specific syntax used for subjectAltName allows us to use the same configuration file for all machines, rather than creating a separate one for each IP address.
You can then use the short script below to create a TLS certificate for the machine at 192.168.0.50:
openssl genpkey -algorithm EC -pkeyopt ec_paramgen_curve:P-256 -out %IP%.key
openssl req -new -key %IP%.key -subj "/O=MyCompany/CN=%IP%" -out %IP%.csr
openssl x509 -req -in %IP%.csr -CA root.crt -CAkey root.key
-CAcreateserial -days 199 -out %IP%.crt -extfile host.conf
openssl verify -CAfile root.crt %IP%.crt
It's up to you to customize this script to suit your needs. If you're using Unix, replace set IP= with export IP=, and replace the %IP% with $IP.
Also note that we have limited the certificate's validity to 199 days, similar to public certificates, but this is not a requirement for certificates issued by an company root certificate.
This script generates two files, 192.168.0.50.crt and 192.168.0.50.key, which you need to install on your private server, for example, on VirtualHub-V2 in our scenario. Please note: to ensure the server can read the private key, it is intentionally unencrypted (no password): VirtualHub-V2 securely stores it itself. However, be sure to delete all copies from your disk once the certificate has been installed on the server; you won't need them anymore (you can always generate a new certificate if necessary).
Summary
If you want a TLS-secured connection between two systems, you must:
1. Install a certificate on the server:
- issued by your own certificate authority if the server is on a private network
- issued by an organization such as Let's Encrypt if the server is on the Internet
2. Include the corresponding root certificate in the client software:
- either your own root certificate if the server is on a private network
- or the root certificate(s) from the organization that provided the certificate, if the server is on the Internet; note that if you do not control the certificate updates on the server, you must provide a bundle containing all current public certificates
3. Manage the distribution and renewal of certificates:
- renewing the certificate on the servers before it expires (i.e., several times a year)
- distributing the company's root certificate to all users and installing it
- updating applications in the event of a change to the root certificate
Conclusion
Clearly, all of this represents a significant time investment, and the cost-benefit trade-off must be carefully weighed. For minor automation applications or the collection of non-critical metrics within a secure network, with no risk of privilege escalation, it may be more reasonable to settle for an unsecured connection.
Still within the context of a secure private network, one could also consider half-measures to reduce the effort while preserving the encryption provided by TLS, such as
- disabling validation of the server certificate's expiration date in applications
- accepting the self-signed certificate provided by default by a server
But one must think twice about the harmful consequences of these half-measures. For instance, think about how the application will handle the day the server certificate actually changes. Ultimately, this is rarely a good choice, and it's better to make a clear decision based on the application - either opting for an unsecured channel or a truly secure channel by investing the necessary effort.
As a reminder, as a first step, starting with the next update to VirtualHub-V2, we'll include a bundle of public root certificates to resolve the issue of callback connections to public servers, as well as an interface and command-line tools to update server and root certificates. We'll take this opportunity to publish a new blog post that provides concrete, screenshot-based instructions on how to set all of this up.
Ultimately, to counter the extra work caused by the shorter validity periods of host certificates, we'll likely add ACME support directly into VirtualHub-V2, so you can set up automatic renewal of your private certificates using a private ACME server.
In any case, avoid the false sense of security that comes from rushing a security solution: an unlimited root certificate with a poorly protected key poses far more risk to your business than it provides security.