![]() This week, we are looking again at the Android library. We have published the first demo app on Google Play, and we have performed the same performance measures as run previously on traditional computers. We have also brought some improvements on the example we presented a few weeks ago.
This week, we are looking again at the Android library. We have published the first demo app on Google Play, and we have performed the same performance measures as run previously on traditional computers. We have also brought some improvements on the example we presented a few weeks ago.
Google Play
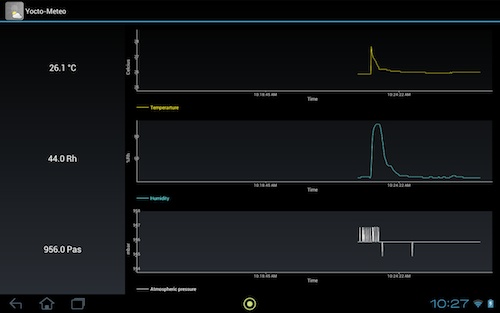
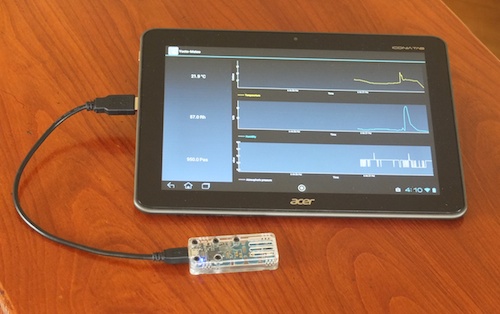
We have improved the Yocto-Meteo application and have published it on Google Play. On top of the improvements described below, we have added a small graph which allows you to see the evolution of the different measures over the last 24 hours.
In a few days, we are going to publish a typical application for each module on Google Play. As usual, the complete sources will be available with the Android library.
Performances with Android
In our previous article on performance measures, we had not tested Android. These tests are now available:
| Machine | Command sending | Repeated sending | Latency | 1st reading |
|---|---|---|---|---|
| MK805 (Linux ) | 1.7 [ms] | 5.0 [ms] | 6.5 [ms] | 41 [ms] |
| Raspberry Pi (Linux) | 2.0 [ms] | 5.0 [ms] | 7.9 [ms] | 80 [ms] |
| Acer IconiaTab A200 (Android 4.0) | 4.8 [ms] | 7 [ms] | 16.5 [ms] | 52 [ms] |
You can see that Android is slower than machines under Linux which use an ARM processor, but these performances remain very good and are largely superior to the needs of most applications.
Tips and Tricks
We already explained that Android authorizes an application to access a USB device only after having sought confirmation from the user. The authorization is valid even if you stop and restart the application. However, as soon as a module is unplugged or if the tablet reboots, you must confirm the access authorization again. To avoid this annoyance, you must add in the AndroidManifest.xml file an intent-filter to force the application to start as soon as the device is connected. With this solution, Android asks the user for authorization confirmation only once.
The first step consists in creating an XML file in the resources which contains all the modules which are used. This file must be saved in the res/xml directory. In this file, we are going to list the USB vendorid and deviceid of the modules which are going to be used. You can find the vendorid and the deviceid in the documentation of the module you are using.
<resources>
<usb-device vendor-id="9440" product-id="24" />
</resources>
You must then modify your AndroidManifest.xml for the application to run as soon as one of the devices contained in the file we have just created is connected. You must add <action android:name="android.hardware.usb.action.USB_DEVICE_ATTACHED"/> in the <intent-filter> section of the main activity. In the <activity> section, you add the pointer to your xml file containing the list of the USB devices (device_filter.xml in our case).
...
<uses-feature android:name="android.hardware.usb.host" />
...
<application ... >
<activity
android:name=".MainActivity" >
<intent-filter>
<action android:name="android.intent.action.MAIN" />
<action android:name="android.hardware.usb.action.USB_DEVICE_ATTACHED" />
<category android:name="android.intent.category.LAUNCHER" />
</intent-filter>
<m https://www.yoctopuce.com/EN/article/api-update-and-new-performance-measures eta-data
android:name="android.hardware.usb.action.USB_DEVICE_ATTACHED"
android:resource="@xml/device_filter" />
</activity>
</application>
</manifest>
When recompiled, the application runs as soon as you connect the module.