![]() Someone recently asked us whether there was a Yoctopuce module which could interface an OMRON V3A magnetic stripe card reader over USB. Although nowadays these magnetic strips are not the most secure way to identify someone, they are still present on credit/debit cards for example. So we took an interest in them.
Someone recently asked us whether there was a Yoctopuce module which could interface an OMRON V3A magnetic stripe card reader over USB. Although nowadays these magnetic strips are not the most secure way to identify someone, they are still present on credit/debit cards for example. So we took an interest in them.
On the magnetic strip itself, data is stored with a differential Manchester encoding: in summary, it's a code which contains 0 and 1 (data) superposed with transitions at fixed intervals (the clock) so as to be able to correctly interpret the data even when the swiping speed of the card in the reader varies.
The OMRON magnetic strip card reader simply reads the signal and separates it into the data and the clock signal onto two distinct digital outputs. It results in a signal of this type:
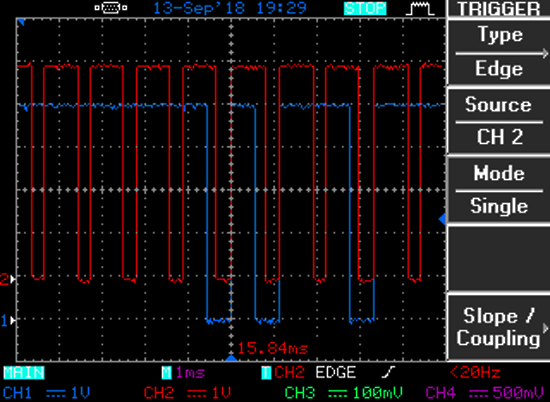
Signal emitted by the OMRON magnetic card reader
This type of signals corresponds to what we call a SPI link (Serial Peripheral Interface) and to read it, you therefore need a Yocto-SPI.
On top of decoding the SPI signal, the Yocto-SPI can provide a 5V or 3.3V power source taken from the USB bus, which enables us to power the OMRON reader. And, icing on the cake, we can even use the Yocto-SPI unused output lines to drive the leds of the reader to provide a visual feedback.
Connections
Here is the connections that we recommend between the Yocto-SPI and the OMRON reader.
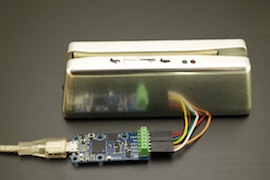
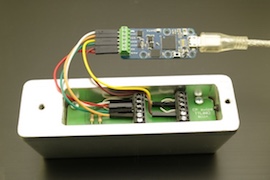
How to connect by USB a OMRON magnetic card reader (V3A series) with a Yocto-SPI
As the Yocto-SPI can work in different ways, you must configure it correctly with the VirtualHub for the connection to work:
- Enable the 5V power source for the card reader
- Configure the signal electrical level at 5V
- Select the order of the bit arrival in lsb (least significant bit first)
- Enable the use of an external clock (slave mode) rather than generating a clock at a specified frequency
Note that the latter setting is available only since firmware 32351, that just came out (what a coincidence...)
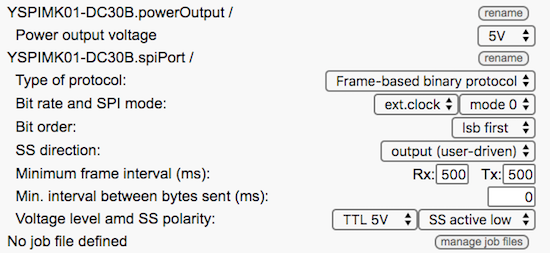
Yocto-SPI configuration with an external clock (SPI Slave)
If all the connections are correct, you should now see values coming in the control window of the VirtualHub when you swipe a card in the reader.
Decoding
You must still perform an important task before you can exploit the data returned by the card reader: you must decode them. Indeed, you can't use the raw data directly:
- Bit polarity is reversed
- the bit flow starts with an undetermined number of 0, so the useful data don't necessarily start at the beginning of a byte
- to detect reading errors, between each symbol (stored over 4 bits) there is a parity bit which must be checked and then deleted from the message for the latter to become understandable
- at the end of the message, a longitudinal redundancy check code is used to validate the message as a whole
- after the check code, an undetermined number of 0 follows the useful data without being part of it
We'll spare you the details of the bit manipulations to be performed for decoding, but you can find the complete source code of our small test program, written in C#, on GitHub. The function which performs the decoding is located in the Form1.cs file and is called DecodeTrack2, as this format is specific to Track 2 defined by the American Bankers Association (ABA). This program enables you to display a credit card number, its expiry date, and annex information located on the magnetic strip with a simple reading of track 2.
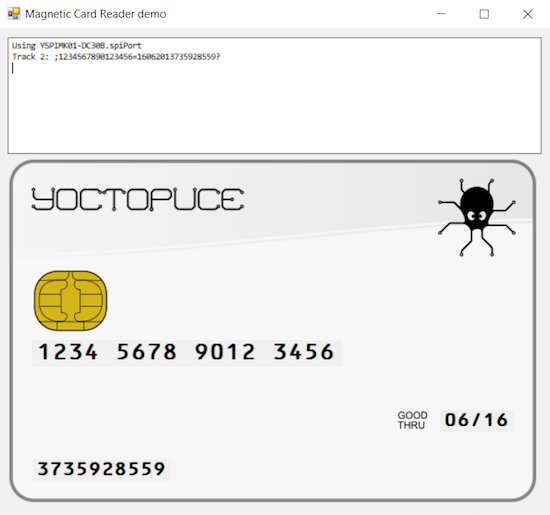
Demo of credit/debit card track 2 decoding


