![]() This week, we show you how to make a Windows application using Yoctopuce modules, in C#. The exercise is interesting because most C# examples provided with the Yoctopuce API are actually console applications. Windows Forms applications introduce some small differences which you should note. Note also that this post doesn't pretend to teach you C# programming. You are supposed to have some knowledge of it already :-)
This week, we show you how to make a Windows application using Yoctopuce modules, in C#. The exercise is interesting because most C# examples provided with the Yoctopuce API are actually console applications. Windows Forms applications introduce some small differences which you should note. Note also that this post doesn't pretend to teach you C# programming. You are supposed to have some knowledge of it already :-)
We are going to write a small and quite simple application which displays the value of a temperature sensor. Then, we'll generalize to display the value of any sensor.
Installing the API
The first thing to do is to install the C# Yoctopuce library. You can download it from the dedicated page. It's a Zip file that you must simply unzip wherever you want. The essential directory is "Sources" as well as its "dll" sub-directory. When you have copied the files, you can consider the installation done.
Before you go any further, we recommend that you read carefully our post on the logical structure of Yoctopuce modules, if you haven't done so already. It will help you to understand what follows.
To illustrate this post, we used VisualStudio 2015. But the principle is the same for other versions.
The application: setting up
When you have opened VisualStudio, create a new C# project of the Windows Forms type. You are going to find yourself with a completely empty Form.
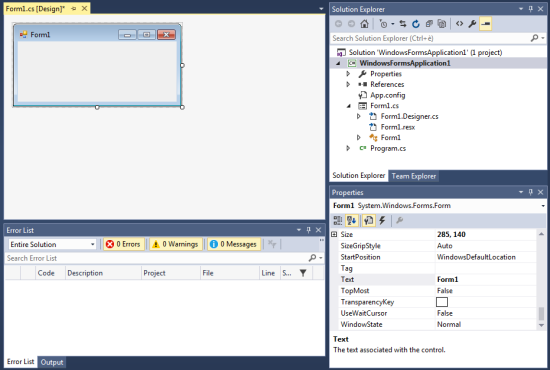
Create a new C# project of type Windows Form
Then you must tell VisualStudio to use the Yoctopuce API. We are going to have to use the yocto-api.cs, Yocto-temperature.cs, and yapi.dll files. Right-click on your project in the "Solution Explorer" and select: Add > Existing Item....
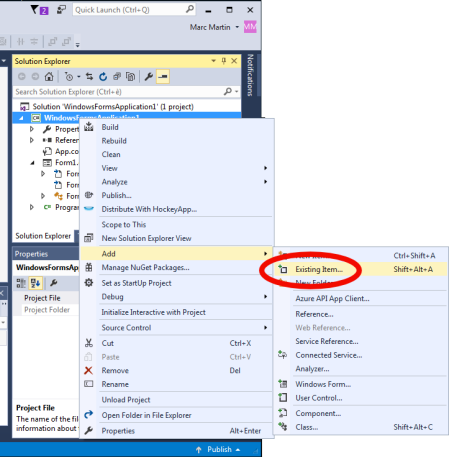
Add existing item
Select the yocto-api.cs and Yocto-temperature.cs files from where you have unzipped the API and click "Add as link". Using "Add as link" is not without reason, it allows you to use the files from their original location rather than copying them in your project. Thus, if you update your API files, the application is automatically updated when next compiling. But if you'd rather copy the files in your project, we won't mind :-)
Do this operation again with the yapi.dll file located in the "dll" sub-directory. Mind to change the file filter and to select "Executable files (*.exe, *.dll, *.ocx)" instead of "Visual C# files (*.cs; *.resx ...)".
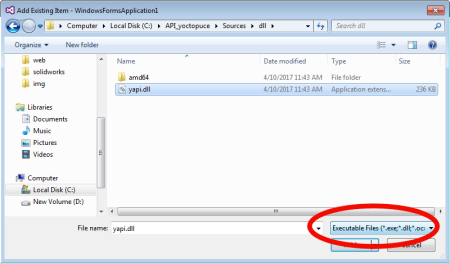
Adding yapi.dll
When the DLL is added, select it in the Solution Explorer and change its "Copy to Output Directory" property to "Copy always". The effect is to systematically copy the api.dll dll in the executable directory.
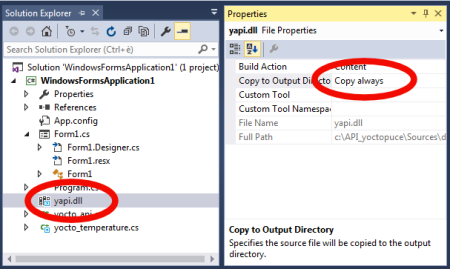
Copy the Dll
There, it's ready, we can start to code.
Initializing the API
The first thing to do is to initialize the API with YAPI.RegisterHub. The best place to do so is in the program.cs file containing the entry point into the application. Thus, if the Yoctopuce API initialization encounters a problem, we can immediately stop the application from running.
{
Application.EnableVisualStyles();
Application.SetCompatibleTextRenderingDefault(false);
string errsmg = "";
if (YAPI.RegisterHub("usb", ref errsmg) == YAPI.SUCCESS)
Application.Run(new Form1());
else
MessageBox.Show("Init error:" + errsmg);
}
Interface with the user
Let's come back to our quite empty Form. To make it simple, we are going to insert two labels: the first one to indicate the temperature, the second one to indicate the name of the sensor that was used.
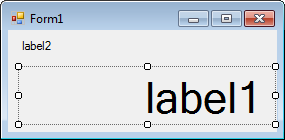
We add two labels
We initialize the label text into the Form constructor.
{
InitializeComponent();
label1.Text = "N/A";
label2.Text = "No sensor detected";
}
Interface with the sensor
In the opposite to a console application, we can't afford to create an never-ending loop to read the sensor permanently. Therefore, we are going to use a timer which calls a function at a 10Hz frequency. It's this function which is going to take care of:
- calling YAPI.HandleEvents on a regular basis. In fact, it's not 100% necessary, but it's good practice to give control to the Yoctopuce API from time to time.
- calling YAPI.UpdateDeviceList once every two seconds, which forces the API to detect again the connection of new modules. It's a rather heavy process, it's best to avoid doing it too often, thus the two second delay between calls.
- detecting the first "YTemperature" function available with YTemperature.FirstTemperature()
- if this function is available, reading the temperature and updating the interface.
This translate into the following code:
int hardwaredetect = 0;
private void timer1_Tick(object sender, EventArgs e)
{
string errmsg ="";
if (hardwaredetect == 0) YAPI.UpdateDeviceList(ref errmsg);
hardwaredetect = (hardwaredetect + 1) % 20;
YAPI.HandleEvents(ref errmsg);
if (sensor == null) sensor = YTemperature.FirstTemperature();
if (sensor != null)
{
if (sensor.isOnline())
{
label1.Text = sensor.get_currentValue()+ sensor.get_unit();
label2.Text = sensor.get_friendlyName();
}
else
{
label1.Text = "OFFLINE";
label2.Text = "Sensor is offline";
sensor=null;
}
}
}
As everyone knows, users are quite deceitful, they are bound to disconnect the module at the worst moment. So, before accessing a function, we make quite sure that the corresponding module is connected with a call to sensor.isOnline(). To make it short, the complete code of the Form looks like this:
{
public Form1()
{
InitializeComponent();
label1.Text = "N/A";
label2.Text = "No sensor detected";
timer1.Interval = 100;
timer1.Tick += timer1_Tick;
timer1.Enabled = true;
}
YTemperature sensor = null;
int hardwaredetect = 0;
private void timer1_Tick(object sender, EventArgs e)
{
string errmsg ="";
if (hardwaredetect == 0) YAPI.UpdateDeviceList(ref errmsg);
hardwaredetect = (hardwaredetect + 1) % 20;
YAPI.HandleEvents(ref errmsg);
if (sensor == null) sensor = YTemperature.FirstTemperature();
if (sensor != null)
{
if (sensor.isOnline())
{
label1.Text = sensor.get_currentValue()+ sensor.get_unit();
label2.Text = sensor.get_friendlyName();
}
else
{
label1.Text = "OFFLINE";
label2.Text = "Sensor is offline";
sensor=null;
}
}
}
}
And when you compile all this, you obtain the expected result, a Windows window displaying the temperature as soon as a Yoctopuce temperature sensor is connected:
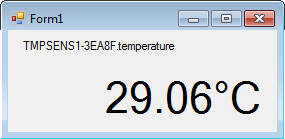
It's working!
Note that the code, simplistic by design, can manage only one temperature sensor at a time. If you want to manage several sensors, no problem, the API is obviously designed for this.
Magic trick
This example manages only temperature sensors, but by simply modifying two lines of code, you can make it work with any Yoctopuce sensor: you only need to use the YSensor class instead of the YTemperature class:
YTemperature sensor = null;
....
if (sensor == null) sensor = YTemperature.FirstTemperature();
// by
YSensor sensor = null;
....
if (sensor == null) sensor = YSensor.FirstSensor();
Et voilà! it now works also with a light sensor.
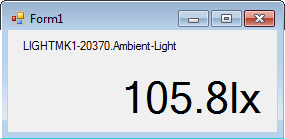
Now it works with all the other sensors as well
This "magic trick" works because all the Yoctopuce classes corresponding to sensor type features inherit from the YSensor class. You can use the YSensor class to access the basic functions of a sensor such as obtaining the current value or the measuring unit.
Here you are, we saw the basics. Now, with the help of the reference documentation, you should be able to stand on your own two feet.


