This week, we're testing a small LCD screen manufactured by Waveshare which has the specificity of having an I2C interface. We don't have too many doubts about the possibility of interfacing it with a Yocto-I2C, but we expect that it won't be trivial insofar as display controllers like being difficult, and generally demand a proper initialization before agreeing to operate.
This difficulty is due to the fact that, even though they are often sold together, diplay tiles and their controllers rarely come from the same manufacturer. Controllers are designed to be generic, so that they can drive different types of tiles, which means that they have to be initialized correctly if they are to work.
The LCD1602-RGB screen
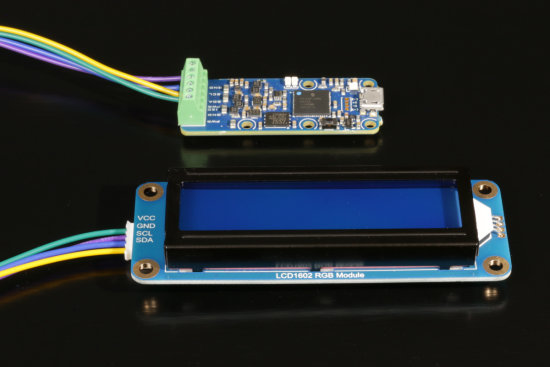
Waveshare's display comes in the form of a 90x32mm PCB with a 2-line, 16-character LCD. The display area is approximately 60x13mm. It is backlit with RGB LEDs. The I2C port is accessible via a connector, and a cable with the appropriate connector is supplied. Connecting the display with a Yocto-I2C is just trivial.

The WaveShare LCD1602-RGB display connected to a Yocto-I2C
You can power the display with the 3.3V of the I2C bus, but you can also use the 5V of the Yocto-I2C's powerOutput function, which gives you a very slightly better contrast.
Backlighting
The display is backlit by RGB LEDs driven by an NXP PCA9633 chip. Logically enough, this chip has an I2C interface. Its address is configurable, but on this screen it's 0xC0 (on 8 bits). After recognizing its address on the I2C bus, the PCA9633 expects to receive a command byte, organized as follows:
- Bit 7: register pointer auto-increment if set to 1
- Bit 6-5: auto-increment options
- Bit 4: always 0
- Bit 3-0: register pointer
there are twelve registers, but the ones we're most interested in are the following
- 0x00 : Mode register 1
- 0x02 : Brightness control LED0
- 0x03 : Brightness control LED1
- 0x04 : Brightness control LED2
- 0x08 : LEDOUT (LED driver output state)
For information, LED 0 is blue, LED 1 is red and LED 2 is green.
To initialize the chip, you must
- set register mode 1 to zero to take the chip out of low-energy mode
- set LEDOUT to 0xff to make LEDs individually controllable
This gives the following I2C commands to initialize the PCA9633
{S}C00000{P} {S}C008FF{P}
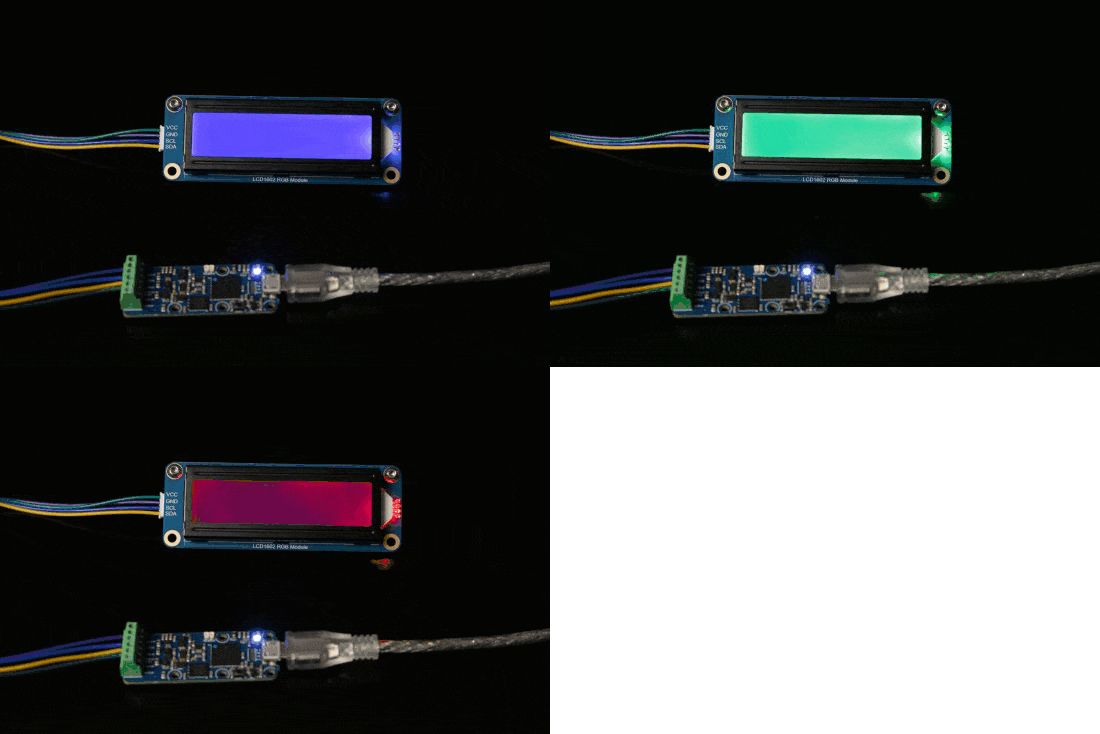
To control the LEDs, set the brightness values in the LED0, LED1 and LED2 registers. This can be done all at once, using auto-increment. For example, set the blue LED to 0x33, the green LED to 0x55 and the red LED to 0x77 using the command
{S}C082335577{P}

Backlighting done, it's working
The display
The display itself is managed by an AiP31068 chip from Wuxi I-CORE Electronics Co. Ltd, a Chinese manufacturer that is a priori unknown, but fortunately we were able to find a datasheet on the website of Newhaven Display, a WaveShare competitor.
The 8-bit address of the AiP31068 is 0x7C. After recognizing its address on the I2C bus, the controller waits for a byte to tell it whether the following bytes describe a command or data.
- 0x80: command
- 0x40: data
Commands have a specific format: they are encoded on 1 byte, the first most significant bit set to one indicates the command and the following are the parameters of the command in question. For example:
- bit 0 to 1: Clear display command
- bit 1 to 1: Return home command
- bit 2 to 1: Entry mode set command
- bit 3 to 1: Display ON/OFF control command
- bit 4 to 1: Cursor or Display Shift command
- bit 5 to 1: Function Set command
- bit 6 to 1: Set CGRAM Address command
- bit 7 to 1: Set DDRAM Address command
Initializing
The datasheet gives the sequence of commands required to initialize the chip, and this is worth mentioning because not all manufacturers take the trouble to describe this sequence. On the other hand, there are some minor inconsistencies between the example given and the rest of the datasheet. But here's the sequence we managed to make work.
- Call the "Function Set" command with value 8 to configure the controller in 4-bit, 2-line, 5x8 pixel character mode. The I2c command is therefore:
{S}7C8028{P}
- Call the "Display ON/OFF control" command with value 4 to switch on the display
{S}7C800C{P}
- Call "Clear display" command to clear the display
{S}7C8001{P}
- Call the "Cursor or Display Shift" command with value 0x4 so that the cursor moves automatically from left to right and the screen memory pointer increments automatically.
{S}7C8014{P}
Putting cursor/data pointer in the right place
The screen display memory is in DDRAM, so although the screen has only 2x16 characters, the AiP31068 actually has 128 bytes of memory. The first 64 (0x40) for the first line and the next 64 for the second. To set the data pointer to the coordinates (col, line), send the byte 0x80 + col + line*64. For example,
- To place the cursor at the beginning of the first line, use
{S}7C8080{P}
- To place it at the start of the second line, use
{S}7C80C0{P}
- To place the cursor on position 4 of the second line, use
{S}7C80C4{P}
(note that we count from position 0, so position 4 is the fifth character).
Writing characters
To write characters, place the cursor in the desired position using the function described above, then send the data as ASCII codes. Note that this time we're sending data, not a command, so the byte just after the address must be 0x40. So, to write "1234" (ascii 0x31..0x34) at top left, we'd call
{S}7C8080{P} {S}7C4031323334{P}
A Python class
We can now synthesize everything we've learned about this LCD1602-RGB screen into a small Python class that makes the basic functions easy to use. If you don't like Python, you can easily translate this class into the language of your choice.
def __init__(self,i2cPort):
errmsg = YRefParam()
self.i2cPort = i2cPort
## init I2C port
self.i2cPort.set_i2cMode("400kbps")
self.i2cPort.set_i2cVoltageLevel(YI2cPort.I2CVOLTAGELEVEL_3V3)
self.i2cPort.reset()
## init PCA9633 RGB driver
#Mode1=0x00
self.i2cPort.writeLine("{S}C00000{P}")
#ouput=0xFF , all led dimming/blinking can be controlled individually
self.i2cPort.writeLine("{S}C008FF{P}")
## init AiP31068 driver
# function set call : 4bit mode, LCD 2lines , 5x8 dots
self.i2cPort.writeLine("{S}7C8028{P}")
YAPI.Sleep(1, errmsg)
# Display ON/OFF control: display on, cursor off, blick off
self.i2cPort.writeLine("{S}7C800C{P}")
YAPI.Sleep(1, errmsg)
# clear display
self.i2cPort.writeLine("{S}7C8001{P}")
YAPI.Sleep(1,errmsg)
# left to right, AC pointer increased
i2cPort.writeLine("{S}7C8014{P}")
YAPI.Sleep(1,errmsg)
def setColor(self,r,g,b):
self.i2cPort.writeLine("{S}C082"+'{:02x}'.format(b)+'{:02x}'.format(g)+'{:02x}'.format(r)+"{P}")
def setCursorPosition(self,col,line):
# warning line can be 0 or 1 only
self.i2cPort.writeLine("{S}7C80"+'{:02x}'.format(0x80|line*40| col)+"{P}")
def write(self,line1,line2):
for i in range(0,2):
self.setCursorPosition(0,i)
command = "{S}7C40" # about to write data
if i==1 : line1=line2 # quick and dirty swap
for j in range(0,len(line1)):
command =command+ '{:02x}'.format(ord(line1[j]))
for j in range( len(line1),16):
command = command + "20" ## pad with spaces
command=command+ "{P}"
self.i2cPort.writeLine(command)
And an example code to use it:
from yocto_i2cport import *
errmsg = YRefParam()
if YAPI.RegisterHub("usb", errmsg) != YAPI.SUCCESS:
sys.exit("init error" + errmsg.value)
i2cPort = YI2cPort.FirstI2cPort()
if i2cPort is None:
sys.exit('No module with I2C port found')
display = WaveshareLCD1602RGB(i2cPort)
display.setColor(255,0,0)
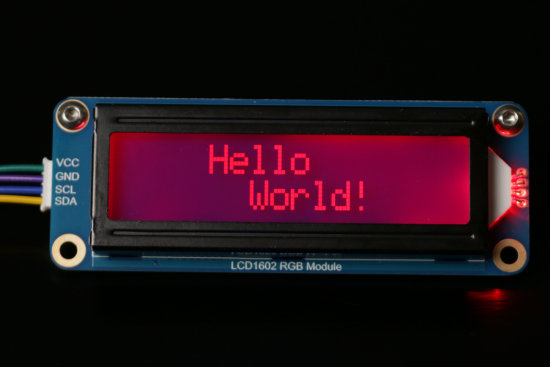
display.write(" Hello"," World!")
YAPI.FreeAPI()

It works!
Conclusion
In 2024, this kind of screen may seem a little obsolete, as contrast and viewing angle are nowhere near as good as what you can get with a modern OLED or e-paper screen. However, if you need to display a few dozen characters on a small screen, with the option of changing the backlighting color to attract your user's attention, WaveShare's LCD1602-RGB screen connected to a Yocto-I2C could well do the trick.
While the hard part is done, note that the small class we've written about here does only the bare minimum. It doesn't do any parameter or error checking. Moreover, the display is apparently capable of doing more sophisticated things, such as displaying a blinking cursor, and scrolling lines horizontally.


