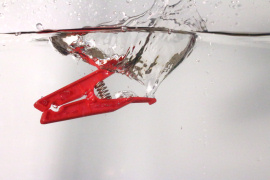
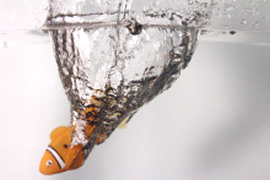
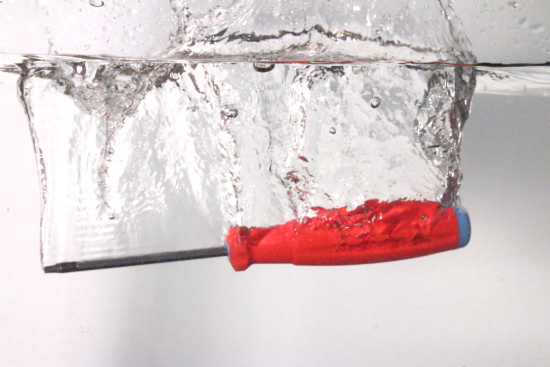
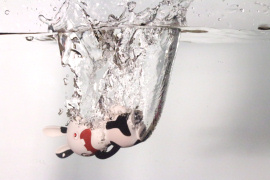
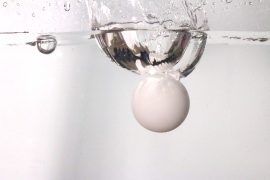
![]() In the latest issue of Make, we found a nice article by Thomas Burg and Johannes Gottwald about splash photography. The principle behind this technique, often used for commercials, is to take a picture of an object while it dips into a liquid. This can produces stunning pictures. Of course, after reading that, we were eager to give it a try...
In the latest issue of Make, we found a nice article by Thomas Burg and Johannes Gottwald about splash photography. The principle behind this technique, often used for commercials, is to take a picture of an object while it dips into a liquid. This can produces stunning pictures. Of course, after reading that, we were eager to give it a try...
Thomas Burg and Johannes Gottwald have used a rather mechanical approach: they built a small Arduino-based system to release an object automatically, then trigger the camera after a precise amount of time. Our approach is more pragmatic: we just built a light barrier on top of an aquarium.
The light barrier
The idea is to build a simple light barrier using a few infra-red LEDs and phototransistors. As infra-red light source, we have used Everlight HIR333-A, and as IR phototransistor we have used Vishay BPW17N. To read the phototransistors, we have just wired them to a Yocto-Knob, which is cabable to measure the resistance change depending on the amount of infra-red light reaching the phototransistor. To power the LEDs, we used the 5V from the USB bus on the device, with a 200Ω resistance in series.

Connecting IR LEDs and phototransistors
The IR diodes and phototransistors have been fixed to two plastic bars with evenly spaced holes. These two bars have then been mounted on two opposite edges of the aquarium, so as to detect each time an object enters or leaves the acquarium.

LEDs and photo-transistors are fixed into plastic bars...

...mounted on opposite edges of the aquarium
In order to trigger the camera, we used a simple Yocto-Relay connected to the remote control port of the camera, like we already did in the past.
The software part
We wrote this code in Delphi for a change. This was a matter of a few minutes only. The only subtlety is to read the Yocto-Knob inputs using callbacks, in order to be as quick as possible. The first thing to do is to initialize the Yoctopuce API using yRegisterHub.
begin
writeln(errmsg);
halt;
end;
Then we look for the relay driving the camera. We gave it the logical name “shutter”, which makes it easier to find it back.
if not(relay.isonline()) then
begin
writeln('Shutter relay not found');
halt;
end;
Then we enumerate all AnButton inputs. Each of them maps to one of the phototransistor. So to each of these inpus, we assign a callback named detect, which is a procedure that will be automatically invoked each time an entry of the Yocto-Knob changes significantly.
while (button <> nil) do
begin
button.registerValueCallBack(detect);
button := button.nextAnButton();
end;
This is it, we can now sit in an idle loop, waiting for the event-driven callbacks to do their job.
while true do
Ysleep(100,errmsg);
The callback code must trigger the camera relay when the value read on the analog input is larger than a threshold and that the last picture was taken more than 2.5 seconds ago. As we have filled in the aquarium about half-full, the time needed for the object to travel from the top of the aquarium to the water happens to be approximately the time needed to detect the object and trigger the camera. We can therefore trigger the relay as soon as we detect the object. If needed, we could have added a few milliseconds of extra delay using relay.delayedPulse instead of relay.pulse.
begin
if (strToint(value) > 500) and (yGetTickcount()-lastEvent > 2500) then
begin
relay.pulse(250);
lastEvent := yGetTickcount();
end;
end;
That’s it, you can download the full code here.
Before starting, it is best to calibrate the range of the Yocto-Knob inputs. This is done very simply using the VirtualHub: just enable calibration mode on the inputs, and bring a few objects that you plan to take picture of in front of the phototransistors. That will be enough for the device to capture the [min...max] range observed during the calibration, in order to later report the observed values with regard to this range. This provides an optimized sensitivity for the application.

It is always best to calibrate the range of your Yocto-Knob inputs.
Does it work ?
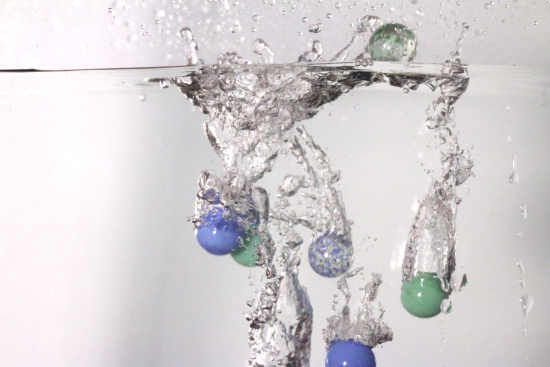
Yes, it does work rather well. Trying various fall heights, the resulting picture changes significantly but the image is quite reproductible. The big advantage of this method for splash photography is that the setup to make a new picture is reduced to the strict minimum: drop an object in the aquarium and the picture will be taken automatically. You can then recover the object and retry immediately.
Conclusion
Splash photography is a pleasant hobby, quite easy to get started with, at least with Yoctopuce devices. This being said, here are a few common pitfalls to save your time:
- Use manual focus only: autofocus makes the camera too slow.
- To get sharp pictures, use very short exposure time and lots of light. Rather than a flash, use a LED flood light, which produces less parasitic infrared than an halogen flood light.
- If the camera starts taking pictures every 3 seconds, make sure there is not a water drop in front of a LED or a phototransistor.
- Periodically remove the small air bubbles that appear progressively on the faces of the aquarium, they would waste your best pictures
- When falling into water, some objects can throw water at an amazing distance: don’t leave the control computer too near :-)

