We have pre-announced the Objective-C library a few weeks ago, it is now available on the programming libraries download page. From now on, you can create Mac OS X Cocoa applications that will natively communicate with Yoctopuce modules (directly using USB, or via TCP).
In order to use the Objective-C library, you will need XCode version 4.2 (earlier versions will not work), available freely when you run Lion. If you are still under Snow Leopard, you will need to be registered as an Apple developper in order to be able to download XCode 4.2. The Yoctopuce Library is ARC compatible. You can therefore implement your projects either using the traditional retain / release method, or using the Automatic Reference Counting.
Here is a small guide to compile a basic Cocoa application, that will simply display the temperature measured by a Yocto-Temperature connected on USB.
Create your project as you are used to. In this example, we will create a Cocoa "test" application for Lion using Automatic Reference Counting. Once the project is created, the first thing to do is to add the IOKit Framework, needed for USB communication.
Then we need to add all the source files from the Yoctopuce library, which you will find in the "Source" subdirectory. The easiest way to do so is to select all files in the Finder and to drag-and-drop them directly to XCode. From there, you should have a project that compiles without any error. If this is not the case, verify that you are indeed using version 4.2 of XCode, and that you have properly added the IOKit Framework. If you still have errors, send us an email at support@yoctopuce.com.
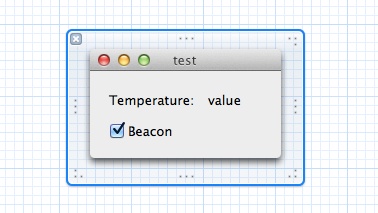
In this example, we will create a very limited application that will read the temperature and control the beacon led of the module. Its purpose is simply to show how simple it is to use the library in Objective-C. First, we have to create the graphical user interface, using two NSLabel and one NSCheckbox as follows:
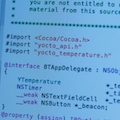
We will modify the header to include "yocto_api.h" that is needed to use the Yoctopuce API. In order to use the temperature sensor, we will include as well "yocto_temperature.h". that provides in addition the YTemperature class. We will then declare an instance variable _tempSensor of type YTemperature* and a _timer of type NSTimer*.
We will also create the connections needed using Interface Builder.
Your header should now look as follows:
#import "yocto_api.h"
#import "yocto_anbutton.h"
@interface BTAppDelegate : NSObject <NSApplicationDelegate>
{
YAnButton *_tempSensor;
NSTimer *_timer;
__weak NSTextFieldCell *_tempDisplay;
__weak NSButton *_beacon;
}
@property (assign) IBOutlet NSWindow *window;
@property (weak) IBOutlet NSTextFieldCell *_tempDisplay;
@property (weak) IBOutlet NSButton *_beacon;
@end
We have three methods to implement:
- (void) update;
- (IBAction)_SetBeacon:(id)sender;
- (void) applicationDidFinishLaunching:(NSNotification *)aNotification;
This method is invoked once the OS has loaded the application, it is therefore the ideal place to initialize the Yoctopuce library. The code is very similar to all languages: we register the USB local hub and we initialize an object that will point to the first temperature sensor discovered. We will also initialize our NSTimer that will invoke the update method every second.
{
// Insert code here to initialize your application
NSString *errmsg;
yRegisterHub(@"usb", &errmsg);
_tempSensor = yFirstTemperature();
_timer = [NSTimer scheduledTimerWithTimeInterval:1 target:self selector:@selector(update) userInfo:nil repeats:YES];
}
- (void) update;
The update method is called automatically every second by the NSTimer. Its purpose is to verify that the Yocto-Temperature is still connected, and to display the temperature and the beacon state (the blue led). In order to read the temperature, we only have to invoke the get_currentValue method on the _tempSensor object. This method returns a floating-point number that we can put directly into the NSLabel _tempDisplay. For the beacon, it is only slightly more complex: we first get a pointer to the module, from which we can ask the beacon state.
{
if([_tempSensor isOnline]){
[_tempDisplay setFloatValue:[_tempSensor get_rawValue]];
YModule *moduleOfTempSensor=[_tempSensor module];
[_beacon setState:[moduleOfTempSensor get_beacon]];
}else{
[_tempDisplay setStringValue:@"disconnected"];
}
}
- (IBAction)_SetBeacon:(id)sender;
The last method is triggered by the user (when clicking on the checkbox). The code is quite simple: we check that the module is still connected, and if it is the case, we update the beacon led state using the new value of the checkbox.
{
if(![_tempSensor isOnline])
return;
if([sender state])
[[_tempSensor module] set_beacon:Y_BEACON_ON];
else
[[_tempSensor module] set_beacon:Y_BEACON_OFF];
}
Here is the demo:
The final code, including the project file, is included in the subdirectory Examples/Yocto-FirstExample of the Objective-C library. You will also find the whole API documentation and a few other examples in the zip file. Please note that this first release of the library has only been tested on Mac OS X, not IOS. But this is work in progress, and the library will shortly be supported on IOS as well.
Links:
- Yoctopuce libraries download page
- Objective-C library reference
- Library reference in PDF format

