 CO2 sensors are increasingly popular to monitor air quality at home and in business premises. So much so that we tend to forget that the measures are based on rather advanced technologies, requiring some precautions if we want to make sure that we obtain valid measures. So, do we need to calibrate a CO2 sensor and, if we do, how should we do it?
Most serious CO2 sensors are based on the NDIR (non-dispersive infrared) technology, consisting in measuring the number of CO2 molecules between a particular infrared light source and a detector. At the factory, the sensor manufacturer must perform a full sensor calibration with different CO2 concentrations to ensure a correspondence between the detector measures and the actual levels of CO2. The advantage of the NDIR technology is that the sensor intrinsic parameters remain stable during the sensor life span. Theoretically, no later full calibration is required.
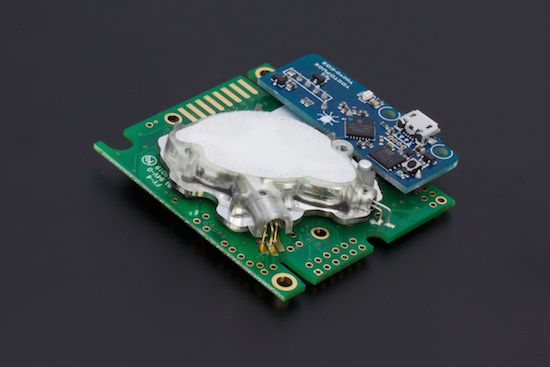
Except that, unfortunately, the characteristics of the light source and of the detector are not absolutely constant in the sensor life span: after a while, the sensor tends to underestimate the number of CO2 molecules. As it is a predictable pattern, affecting a single parameter of the measure, the sensor can take it into account and perform an automatic correction to counter it. For example, the SenseAir K30 sensor embedded in the Yocto-CO2 uses a method called ABC (Automatic Baseline Calibration) that adjusts the measures without external intervention.

The Yocto-CO2, with its embedded SenseAir K30 sensor
ABC automatic calibration
Automatic calibration is based on the fact that in a common environment, the CO2 level comes back to the norm (400ppm CO2) periodically, at least every few days. Starting from there, the sensor constantly monitors the lowest observed CO2 level over a period of several days. If these lowest values diverge from the norm, the sensor gradually makes a correction to compensate for the change. It is an efficient and reliable method for a common environment where the CO2 level goes back to normal when there is no CO2 production for a few hours: during the night for businesses, during the day for a bedroom.
There are a few cases where automatic calibration is not adequate: for example if you intend to use a Yocto-CO2 in an food processing environment constantly saturated in CO2 or, in the opposite, in an artificially CO2-free environment. In these two cases, the ABC system could have a negative influence on sensor calibration. You can therefore disable automatic calibration with the set_abcPeriod(-1) function, or with the command line:
You can enable automatic calibration again by specifying, instead of -1, the number of hours during which you want measures to be taken for automatic calibration.
If you disable automatic calibration, you must instead periodically perform a manual calibration. There are two ways to do so.
Baseline calibration
If you can move your Yocto-CO2, a simple way to calibrate it is to bring it outside, away from any vehicle or any combustion source. The CO2 level is naturally very close to 400ppm. Make sure air had time to circulate into the sensor and that the measure has stabilized for about 1 minute, then trigger a baseline calibration with the triggerBaselineCalibration() function or with the command line:
This is enough to calibrate your sensor for the next few months.
Zero calibration
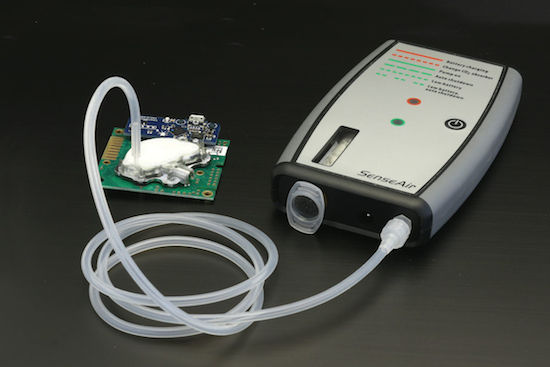
The surrounding air is unfortunately not going to stay at 400ppm CO2 forever. If you want to perform a more precise calibration without depending on the surrounding air, or simply if you cannot move your sensor, you can also calibrate the sensor on a gas sample which is completely free of CO2. For this, you need to circulate into the sensor either pure nitrogen (N2), or CO2-free air as obtained from a small calibration tool similar to that sold by SenseAir:

Zero calibration of the Yocto-CO2
To circulate the gas into the sensor, set a small tip with a 2.2mm external diameter in one of the two openings on top of the sensor, as is the above picture. Circulate the gas at a 0.2 litre/min speed for about two minutes, that is one minute more than the time necessary for the measure to stabilize. When ready, trigger the zero calibration with the triggerZeroCalibration() function or the command line:
Here you are, your sensor should be as accurate again as it was just out of the factory, on its complete measuring range!


