![]() A few months ago, a small feline has taken up residence next to Yoctopuce and sometimes comes to visit. So that it can come in and out freely during the day, we installed a microchip cat flap which we can control remotely. When we installed it, we thought that there was bound to be some interesting tinkering that we could do with the cat flap and some Yoctopuce modules, and there we are...
A few months ago, a small feline has taken up residence next to Yoctopuce and sometimes comes to visit. So that it can come in and out freely during the day, we installed a microchip cat flap which we can control remotely. When we installed it, we thought that there was bound to be some interesting tinkering that we could do with the cat flap and some Yoctopuce modules, and there we are...
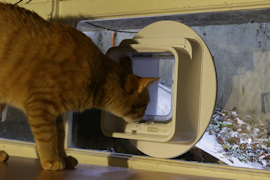
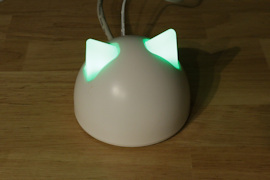
You can drive the connected Surepet Microchip Cat Door through internet thanks to a small, cat-shaped hub.
Even if cats are naturally nocturnal animals, it is often recommended not to let them out at night: not only is it when they have a higher tendency to bring back live toys in the house, but it's also during the night that they are more often victims of accidents. This is why automatic cat flap manufacturers propose a curfew mode - very trendy - enabling you to stop the animals going out on a defined schedule.
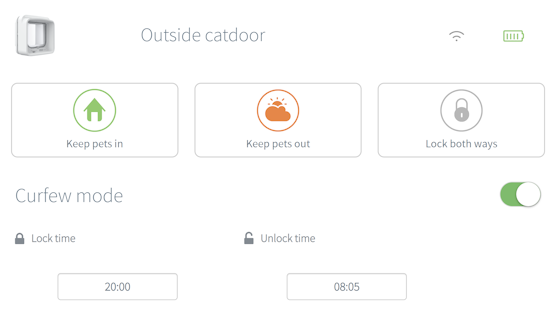
Configuring the curfew at fixed times
Except that... between September, when we mounted the cat flap, and January, the hours of the night have changed quite a bit, and the cat flap thus stays open several hours after nightfall and opens well before the sun is up - and even more so as the time change wasn't taken correctly into account. Too bad! So today, we propose an improvement of this connected cat flap, which consists in simply using an ambient light sensor to automatically adapt the opening schedule during the whole year.
Principle
The principle is simple: somewhere in the house, a Yocto-Light-V3 sensor connected to the network measures the outside luminosity. The simplest way is to mount it directly on a YoctoHub-Ethernet or a YoctoHub-Wireless-n close to a network access point and to a window. Somewhere else, a monitoring computer periodically checks the ambient luminosity and (un)locks the cat flap depending on the hour and on the light, by contacting the Surepet Care server.
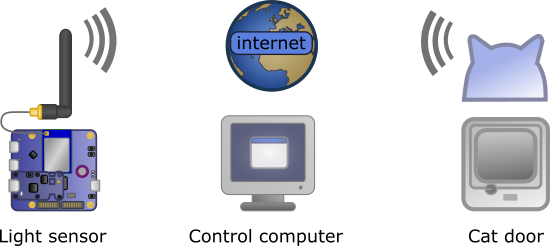
Controlling the cat flap with a light sensor
Design
You must pay particular attention to the robustness of the solution, especially to the tolerance of network losses which are unavoidable. We take the opportunity of this not too complex project to show
- how to separate from the application logic the different interfaces to the outside, and
- how to implement the application logic with a finite state machine.
The separation enables us to simplify the application by splitting it into components which we can design, test and document independently from one another. The implementation with a finite state machine enables us to make sure that the distinct possible states of the system are clearly defined, and that all the transition cases from one state to the other are taken care of. Here is the design that we propose:
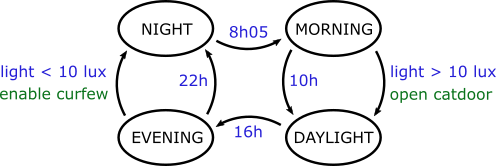
Articulation of the controlling system
We decided to perform the implementation in Node.js, but you can very easily translate this code into any other language.
Interface to the light sensor
To be robust, the code taking care of the communication with the light sensor is designed to support connections and disconnections at any time. This enables us to manage wifi network failures, power outages, and so on. However, as we don't want to propagate this complexity to the main application, everything is done internally in this interface which makes directly available to the application the most recent value of the measured luminosity in [lux] or -1 if there is no recent measure currently available.
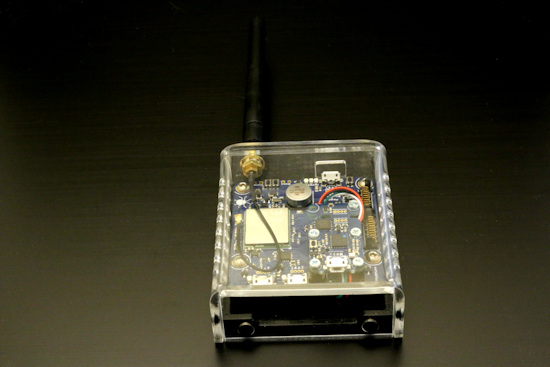
The light sensor mounted on a YoctoHub Wi-Fi
The passive connection with the light sensor connected to the wifi network is performed with the YAPI.PreregisterHub() method, which doesn't require an immediate connectivity with the sensor:
// an error in case the hub is momentarily not reachable
await YAPI.PreregisterHub(this.hubAddr, new YErrorMsg());
We then activate a call from a callback as soon as a sensor is available and as soon as the connection is lost:
await YAPI.RegisterDeviceArrivalCallback((m) => {
this._deviceArrivalCallback(m);
});
await YAPI.RegisterDeviceRemovalCallback((m) => {
this._deviceRemovalCallback(m);
});
The module connection callback detects the presence of a Yoctopuce light sensor and configures it to perform measures averaged over 30 seconds (2 measures per minute):
{
let product = await module.get_productName();
let serial = await module.get_serialNumber();
console.log('Yoctopuce device connected: '+product+' ('+serial+')');
if(!product.match(/^Yocto-Light/)) return;
// If a Yocto-Light(-V3) is found, get average luminosity twice per minute
let sensor = YLightSensor.FindLightSensor(serial+'.lightSensor');
await sensor.set_reportFrequency("2/m");
await sensor.registerTimedReportCallback((s,m) => {
this._lightSensorCallback(s,m);
});
// initialize current luminosity with current instant value
this.currentLuminosity = await sensor.get_currentValue();
}
When a measure is available, it is saved in a module property to be immediately available:
{
this.currentLuminosity = measure.get_averageValue();
//console.log('Average luminosity: ' + this.currentLuminosity + ' lux');
}
And when we loose the connection with the light sensor, we signal it and we invalidate the light measure. If need be, we could improve the solution by associating an expiry date on the measure, rather than invalidating it immediately.
{
let product = await module.get_productName();
let serial = await module.get_serialNumber();
console.log('Yoctopuce device disconnected: '+product+' ('+serial+')');
if(!product.match(/^Yocto-Light/)) return;
this.currentLuminosity = -1;
}
The complete code of this light sensor managing module is available in the light-sensor.js file on GitHub.
Interface to the Sure Petcare connected cat flap
The code used to interface the connected cat flap works along the same principle: the program periodically contacts the monitoring server to read the current lock state of the cat flap, and provides the last known state to the main application. Indeed, the application cannot be supposed to be the only controlling source of the cat flap. Someone could manually lock the cat flap for some reason. In this case, the application must take it into account and not unlock it. In the opposite, if the main program decides to change the lock state, the command is stored and sent during the next connection.
Calls to the Sure Petcare REST API, through the app.api.surehub.io server, were implemented on the basis of a similar API implemented by Wylan Swets and published as MIT license on GitHub. We are very thankful to him to have done all the protocol analysis work and to have made the result available to all. We nevertheless chose to make our own implementation in using async/await calls rather than the asynchronous stringing by callback for code readability, and with a reading interface separated from the network calls. The complete code of our cat flap management interface is available in the sure-petcare.js file on GitHub.
Main application
The main application thus only needs to manage the logic of the states, that we modeled at the beginning of this post. We only need to regularly check if a state transition is required and to trigger the potential corresponding action. We use four main states:
- state NIGHT: During the night, the cat flap is normally in curfew mode and nothing happens.
- state MORNING: In the morning, we keep the curfew mode until the luminosity reaches a given value. We then switch to DAYLIGHT state.
- state DAYLIGHT: During the day, nothing happens.
- state EVENING: In the evening, we wait for the luminosity to lower below a given value to enable the curfew mode and switch to the NIGHT state.
Each of these states can end with a time condition: the cut-off time to go to the next state. This time normally corresponds to the curfew schedule programmed in the user interface of surepetcare.io, which guarantees a minimal adequate behavior even in the event of a complete failure of the light control system.
On top of this, the MORNING and EVENING states can end due to a light condition, triggering the activation or deactivation of the curfew on the cat flap, at a time more appropriate for the season. It was the original goal of this application... The complete code of the main application is available in the demo.js file on GitHub. It's also in this file that you can configure your own identifiers for the connection to the surepetcare server, as well as the standard schedule that you want to apply.
Conclusion
This decoupling and state machine methodology may seem exaggerated for such a simple application.But when you want to implement your own automatic system with a reasonable guarantee that it will work well in the long range whatever the contingencies, we believe it's the best way to proceed.
Moreover, if you decide to make this project your own, it will be easier for you to adapt it to your own needs than if everything was coded into one large function mixing error handling and logical transitions.


