 Quasar is a framework written in JavaScript that promises the holy grail for developers: to make a cross platform application. Quasar is based on other well-known technologies such as npm, Vue.js, Webpack, Electron, Cordova and gathers them in a single framework. As we are curious, we wanted to test this framework with our TypeScript library.
For this test, we will see if we can make a simple application that displays the list of modules connected to a YoctoHub.
The first thing to do is to install Quasar with the npm command "npm i -g @quasar/cli". Then you can create a new project with the command "npm init quasar".
c:\data\>npm init quasar .d88888b. d88P" "Y88b 888 888 888 888 888 888 8888b. .d8888b 8888b. 888d888 888 888 888 888 "88b 88K "88b 888P" 888 Y8b 888 888 888 .d888888 "Y8888b. .d888888 888 Y88b.Y8b88P Y88b 888 888 X88 888 888 888 "Y888888" "Y88888 "Y888888 88888P' "Y888888 888 Y8b ? What would you like to build? - Use arrow-keys. Return to submit. > App with Quasar CLI, let's go! - spa/pwa/ssr/bex/electron/capacitor/cordova AppExtension (AE) for Quasar CLI Quasar UI kit
This command launches the Quasar project creation wizard which allows you to specify the project name and various parameters. For this example, we kept the default parameters except for the language where we used TypeScript instead of JavaScript. You can then test the application in a web browser with the command"quasar dev".
Add the Yoctopuce library
What we are really interested in is to see if our library works with the framework. To do this, we must add our TypeScript library with npm.
npm install yoctolib-esm --save-dev
Note the --save-dev option which specifies that the library should be added to the development dependencies section. Quasar uses Webpack (or Vite) to compile the application and decide which packages need to be included in the final application. That's why it's enough to include the Yoctopuce library in the development dependencies.
Once the Yoctopuce library is installed, it can be used in the application like any other library. You just have to import the objects you use:
Note that we used the path yocto_api_html to use the HTML version of the Yoctopuce library. For more information on this subject you can read our tutorial "How to get started with TypeScript and Yoctopuce modules".
We can then use our library in Vue.js objects. For example the following code builds a list of modules present on the YoctoHub with the IP address "192.168.1.15".
export default defineComponent({
name: 'IndexPage',
data()
{
return {
module_list: [] as ModuleItem[]
};
}
async created()
{
let errmsg: YErrorMsg = new YErrorMsg;
await YAPI.RegisterHub("192.168.1.15", errmsg);
let module = YModule.FirstModule();
while (module) {
let m: ModuleItem = {
serial: await module.get_serialNumber(),
product: await module.get_productName(),
name: await module.get_logicalName(),
};
this.module_list.push(m);
module = await module.nextModule();
}
}
});
For readability reasons, we have included only the script of this Vue.js component. But you can find the complete code on GitHub.
The demo application.
We have modified the main page of the application which is automatically created by quasar when the project is created.
The code is too long to be detailed, but the main page is an expanded version of the code we just presented. The complete project is available on GitHub.
To test the project locally, you need to run the "quasar dev" command at the project source. This command compiles the project and runs it in a browser.
The command to get the production version of the application is "quasar build -m electron". This command compiles the application in production version and uses Electron to generate a "native" application. You have to run this command on the three OS (Windows, Linux and macOS) to get the three applications.
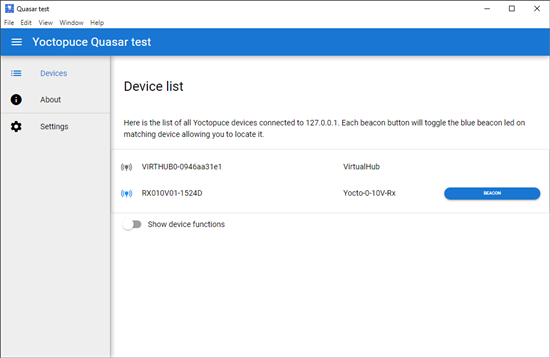
the Windows version
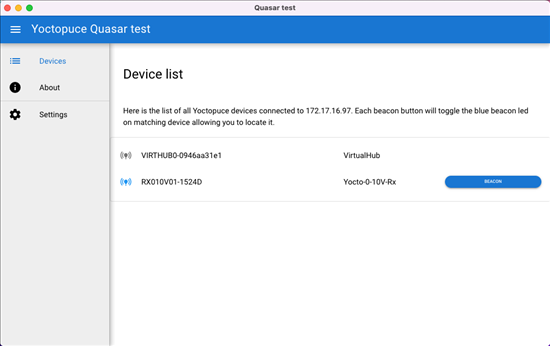
the macOS version
Mobile versions.
The mobile versions are compiled using Cordova. This application is not included with Quasar, and must be installed using npm:
npm install -g cordova
You also need to have Android Studio and Xcode installed.
As for the Windows or macOS versions, it is possible to launch the application in debug mode during development with the following commands:
quasar dev -m cordova -T android quasar dev -m cordova -T ios
To get the production versions, simply replace "dev" by build:
quasar build -m cordova -T android quasar build -m cordova -T ios
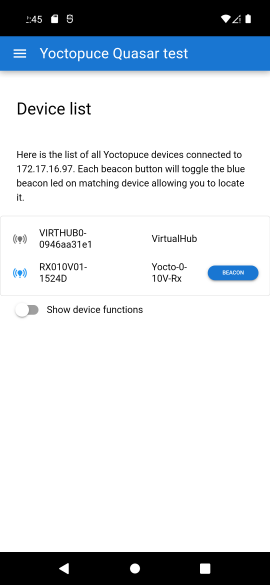
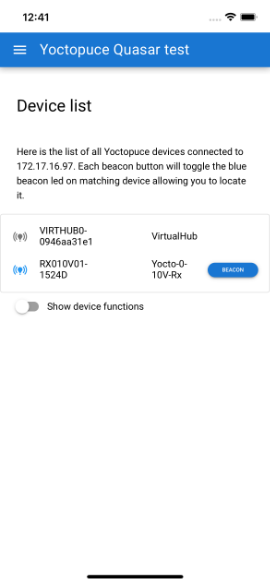
Conclusion
The goal of this article was to see if we could easily make the equivalent of the VirtualHub main page with this framework. And the answer is yes. Once the application was written on our development machine, we were able to generate all versions without having to modify a single line of code.
This application is basic, but uses the network and stores settings on disk. These features are not so obvious to implement in a mobile application.
This is not completely surprising, as this framework is actually a stack of other well-known technologies: npm, Vue.js, Electron, Cordova, etc. But offering a unified package as well as good documentation is very nice and saves a lot of time.
However, the downside is the amount of dependency on npm libraries that this application needs. The risk is to use, without realizing it, a package that contains a vulnerability. Or to find yourself unable to compile your application, because one of the packages has been removed. This is currently the biggest problem of all solutions that are based on npm packages.
In any case our TypeScript library is compatible with this framework. It's up to you to weigh the pros and cons of this solution.


