![]() The post of this week is dedicated to customers who found on the Internet a web site explaining how to build a system based on Yoctopuce modules and who want to build their own system by following the instructions provided on the said web site, but who have no desire to take time to understand how Yoctopuce modules work. If you recognize yourself in this description, you can find here some basic notions from which you cannot escape :-)
The post of this week is dedicated to customers who found on the Internet a web site explaining how to build a system based on Yoctopuce modules and who want to build their own system by following the instructions provided on the said web site, but who have no desire to take time to understand how Yoctopuce modules work. If you recognize yourself in this description, you can find here some basic notions from which you cannot escape :-)
General information
Yoctopuce modules are USB modules. To connect them to your computer, you don't need to install drivers, but you need a USB cable. Typically, a USB-A to micro-B cable. Beware: make sure to use a proper USB cable and not a charging cable. Inside a charging cable, there are only power supply wires and no data wire. If when you connect your module, it turns on but doesn't show in your computer device manager, you may have the wrong sort of cable.

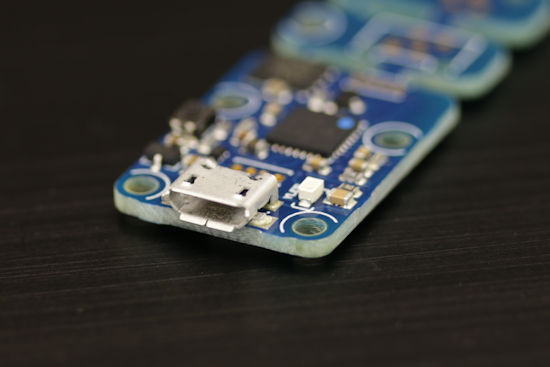
All Yoctopuce modules use Micro-B connectors
Module electric consumption vary from one model to another. You can learn which module consume how much with the VirtualHub (see below). If one or several modules consume more than what the USB port of your machine can provide, you will start to observe a lot of strange behaviors: modules rebooting, disconnecting randomly, and so on. You can solve the issue by inserting a USB hub powered with a good power source. If you want to be sure to have enough margin in the worse case, select a hub which can provide at least 2A.
Configuration
Before installing the modules in the system that you are building, you probably need to configure and test them. To do so, you need the VirtualHub application, which you can download from our web site. There is a specific version for each operating system. Note that if you work with a Raspberry Pi, you need to use the Linux/armhf version.
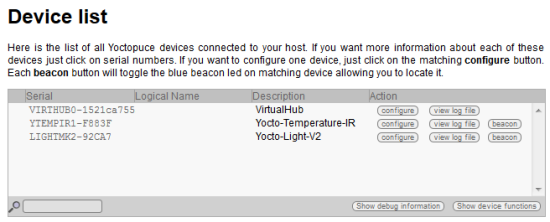
When the VirtualHub is running and when your Yoctopuce modules are connected by USB directly to your computer, open a web browser on the http://127.0.0.1:4444 URL and you obtain a page displaying the list of modules. Note that http://127.0.0.1 is not a public internet site, but simply the local address of the machine on which you are currently working, some kind of internet version of "home, sweet home".

The VirtualHub interface
You can click on the serial number of the module you are interested in to know its state: measured values, consumption, firmware version, and so on. You can also click on the corresponding "configure" button to configure it. Note that changes in the configuration are applied in real time, but they are not saved until you click on the "save" button. If you forget to save, the module restores the previous configuration at the next startup.
As the VirtualHub works like a web server, you can access it from a remote machine. Thus, if the IP address of the machine running a VirtualHub is 192.168.0.42, the URL to access it remotely is http://192.168.0.42:4444.
The VirtualHub enables you not only to have a user interface to manage Yoctopuce modules through the network, but it also provides a network interface to applications programmed to drive Yoctopuce modules. Thus, an application managing Yoctopuce modules doesn't necessarily have to run on the same machine as the one on which the Yoctopuce modules are connected. You can find more information on the VirtualHub in this post.
The YoctoHubs
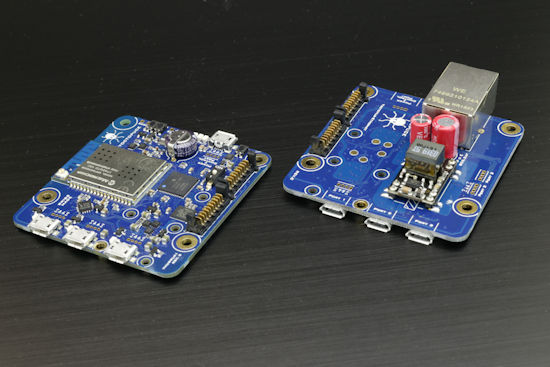
If the system that you are building uses YoctoHubs such as the YoctoHub-Ethernet or the YoctoHub-Wireless-g, you must know that these YoctoHubs are used to provide a network interface to Yoctopuce modules without having to use a real computer. In fact, they behave exactly like a computer running a VirtualHub, but they are smaller and simpler to maintain. They are roughly 6 x 6cm boards on which you can connect up to three Yoctopuce modules.

A YoctoHub-Wireless-G and a YoctoHub-Ethernet
As they are network modules, they need an IP address to work. In a standard network configuration, an IP address is assigned by DCHP to each device present on the network. You need to know this address to remotely access the YoctoHubs. To do so, you need the VirtualHub.
The YoctoHub-Ethernet
Connect the YoctoHub-Ethernet to your network with an UTP cable and to your computer by USB. Open the status window corresponding to the YoctoHub. In the "Network" section, the Readiness field must be set to "4-WWW ready" and you can find the IP address of the hub right below.

The "Network" section of the Yocto-Ethernet
The YoctoHub-Wţreless
For a YoctoHub-Wireless-g, connect the antenna to the module, and connect the YoctoHub to your computer via USB. With the VirtualHub, open the YoctoHub configuration window, in the "Network configuration" section edit the "WLAN settings", configure the wifi connection in infrastructure mode, select the appropriate wifi network and enter the WiFi password. When the connection is working, you know the IP address of our YoctoHub-Wireless.

Configure the network access of the YoctoHub-Wireless network
When the YoctoHub is working, you can disconnect it from your computer and power it through its USB connection, for example with a USB charger (5V, minimum 2 amps). Note that you can also power the YoctoHub-Ethernet by PoE.
When you configure a YoctoHub through a USB connection with your computer, the VirtualHub doesn't show you the modules which are connected to the YoctoHub. To access these sub-modules, you need to directly connect on the YoctoHub with a web browser. For example, if the IP address of your YoctoHub is 192.168.0.43, the URL becomes http://192.18.0.43:4444. Keep in mind that a YoctoHub works like a computer on which a VirtualHub is running.
If you need more than 3 ports on your YoctoHub, you can add them with one or several YoctoHub-Shields. Note, the YoctoHubs work only with Yoctopuce modules, you cannot extend the number of ports with a simple USB hub.
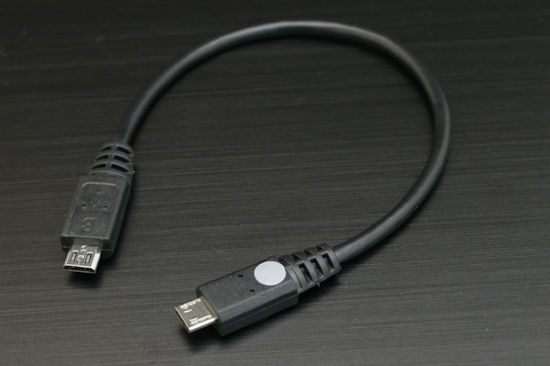
The connection between the YoctoHubs and their sub-modules is performed with micro-B/micro-B USB cables. This type of cable is not very common, but you can find them on the Yoctopuce shop.

Don't forget the cables
If you forget the IP address of an already installed YoctoHub, you can use the Yocto-Discovery application to find it again.
Final comments
For technical reasons, there can be only one application at a time on the same machine accessing the Yoctopuce modules directly by USB. The VirtualHub counts as one application accessing modules directly. Thus, if you run an application using Yoctopuce modules and you obtain the error message Cannot register usb: Another process named xxx (pid xxxx) is already using yAPI, check that you don't have another Yoctopuce application or a VirtualHub already running. This being said, you can easily work around this limitation by using a VirtualHub as a gateway.
If, finally, you want to know more, you can find a whole series of articles detailing the thousand and one secrets of Yoctopuce modules on this page.


