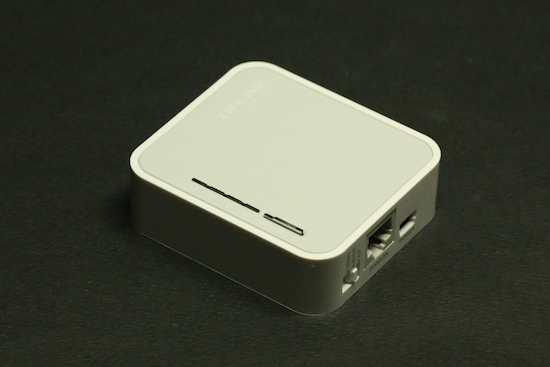
![]() Do you know which is the smallest and cheapest machine, with Ethernet and Wifi network support, and to which we can connect Yoctopuce sensors and actuators? It's neither the Raspberry Pi, nor the BeagleBone. It's an even smaller machine, sold with an enclosure and a power cord, available in chain stores from $35: the TP-Link MR3020. When you take it out of the box, it's only a simple travel Access Point. But with a few clicks, you can install OpenWrt and new opportunities arise...
Do you know which is the smallest and cheapest machine, with Ethernet and Wifi network support, and to which we can connect Yoctopuce sensors and actuators? It's neither the Raspberry Pi, nor the BeagleBone. It's an even smaller machine, sold with an enclosure and a power cord, available in chain stores from $35: the TP-Link MR3020. When you take it out of the box, it's only a simple travel Access Point. But with a few clicks, you can install OpenWrt and new opportunities arise...

The small TP-Link MR3020 Ethernet-Wifi router can host Yocotpuce modules thanks to OpenWrt
Installing OpenWrt can be performed by anyone: the documentation page on OpenWrt is very detailed. Nothing to recompile, you simply load the MR3020 OpenWrt firmware, and you "update" the firmware with the MR3020 standard interface. After a restart, the MR3020 Takes a new IP from DHCP and you can configure it through the OpenWrt web interface or connect yourself to it via SSH.
Installing Yoctopuce tools
From now on, Yoctopuce tools are available for the MIPS platform used by the MR3020. The following commands (run on any UNIX machine) allow you to copy the VirtualHub and an autostart script on your MR3020 (use the IP address of your MR3020 of course !):
$ unzip VirtualHub.linux.16041.zip
$ scp mips/VirtualHub root@192.168.0.254:/usr/sbin/VirtualHub
$ scp startup_script/yvirtualhub.openwrt root@192.168.0.254:/etc/init.d/yvirtualhub
Then, connect yourself via SSH to your MR3020 and run the following commands:
# opkg install libusb-1.0
# /etc/init.d/yvirtualhub enable
# /etc/init.d/yvirtualhub start
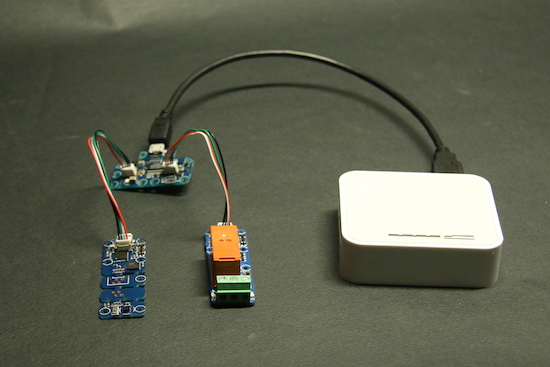
That's it. You can now connect Yoctopuce modules and connect yourself remotely on port 4444 of the MR3020 to read the values of sensors or drive relays. The Yoctopuce VirtualHub service starts automatically if you restart the machine. Unlike other cheap machines, the MR3020 is able to correctly power several Yoctopuce modules through a USB hub. Stay however with short USB cables.

The MR3020 correctly powers several Yoctopuce modules through a USB hub
Applications
Installing a simple VirtualHub can be enough for applications using remote sensors, for example from an Android app, or by HTTP callback to a Cloud service. We can imagine, for instance, using this machine as a Wifi access point with additional possibility
- to control the power supply of another appliance in the room
- to monitor temperature and humidity
- to monitor air quality
- etc.
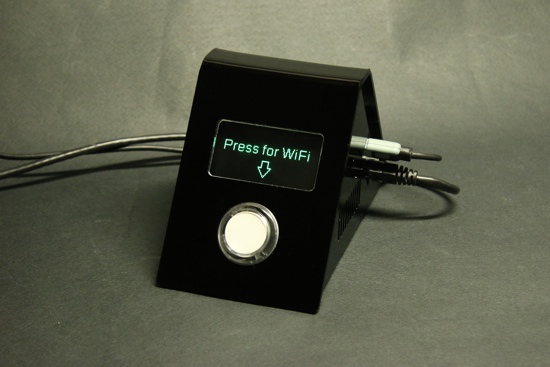
But we can also take advantage of having a machine able to run a personalized program to install some logic in it. For example, we can add to the MR3020 the possibility to work as an "on demand" access point, to provide a temporary access code to visitors in a conference room: the access point is disabled (for security reasons) on a normal basis, and by pushing a button, it is activated for an hour with a randomly chosen password displayed on a small screen.

An automatic Wireless hotspot reconfigurable on demand
For this application, you just need a MR3020 and a Yocto-MaxiDisplay (or Yocto-Display). The button is wired on one of the analog inputs of the display, and the display is connected by USB to the MR3020.

Wifi On demand: the schematics
We wrote the program in C++, since Python is not readily available on the MR3020. The process is simple: we start the Yoctopuce library on USB, and configure it to get a callback whenever the button is pressed. In the callback, we rewrite the hotspot configuration file and ask the system to reload it. The access point is automatically disabled after one hour. Here are the relevant chunks of code:
{
string errmsg;
if(YAPI::RegisterHub("usb", errmsg) != YAPI_SUCCESS) {
cerr << "RegisterHub error: " << errmsg << endl;
return 1;
}
YAPI::RegisterDeviceArrivalCallback(deviceArrival);
YAPI::RegisterDeviceRemovalCallback(deviceRemoval);
while (true) {
YAPI::UpdateDeviceList(errmsg);
YAPI::Sleep(1000, errmsg);
if (IsWifiUp) {
if (time(NULL) > PasswordExpiration ) {
system("wifi down");
IsWifiUp=0;
showMessage(WELCOME_MSG);
}
}
}
}
static void anButtonValueChangeCallBack(YAnButton *bt, const string& value)
{
if (!bt->get_isPressed()) return;
if (!IsWifiUp) {
showMessage(STARTING_MSG);
generatePasswd(SecretKey);
if (startWifi(SecretKey) < 0) {
showMessage("unable to start WiFi");
return;
}
showMessage(HOTSPOT_MSG);
IsWifiUp = 1;
}
PasswordExpiration = time(NULL) + PASSWORD_EXPIRATION;
}
Unlike a Raspberry Pi or a BeagleBone, the MR3020 does not have enough disk space to run the compiler directly. So, in order to compile your program, you must install the OpenWrt cross-compilation environment on any UNIX machine, as described here, and compile the program on this UNIX machine, then copy the binary to the MR3020.
Last step: before running a C++ program, you must install the C++ library on the MR3020. As there is not much free space on the flash disk, you will probably have to erase the VirtualHub (if you had installed it previously) to install the C++ library instead:
# opkg install libstdcpp
You will find the full source code of our application on GitHub. And here is the result:
These first tests running OpenWrt on a MR3020 are very promising, and unlike many other cheap machines, this one seems to perform exactly as advertised. The only thing we could have wished is a bit more space on the flash memory to add custom software.


