![]() There are now small infrared cameras in the form of break-out boards that are very affordable and easy to integrate into automation projects. Surprisingly, they often use the I2C protocol to transfer data. Today, we show you how to use a Yocto-I2C to interface this type of camera.
There are now small infrared cameras in the form of break-out boards that are very affordable and easy to integrate into automation projects. Surprisingly, they often use the I2C protocol to transfer data. Today, we show you how to use a Yocto-I2C to interface this type of camera.
The Yocto-I2C is capable of handling the subtleties of an I2C communication, bidirectional in nature. To make an I2C request, the host sends to the Yocto-I2C the format of the desired exchange, and it receives in return the detailed trace of the exchange made, including the ACK/NAK and the values transmitted by the I2C device.
This mechanism was originally designed for handling short messages as commonly used with I2C, for example to read a sensor. However when using these small infrared cameras, reading a 768 pixel 16 bit image leads to using much longer messages than usual, which is why we recently increased the maximum message size supported by the Yocto-I2C. So, to start with, update your Yocto-I2C to firmware 52846 or newer, so that you can use long messages.
The camera which we use for this example is the Melexis MLX90640, available from Adafruit directly mounted on a break-out board. It is in this form that we used it, to connect it to a Yocto-I2C.

The Adafruit break-out board for the MLX90640 thermal camera, connected to a Yocto-I2C
As this was a test we were doing for a customer, rather than developing all the code ourselves to configure the camera and synchronously read the two interlaced half-images, we chose to reuse the Python code provided by Adafruit to use this break-out board. The code is well structured, with a separate interface module that handles I2C communication since it is intended to run on both a Raspberry Pi and a CircuitPython microcontroller. So we just made our own version of the Adafruit I2C interface module that works with the Yocto-I2C. Here is our i2c_device_emu.py file:
class I2CDevice:
def __init__(self, i2c, device_address, probe = True):
self.i2cport = i2c
self.device_address = device_address
if probe:
self.__probe_for_device()
def write(self, buf, *, start = 0, end = None):
if end is None:
end = len(buf)
self.i2cport.i2cSendArray(self.device_address, buf[start:end])
def write_then_readinto(self, out_buffer, in_buffer, *,
out_start = 0, out_end = None, in_start = 0, in_end = None):
if out_end is None:
out_end = len(out_buffer)
if in_end is None:
in_end = len(in_buffer)
res = self.i2cport.i2cSendAndReceiveArray(
self.device_address,
out_buffer[out_start:out_end],
in_end - in_start
)
for i in range(0,len(res)):
in_buffer[in_start+i] = res[i]
def __enter__(self):
return self
def __exit__(self, exc_type, exc_val, exc_tb):
return False
def __probe_for_device(self):
# Try to read a byte from an address,
try:
self.i2cport.i2cSendArray(self.device_address, [])
except OSError:
raise ValueError("No I2C device at address: 0x%x" % self.device_address)
In the adafruit_mlx90640.py file, we replaced the import of adafruit_bus_device.i2c_device with:
from yocto_i2cport import YI2cPort
In the MLX90640 class constructor, we have replaced the Adafruit I2C type with the Yoctopuce YI2cPort version. We also changed the I2C_READ_LEN constant to 256 words, which is the maximum message size of the Yocto-I2C (512 bytes).
We can then take any Adafruit example and make it work with a Yocto-I2C by adding the following initialization code:
if YAPI.RegisterHub("usb", errmsg) != YAPI.SUCCESS:
sys.exit("Failed to attach to USB port: "+errmsg.value)
i2cPort = YI2cPort.FirstI2cPort()
if i2cPort is None:
sys.exit("No Yocto-I2C device found, check USB cable!")
i2cPort.set_i2cMode("600kbps")
mlx = adafruit_mlx90640.MLX90640(i2cPort)
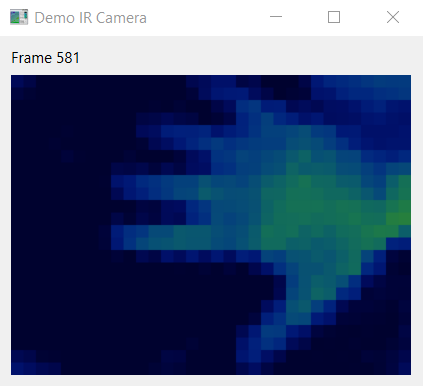
To check that everything works well, we took the mlx90640_camtest.py example intended for the Raspberry Pi, and ported it to run on a Windows or Linux machine with PyQt6 and a Yocto-I2C. Here is the result:
So, thanks to this small i2c_device_emu library, you should now be able to use all the code examples for Adafruit's I2C break-out boards on a real computer with a Yocto-I2C and not be limited to using a Raspberry Pi anymore.

