![]() Do you know the commonality between the TV series Battlestar Galactica (1978) and Knight Rider (1982)? Actually, there are at least two: their creator Glen A. Larson, and this small chase effect in the Cylons visor and at the front of KITT, hence the "Larson scanner" expression. We wondered if we could do the same effect with the autonomous animations of the Yocto-Color-V2.
Do you know the commonality between the TV series Battlestar Galactica (1978) and Knight Rider (1982)? Actually, there are at least two: their creator Glen A. Larson, and this small chase effect in the Cylons visor and at the front of KITT, hence the "Larson scanner" expression. We wondered if we could do the same effect with the autonomous animations of the Yocto-Color-V2.

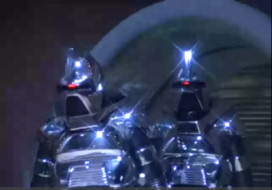
Emblematic "protagonists" of the Knight Rider and Battlestar Galactica series, note the red chase effect
Yocto-Color-V2 and Larson scanner
Obviously, reproducing this light effect with pure programming with a Yocto-Color-V2 requires a few lines of code only. But this implies having a computer communicating continuously with the module. In contrast, configuring a Yocto-Color-V2 so that it reproduces the effect autonomously is sufficiently challenging for us to think that it's worth a post on the topic.
As a reminder, a Yocto-Color-V2 can play autonomous animations. Each of these animations is defined as a series of color variations which can be played by any led with a predefined temporal offset, you will find more details in the Yocto-Color-V2 user manual. It's simple and it provides many possibilities. You can even make it so that these animations start automatically when the module is powered on. Thus, they can work even if the module is powered by a USB charger or battery.
A Yocto-Color-V2 connected to an Adafruit NEOPIXEL 8 led stick
Simplified version
The difficulty in the case of the "Larson scanner" is the back and forth movement. One can use a mirror effect in an animation. Its effect is to inverse the speed and therefore play the animation backward. We are naturally going to take advantage of this feature to make single pixels go back and forth.
But before anything else, let's define a few constants:
- LedCount, the number of leds we must manage, so 8 in our case
- halfPeriod, the time in milliseconds for a one-way journey
Note that a led is on for halfPeriod/LedCount. To avoid artifacts linked issues with rounding in the module, it's best if halfPeriod is a multiple of LedCount.
The led color alternates between two HSL colors defined as follows:
- H, the animation Hue. We selected 0 to keep the historical red
- S, the animation Saturation, we selected the maximum, that is 255
- L,the Luminosity, we took 127, the maximum that we could allow ourselves to use without changing the hue
- Low = (H<<16) | (S<<8) for OFF LEDs
- High = (H<<16) | (S<<8) | L for ON LEDs
Note that the Low corresponding to black is not defined as 0x000000 (black as well) but as 0xHHSS00, to ensure the transitions to be correctly computed. When these basics are laid out, we can build our animation. We wrote it in Python, but it works as well with any other language.
if leds is None: sys.exit("No color led cluster found")
leds.set_activeLedCount(LedCount);
leds.resetBlinkSeq(0) # reset sequence 0
# addHslMoveToBlinkSeq(sequence, color, duration)
leds.addHslMoveToBlinkSeq(0, High, halfPeriod /(2*LedCount)) # High
leds.addHslMoveToBlinkSeq(0, High, 0)
leds.addHslMoveToBlinkSeq(0, Low, 0) # low
leds.addHslMoveToBlinkSeq(0, Low, (LedCount-1)*halfPeriod /(LedCount))
leds.addHslMoveToBlinkSeq(0, Low, 0)
leds.addHslMoveToBlinkSeq(0, High, 0) # High again
leds.addHslMoveToBlinkSeq(0, High, halfPeriod /(2*LedCount)) # keep it
leds.addMirrorToBlinkSeq(0) # do the same thing the other way around
We built the animation in a perfectly symmetrical way with the red (high) straddling the ends of the animation to avoid artifacts which can spontaneously occur on the edges if we do it otherwise.
Finally, we assign the leds to the animation, each led n is offset by -n*(halfPeriod /LedCount) - (halfPeriod /(2*LedCount)) . As this expression is decreasing and as we can't have a negative offset, we start with halfPeriod rather than zero, which is the same since our animation has a length of halfPeriod. The -(halfPeriod /(2*LedCount)) part is used to compensate the fact that the red straddles the edges.
#linkLedToBlinkSeq(ledIndex,Count,Sequence,Offset)
leds.linkLedToBlinkSeq(i,1,0, halfPeriod-i*(halfPeriod /LedCount) \
- (halfPeriod /(2*LedCount))
leds.startBlinkSeq(0) # start the sequence
And here is the result:
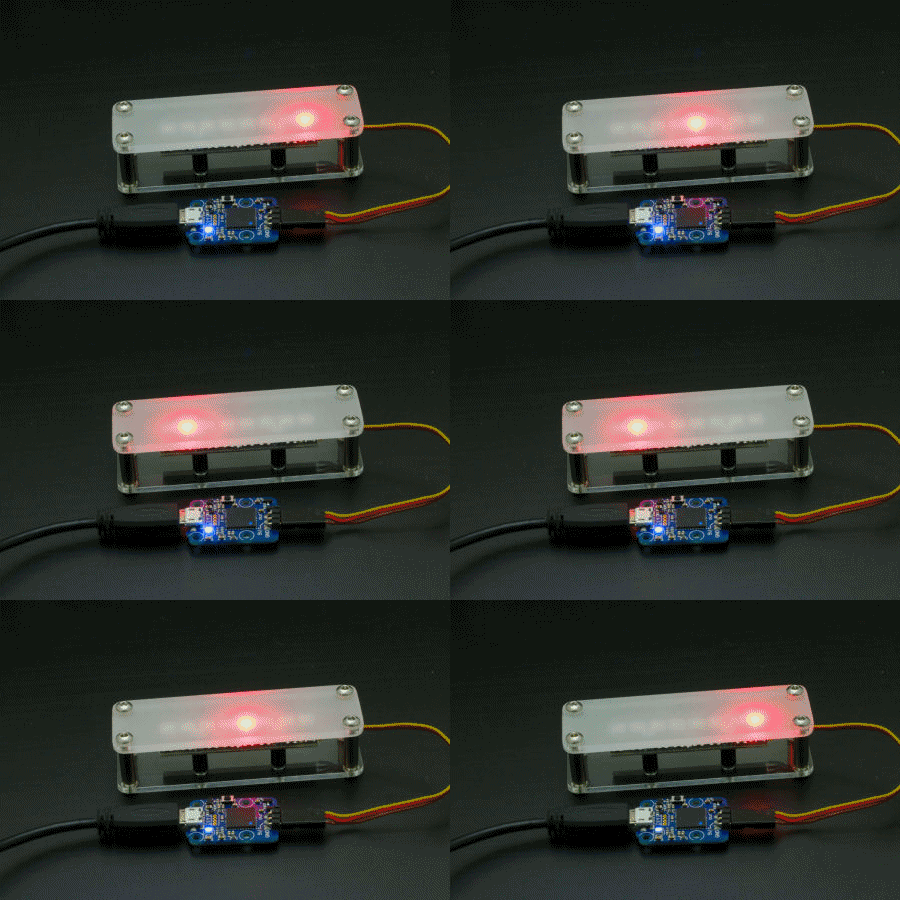
Simplified version of the Larson scanner
Adding a gradient
Now, to improve the overall effect, we'd like to add a gradient before and after the moving pixel, and that's were things get tough. The animations of the Yocto-Color-V2 are naturally cyclic: everything that disappears at one end comes back at the other end. So we must find a way to truncate.
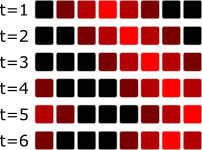
The fact that Yocto-Color-V2 animations are cyclic raises a leftward overflow issue
The trick is to create an animation which is longer than the number of pixels that we want to use, in order to exclude unwanted reflections.
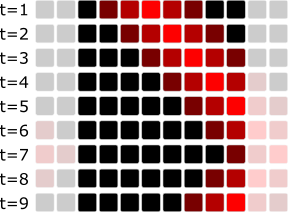
But we can cheat by creating a larger animation
If we define tail = 2 as the length of the gradient in pixels, we modify the length of the animation.
LedCount+= tail
Note, you must select the number of pixels you add to the animation appropriately. Too large, the animation disappears in the hidden part; too short, reflections come back. Enlarging by one time the length of the gradient seems a good compromise.
We build the animation, taking care to keep the times symmetric.
# addHslMoveToBlinkSeq(sequence, color, duration)
leds.addHslMoveToBlinkSeq(0, High, halfPeriod /(2*LedCount))
leds.addHslMoveToBlinkSeq(0, Low, 0.75*tail*halfPeriod /(LedCount))
leds.addHslMoveToBlinkSeq(0, Low, 0.25*tail*halfPeriod /(LedCount))
leds.addHslMoveToBlinkSeq(0, Low, (LedCount-2*tail)*halfPeriod /(LedCount))
leds.addHslMoveToBlinkSeq(0, Low, 0.25*tail*halfPeriod /(LedCount))
leds.addHslMoveToBlinkSeq(0, High, 0.75*tail* halfPeriod /(LedCount))
leds.addHslMoveToBlinkSeq(0, High, halfPeriod /(2*LedCount))
leds.addMirrorToBlinkSeq(0)
The price to pay for this trick is the complexity in setting the offset.
#linkLedToBlinkSeq(ledIndex,Count,Sequence,Offset)
leds.linkLedToBlinkSeq(i,1,0, -(tail/4)*(halfPeriod /LedCount) \
+ halfPeriod-i*(halfPeriod /LedCount) \
- halfPeriod /(2*LedCount) )
leds.startBlinkSeq(0)
And here is the result:
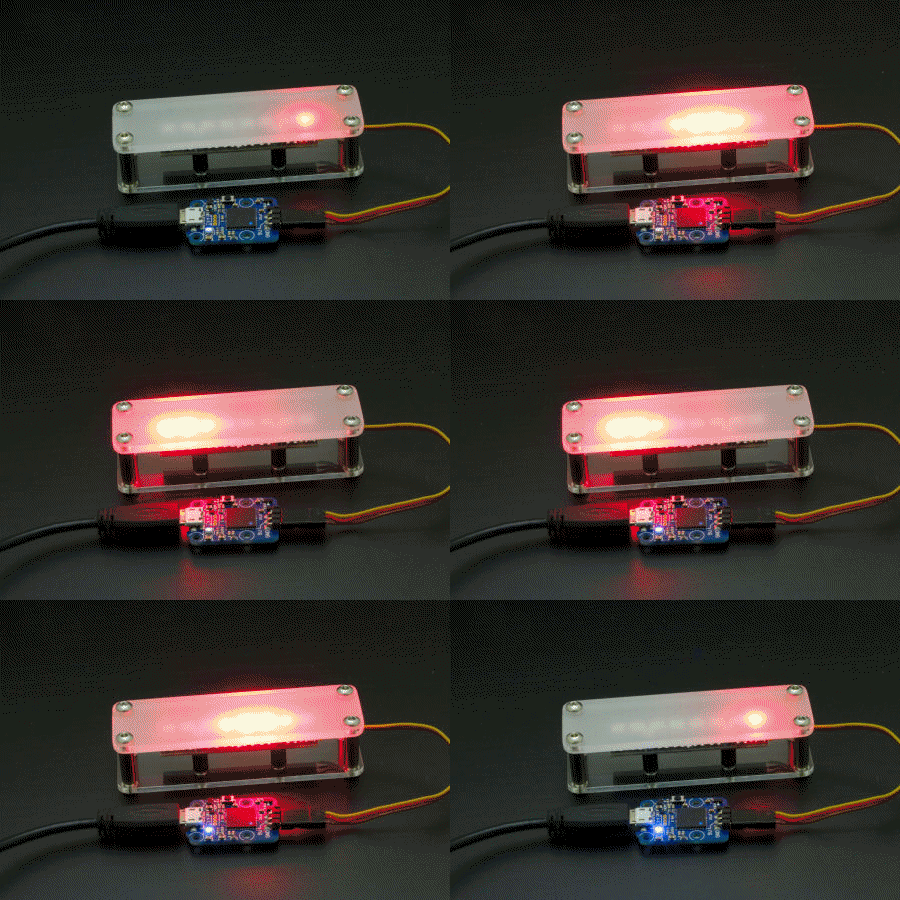
A prettier version
The complete source code of these two animations, and a third one done through pure programming, in this ZIP file.
And now?
The question that arises now is how to have the gradient on one side only, as if the chase effect had left a trail behind itself. We looked for the solution for a long time and we think that it's not possible with the Yocto-Color-V2 autonomous animation system. And this despite Jumps which allow a led to go from one sequence to another. But to be frank, we are not quite sure...

We would have loved to do this


