 A few months ago, we explained how to configure a YoctoHub or a VirtualHub to automatically post sensor values on emoncms.org. Emoncms is a web site which allows you to store measures in the cloud and to display them prettily. There are numerous sites which offer this kind of services (either free or for a fee), but Emoncms is, to our knowledge, the only one which is Open Source and which can be installed on a private server. And this is exactly what we are going to do this week.
There are numerous reasons to prefer storing ones values locally instead of storing them on the cloud: confidentiality issues, Internet connection issues, or to make sure that the cloud service is not going to modify its pricing policy.
Our reason is more pragmatic: our code didn't work with the emoncms development version and we had to install emoncms locally to fix this bug. The emoncms.org web site uses version 8.3.5 of the Emoncms application, but the bug occurred only on version 8.5 of the application... Don't worry, the fix is already included in the latest firmware and in the latest VirtualHub, but we took the opportunity to summarized the changes in the YoctoHubs and in the Emoncms installation process.
Installing Emoncms on a Raspberry Pi
You can install Emoncms on more or less any computer but, in our case, we used a Raspberry Pi 2. The installation process is described in details on this page. It may seem complex because there are numerous commands to run, but in fact you only need to copy the commands one after the other without asking yourself too many questions and it works. The only two moments where you need to think are during the MySQL installation (you must define a password) and when modifying the settings.php file (you must use the MySQL password).

Installing Emoncms is lengthy but simple
We haven't been great proponents of the Raspberry Pi, but it is clear that, for this kind of use, it is doing very well. The machine is powerful enough and doesn't take much space.
Changes in the YoctoHubs
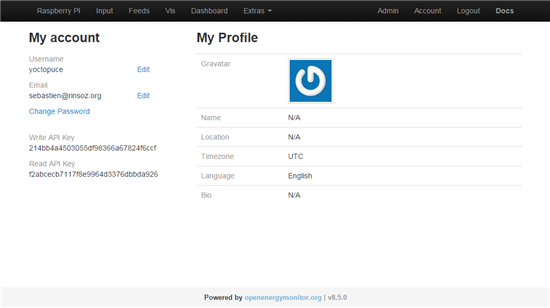
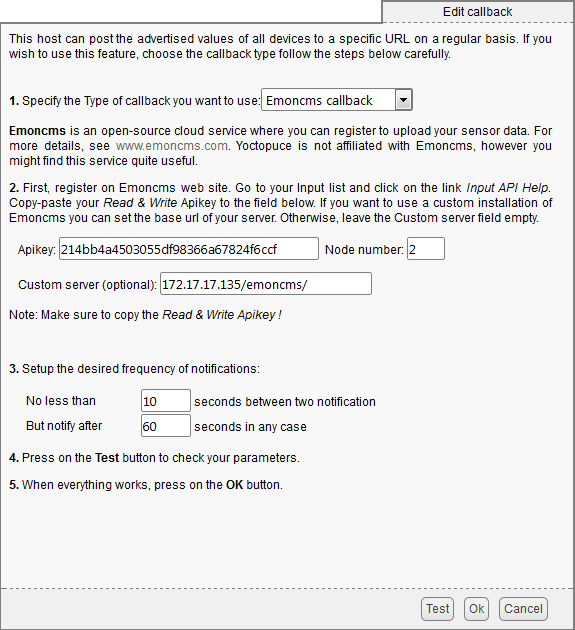
The first thing that you need to check is that the version of your YoctoHub is above 20652. If it is not the case, you must update your YoctoHub or VirtualHub. The new configuration wizard contains a new field, node Id, enabling you to specify the node to which all the uploaded measures are linked. Up to version 8.3, this field was optional but since version 8.4 it is mandatory. To upload on a local server, you must specify the URL of your local installation (in our case it's 172.17.17.135/emoncms). Obviously, you must also specify the API key that you find in the "My account" page or your Emoncms installation.

The new version of the configuration wizard
In case you already configured Emoncms on your YoctoHub before you updated the firmware, you must open the HTTP callback configuration wizard and save it. Normally, all your parameters are kept but you must specify a node Id, otherwise the YoctoHub won't work with the new version of Emoncms.
The rest of the process remains the same. If you have never used Emoncms with a Yoctopuce module, you can read our previous post explaining how to use data uploaded by the YoctoHub.
Here is a video of all the configuration steps:
Conclusion
At the beginning of the post, we mentioned reasons why some people prefer a local installation over the cloud version. This bug illustrates another very important reason: reliability. When you have your own installation, you completely master your service. No one is going to change the configuration behind you back. If you need a truly reliable service, you better take care of it yourself.
We don't know when emoncms.org is going to update its web server, but your YoctoHubs can be ready for that day now!


