 The guys at Yoctopuce love rc modeling and particularly everything that flies. Unfortunately in Winter, the sun goes down early and flying sessions at the end of the day often finish up in the dark. We decided to build a small lighted landing runway that we could control from a smart phone.
The aim is to build a tiny landing runway for a small plane with a 700mm wingspan. The said plane is an E-flite Timber UMX. It is sold with full lighting, it takes off and lands on very short distances. A runway long of a few meters is therefore enough. As wifi signal is available at the runway location, we can drive the lighting from a web page thanks to a smart phone.

The plane is an E-flite Timber UXM
To implement the runway, we used three NeoPixel led strips. The led strips are simply laid on the ground and fixed into position with large staples. The longest strips that we could find are 5 meters long for 150 leds. This allows us to use two strips to delimit a 4m long by 1m wide runway. The remaining strip is used to draw the central line. We also used two NeoPixel 8x8 led panels, to display the runway orientation.
Note: We were told that actual landing runways have a different set of lights, but for aesthetical and practical reasons, we decided to keep this configuration.
To drive all the leds, we need 4 Yocto-Color-V2. These four Yocto-Color-V2 are connected to a Yocto-Wireless-G and a Yocto-Shield. To power the system, we used a battery booster and a regulator allowing us to decrease the voltage from 12V to 5V.
Wiring
As each led can consume up to 45mA when emitting white light at full power, and as a ribbon contains 150 leds, we couldn't use the Yocto-Color-V2 to power the strips. We must use the Yocto-Color-V2 only to drive the leds and we must connect an external power supply directly on the strips.
In this configuration, we must connect the +5v and GRD wires directly on the regulator +5v output, and connect the second GRD wire and the Dout wire on the Yocto-Color-V2.

The 5V regulator powers the strips
In the opposite, the 8x8 led panels are connected serially and powered by the Yocto-Color-V2. The number of leds in the panels is consequent but as we are never going to light all the leds at the same time, there is no need to power the two panels directly. We must simply connect the +5v, the GRD, and the Dout on the corresponding Yocto-Color-V2 pins.

The two panels are powered by the Yocto-Color-V2
When everything is wired, we connect the whole to the YoctoHub-Wireless-g and to the YoctoHub-Shield, which are also powered by the 5V regulator. For this power cable, we used a 1.27-1.27-11 cable that we split into two. The +5v and GRD wires are connected to the regulator and the two data wires aren't used.
Warning: Do not use the YoctoHub-Wireless-g USB port while this cable is connected to the regulator. When you need to access the YoctoHub-Wireless-g by USB, for example to configure the wifi network, you must disconnect this cable.

The global diagram
The control page
To drive the lights, we wrote a simple web page that uses our JavaScript/EcmaScript 2017 library.
The web page contains two buttons to turn the runway lights on and off. All the logic is located in the Runway object. The code initializes the API and retrieves pointers to the four YColorLedClusters objects corresponding to the 4 Yocto-Color-V2. And the methods of these objects enable us to drive the different parts of the led strips.
Below, you can find the part of the code initializing the library, but you can download the complete code on GitHub: https://github.com/yoctopuce-examples/runway.
{
constructor(yoctoHubUrl)
{
this.yocto_hub_url = yoctoHubUrl;
this.runway_lenght = 120;
this.runway_thickness = 30;
this.lpanel_ofs = 2;
this.number = 0;
this.is_on = false;
this.white_color = 0x30;
this.low_white_color = 0x10;
this.back_color = 0xFFFF30;
this.front_color = 0x55FF30;
this.cl_left = null;
this.cl_right = null;
this.cl_middle = null;
this.cl_panel = null;
this.fade_lenth = 1000;
}
async checkConfig()
{
await YAPI.LogUnhandledPromiseRejections();
await YAPI.DisableExceptions();
// Setup the API to use the VirtualHub on local machine
let errmsg = new YErrorMsg();
if (await YAPI.RegisterHub(this.yocto_hub_url, errmsg) !== YAPI.SUCCESS) {
return ('Cannot contact YoctoHub: ' + errmsg.msg);
}
let module = YModule.FirstModule();
while (module) {
await module.set_luminosity(0);
module = module.nextModule();
}
this.cl_left = YColorLedCluster.FindColorLedCluster("left");
this.cl_right = YColorLedCluster.FindColorLedCluster("right");
this.cl_middle = YColorLedCluster.FindColorLedCluster("middle");
this.cl_panel = YColorLedCluster.FindColorLedCluster("panel");
if (!await this.cl_left.isOnline()) {
return "No ColorLedCluster named 'left' found";
}
if (!await this.cl_right.isOnline()) {
return "No ColorLedCluster named 'right' found";
}
if (!await this.cl_middle.isOnline()) {
return "No ColorLedCluster named 'middle' found";
}
if (!await this.cl_panel.isOnline()) {
return "No ColorLedCluster named 'panel' found";
}
await this.cl_left.set_activeLedCount(150);
await this.cl_right.set_activeLedCount(150);
await this.cl_middle.set_activeLedCount(150);
await this.cl_panel.set_activeLedCount(2 * 64 + 2);
await this.cl_middle.resetBlinkSeq(0);
await this.cl_middle.addHslMoveToBlinkSeq(0, this.white_color, 0);
await this.cl_middle.addHslMoveToBlinkSeq(0, 0x00000, 100);
await this.cl_middle.addHslMoveToBlinkSeq(0, 0x000000, 900);
return "";
}
async setLightOn()
{
await this.left_leds(this.white_color);
await this.right_leds(this.white_color);
await this.back_leds(this.back_color);
await this.front_leds(this.front_color);
await this.displayDigits(this.number, this.white_color);
await this.middle_leds(this.low_white_color);
await this.tail_leds(true);
this.is_on = true;
}
async setLightOff()
{
await this.cl_left.hsl_move(0, 150, 0, this.fade_lenth);
await this.cl_right.hsl_move(0, 150, 0, this.fade_lenth);
await this.cl_middle.hsl_move(0, 150, 0, this.fade_lenth);
await this.cl_panel.hsl_move(0, 2 * 64 + 2, 0, this.fade_lenth);
this.is_on = false;
}
async left_leds(color)
{
await this.cl_left.hsl_move(0, this.runway_lenght, color, this.fade_lenth);
}
async front_leds(color)
{
await this.cl_right.hsl_move(0, this.runway_thickness, color, this.fade_lenth);
}
...
}
You can put the files on any web server, or directly on the YoctoHub. For this latest solution, you must use the YoctoHub-Wireless-g configuration window. The "manage files" button enables you to upload files on the module flash memory, and the "Default HTML page" field enables you to change the web page that the YoctoHub returns for default queries (for example: http://192.168.1.15 ).

The web page that allows you to drive the landing runway
Conclusion
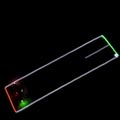
As you can see, the result is pleasing.
We decided to use a YoctoHub-Wireless-g in order to drive the runway from a smart phone, but it's clearly an overkill. Indeed, by programming the default behavior, as in this post on the Yocto-Color-V2, we can obtain the same result with the four Yocto-Color-V2 only. We must simply power the modules in 5V with the same type of cables that we used to power the YoctoHub-Wireless-g.
In this case, you save the costs of a YoctoHub-Wireless-g and of a YoctoHub-Shield, but you can't change the lighting dynamically from your smart phone anymore, which is probably more pragmatic but certainly less fun :-)

