![]() A customer recently asked us for help interfacing a Melexis MLX90393 magnetic field sensor with a Yocto-I2C. We figured that, if we had to do the integration work, we might as well let everyone benefit from it.
A customer recently asked us for help interfacing a Melexis MLX90393 magnetic field sensor with a Yocto-I2C. We figured that, if we had to do the integration work, we might as well let everyone benefit from it.
The MLX90393 is therefore a 3D magnetometer capable of measuring a magnetic field in three orthogonal directions X,Y,Z, with the sensor plane aligned with X and Y. It can also measure temperature. It comes in the form of a small 3x3mm QFN component, already soldered onto an break-out board from manufacturers such as Adafuit, Sparkfun or directly from Melexis.
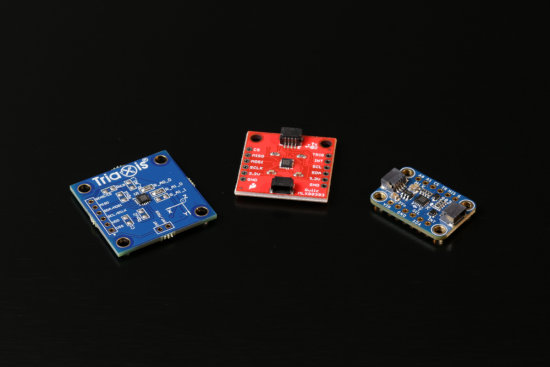
The MLX90393 is available as an break-out board from various sources
They all work on the same principle, although their default I2C address may differ. We chose Adafruit's because it's the one our customer uses.
Connections
Adafruit's board can be powered at 3.3V, while the MLX90393 easily supports 400Hz communications. Yocto-I2C configuration and connections are therefore relatively trivial.
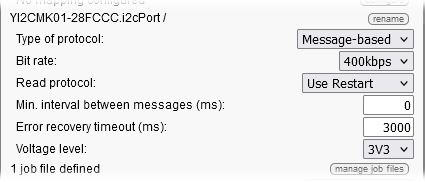
Configuration of the Yocto-I2C
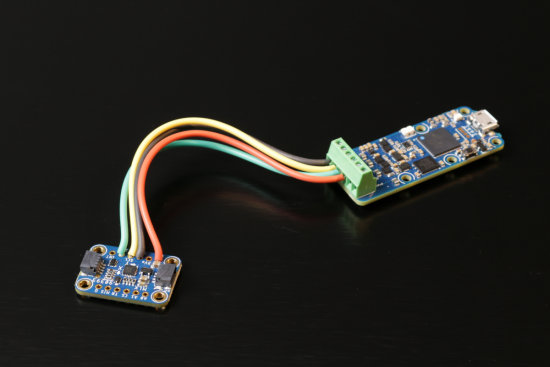
Wiring between the MLX90393 and the Yocto-I2C
MLX90393 considerations
A thorough study of the MLX90393 datasheet reveals a number of important points.
I2C address
Depending on the model used and how pins 11 and 12 are wired, the sensor's I2C address can take on 38 different values. The default address for the Adafruit version is 0x18, which means that I2C read commands must start with 2* 0x18 + 1 = 0x31, and write commands must start with 2* 0x18 = 0x30.
Status byte
After each command, it is recommended to send a "restart" condition and to perform a read operation to retrieve the MLX90393 status byte. Bit 4 of the status byte is the ERROR bit, which indicates whether there has been a problem somewhere. When the ERROR bit is set to 1, the sensor no longer accepts any commands other than "reset".
Reset
The "reset" command is 0xF0, and the module responds with its status byte. Assuming the MLC90393's I2C address is 0x18, the complete command to be sent therefore looks like:
{S}30F0{R}31xx{N}{P}
However, the MLX90393 datasheet mentions that it is preferable to execute the exit command (code 0x80) before initiating a reset. When executing this exit command, the sensor responds with its status. The corresponding I2C command is:
{S}3080{R}31xx{N}{P}
Running a measure
To trigger a single measure on all three magnetometers and the temperature sensor, use the 3F command. Here too, the response is the sensor status, so the command is:
{S}303F{R}31xx{N}{P}
Retrieving measure results
The command to retrieve the results of a measure is 0x4f, the response is the status byte, followed by the values for temperature, magnetic field Z, Y and Z, which are encoded as a signed 16-bit integer. Temperature is an unsigned 16-bit integer that can be converted to degrees Celsius with the 25+(t-46244)/45.2 formula. If GAIN_SEL and RES are set to their default values of zero, the x,y,z values can be converted to µT with the formulas x*0.15, y*0.15 and z*0.242 at 25░C. Temperature variations may slightly affect the results, but the datasheet does not give formal formulas for compensation. In any case, the command to send is:
{S}304F{R}31xx{A}xx{A}xx{A}xx{A}xx{A}xx{A}xx{A}xx{A}xx{N}{P}
Implementation
To interface the MLX90393 with a Yocto-I2C, you can of course send commands from your own code, but it's more efficient to use the Yocto-I2C job system. So we're going to create a job in the form of a small state machine driven by the $state variable, with each of the three states corresponding to a task. As a reminder, the Yocto-I2C constantly tries to execute each task in turn, and a failed assert command interrupts the current task.
Start-up task
The main purpose of this task is to initialize the $state variable. Incidentally, given the number of possible I2C addresses for the MLX90393, we'll use a variable rather than encoding the value directly in the commands, and pre-calculate the $W and $R variables, which we'll use at the start of each command. At the end of the task, we initialize the $state variable to 1.
compute $I2Caddr=0x18 compute $W=$I2Caddr*2 compute $R=$I2Caddr*2+1 compute $state=1
We only need to run this task once.
Sensor initialization task
This task is used to force a sensor reset. We've made sure it's executed at the start of the job, to make sure we get off on the right foot. This task consists of:
- Checking that the $state variable is initialized and that its value is 1
- Sending the EXIT command. As the $W and $R variables are used, writeVar is used instead of writeLine.
- Reading the result.
- Sending the RESET command.
- Reading the result.
- Checking that the status ERROR bit is set to zero.
- Waiting a little
- Setting variable $state to 2
This corresponds to :
assert isset($state) assert $state==1 writeVar {S}($W:BYTE)80{R}($R:BYTE)xx{N}{P} expect (BYTE):{A}{A} (BYTE):{A}($status:BYTE) writeVar {S}($W:BYTE)F0{R}($R:BYTE)xx{N}{P} expect (BYTE):{A}{A} (BYTE):{A}($status:BYTE) assert ($status & 0x10) == 0 wait 200 compute $state = 2
This task is periodic and runs at a frequency of 10Hz.
Sensor interrogation task
This task does the real work:
- It checks that the $state variable is initialized and that its value is 2
- It sets the $state variable to 1, so if an assert interrupts the task, the sensor initialization task will be restarted.
- It sends the command to trigger a measure.
- It reads the status.
- It checks that the $status ERROR bit is set to zero.
- It sends command to trigger the reading of the result.
- It reads the result and maps read values to $status,$t,$z,$y,$x variables.
- It checks that the $status ERROR bit is zero.
- It maps genericSensor 1,2,3 and 4 of Yocto-I2C to the respective values of $x, $y, $z and $t, applying the µT and ░.C conversion formulas.
- As a little bonus, it computes the angle in degrees formed by $x and $y, which it maps to genenicSensor5.
- Finally, it resets the $state variable to 2.
This corresponds to:
assert isset($state) assert $state==2 compute $state=1 writeVar {S}($W:BYTE)3F{R}($R:BYTE)xx{N}{P} expect (BYTE):{A}{A} (BYTE):{A}($status:BYTE) assert ($status & 0x10) == 0 writeVar {S}($W:BYTE)4F{R}($R:BYTE)xx{A}xx{A}xx{A}xx{A}xx{A}xx{A}xx{A}xx{A}xx{N}{P} expect (BYTE):{A}{A} (BYTE):{A}($status:BYTE)($t:WORD)($z:SWORD)($y:SWORD)($x:SWORD) assert ($status & 0x10) == 0 compute $1=$x*0.15 compute $2=$y*0.15 compute $3=$z*0.242 compute $4=25+($t-46244)/45.2 compute $5=180*atan2($y,$z)/pi compute $state=2
This task is periodic and runs at a frequency of 10Hz. That's all for the code part, you can download the complete job here.
Does it work?
Yes, it works without a hitch, but you have to be careful not to use too strong a magnet or place it too close to the sensor, otherwise it causes an overflow and the measured values wrap around, making the result difficult to interpret. To test our job, in addition to using Yocto-Visualization, we built a small gagdet:
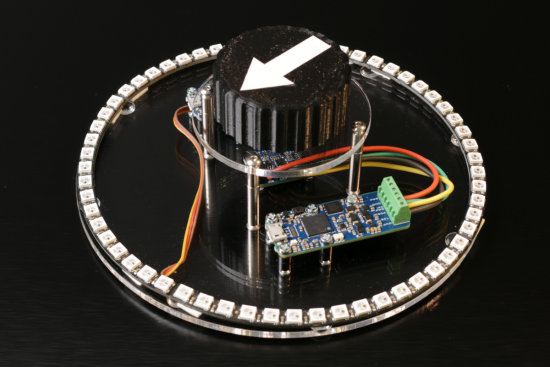
Our MLX90393 test bench
It's based on a Yocto-I2C, a Yocto-Color-V2 and a ring of addressable LEDs. A Python script reads the orientation of the magnetic field induced by a small magnet hidden in a large button simply placed on the device, and lights the corresponding LED with a small fade effect. The whole thing is strangely addictive.
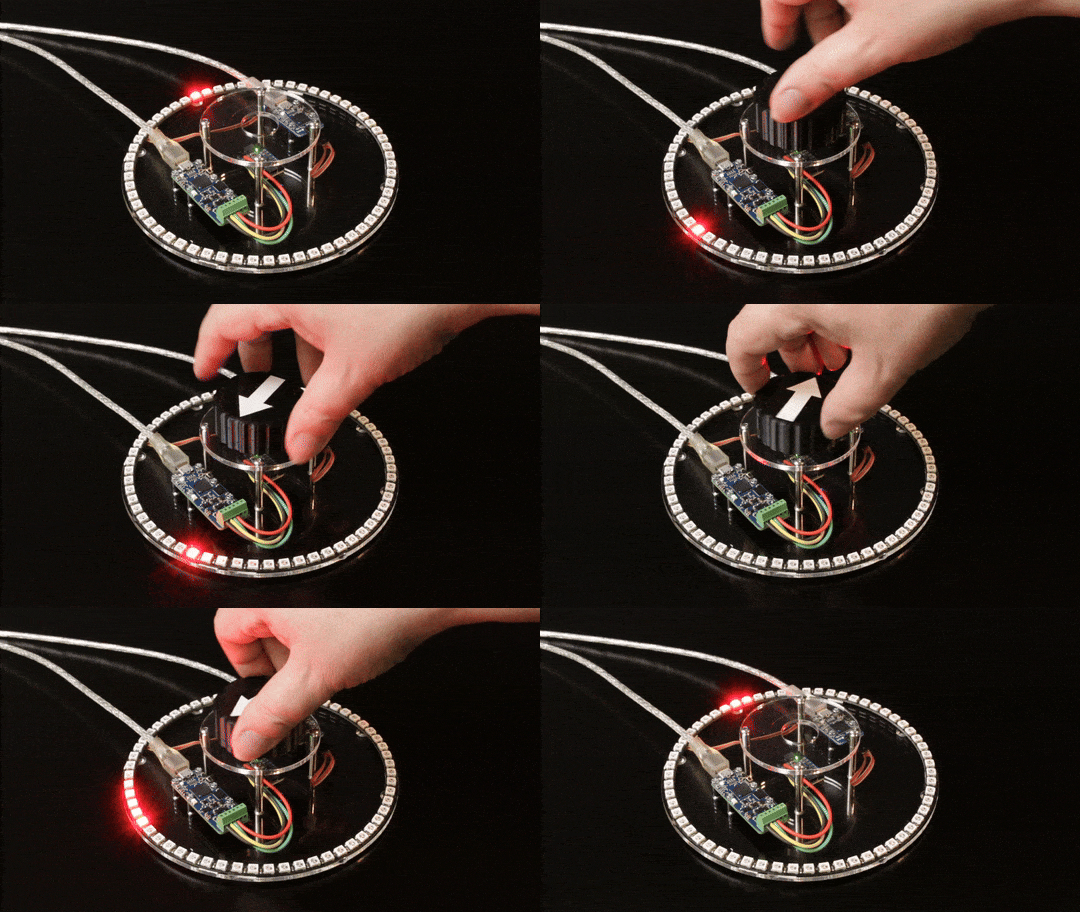
The same, in action
Conclusion
On the face of it, the MLX90393 works pretty well, and thanks to the Yocto-I2C job system, you can easily operate it as if it were a classic Yoctopuce sensor. Only basic operation has been described here, but it is possible to change the sensor's sensitivity range by adjusting the MLX90393's GAIN_SEL and RES_XYZ parameters. It is also apparently possible to store arbitrary data in the sensor's free memory. This test was an opportunity to discover a bug in the WriteVar command, so make sure your Yocto-I2C has firmware greater than or equal to 61198 before trying the job described in this post.


