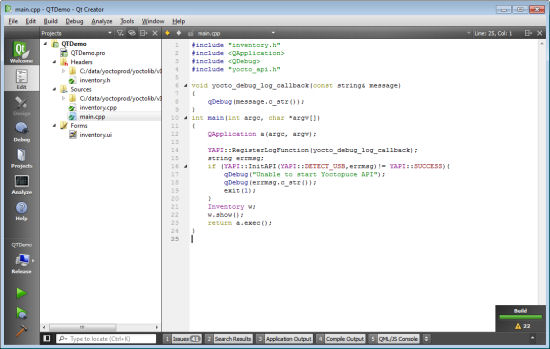
 A customer noticed a few days ago that our C++ library was not compiling under Qt / MinGW under Windows (although OSX and Linux were OK). We have published a fix on GitHub, but we realized that we never talked about Qt on our site. Never too late... Qt is a cross-platform graphical programming framework, that can build binaries for multiple OS. We will demonstrate that with a small program that opens a window to list connected Yoctopuce modules. Thanks to the Qt framework, the exact same project will be usable for Windows, Linux and Mac OS X.
To be honest, we have never used Qt before this week... It was a good surprise to discover how easy it was to use the framework. The install of Qt is a matter of a few clicks. Qt comes with its own IDE, and with only a few lines of code you can create an application that runs on all major OS. We will not give a full Qt tutorial, but just describe what needs to be done in order to be able to use Yoctopuce C++ library in a Qt application.

Qt IDE is named Qt Creator
Adding Yoctopuce C++ library
Before using the Yoctopuce library, you must edit your project to point to the library source files, as well as the required system libraries. You can either use the "Add Existing Files..." menu, or edit directly your .pro project file to add the files to the SOURCES and HEADER variables. You need to update the INCLUDEPATH as well so that the compiler finds the .h include files.
SOURCES += ../../../Sources/yocto_api.cpp \
../../../Sources/yapi/ythread.c \
../../../Sources/yapi/ytcp.c \
../../../Sources/yapi/ystream.c \
../../../Sources/yapi/yprog.c \
../../../Sources/yapi/ypkt_win.c \
../../../Sources/yapi/ypkt_osx.c \
../../../Sources/yapi/ypkt_lin.c \
../../../Sources/yapi/ymemory.c \
../../../Sources/yapi/ykey.c \
../../../Sources/yapi/yjson.c \
../../../Sources/yapi/yhash.c \
../../../Sources/yapi/yfifo.c \
../../../Sources/yapi/yapi.c
# add Yoctopuce Header files
HEADERS += ../../../Sources/yocto_api.h \
../../../Sources/yapi/yversion.h \
../../../Sources/yapi/ythread.h \
../../../Sources/yapi/ytcp.h \
../../../Sources/yapi/yproto.h \
../../../Sources/yapi/yprog.h \
../../../Sources/yapi/ymemory.h \
../../../Sources/yapi/ykey.h \
../../../Sources/yapi/yjson.h \
../../../Sources/yapi/yhash.h \
../../../Sources/yapi/yfifo.h \
../../../Sources/yapi/ydef.h \
../../../Sources/yapi/yapi.h
# add Yoctopuce Library to the Include path
INCLUDEPATH += $$PWD/../../../Sources/
When you start your project after just these changes, it will compile properly but the linker will complain. You need to add the system libraries necessary for Yoctopuce library. These library change from one OS to the other: for Windows, we need to add Windows Sockets 2 (ws2_32.lib) and Setup API (SetupApi.lib). For Linux, we need libUSB 1.0 (libusb-1.0.a). For Mac OS X, we need the CoreFoundation framework and the IOKit framework. To make it easy, here are the few lines to add to your .pro project file so that your project links properly on all operating systems:
macx: LIBS += -framework CoreFoundation
macx: LIBS += -framework IOKit
# add windows socket 2 library and Setup API
win32: LIBS += -lws2_32
win32: LIBS += -lSetupApi
# add libusb 1.0
unix:!macx: LIBS += -lusb-1.0
Now the Yoctopuce library is compiled and linked to your project. You just need to use it.
The application code
As usual, you start by telling to the Yoctopuce library where to look for sensors and actuators. You just have to call YAPI::RegisterHub(), with the information that you want to use USB modules for now (with the parameter "usb").
int main(int argc, char *argv[])
{
QApplication a(argc, argv);
string errmsg;
if (YAPI::RegisterHub("usb",errmsg)!= YAPI::SUCCESS){
qDebug("Unable to start Yoctopuce API");
qDebug(errmsg.c_str());
exit(1);
}
Inventory w;
w.show();
return a.exec();
}
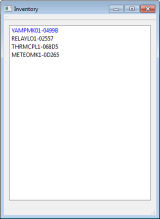
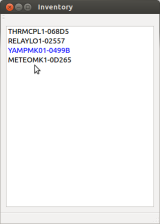
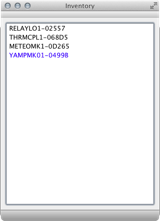
The application main window only uses a QListWidget to display the serial number of connected devices. Devices with the beacon LED turned on will be displayed in blue, while the others will be displayed in black. This widget will be refreshed every second by the updateInventory() method (using a QTimer that invokes the method). This method will force a USB enumeration (using YAPI::UpdateDeviceList()) and update our QListWidget with available modules.
{
string errmsg;
YAPI::UpdateDeviceList(errmsg);
ui->listWidget->clear();
YModule *module = YModule::FirstModule();
while(module){
QListWidgetItem *item =
new QListWidgetItem(QString(module->get_serialNumber().c_str()));
if(module->get_beacon() == YModule::BEACON_ON)
item->setTextColor(Qt::blue);
else
item->setTextColor(Qt::black);
ui->listWidget->addItem(item);
module = module->nextModule();
}
}
The full source code is available under directory Examples/Prog-QT in our C++ library (Note: currently, only the GitHub version has been updated with this new example). Here are a few screenshots from the same project compiled and run on the three operating systems:


Conclusion
As we have seen, it is quite easy to create three binaries from a single Qt project. The framework is flexible enough and well designed so that you can easily use our USB library access devices natively. And a framework that is able to create a native graphical application that run nicely under three different OS from a single project is really worth noting it...


