![]() A noticeable characteristic of Yoctopuce modules is that you can drive them from a server thanks to the HTTP callback API allowing you to work around NAT filters. Obviously, this is truly interesting only if you have a PHP, Java, or ecmascript server. Well, this week we tested some free PHP hosts and we show you in details how to configure them...
A noticeable characteristic of Yoctopuce modules is that you can drive them from a server thanks to the HTTP callback API allowing you to work around NAT filters. Obviously, this is truly interesting only if you have a PHP, Java, or ecmascript server. Well, this week we tested some free PHP hosts and we show you in details how to configure them...
We tested about thirty sites pretending to offer free PHP hosting. We retained only two in the end. Experience showed that the vast majority of these free sites doesn't always work correctly, and some don't even work at all.
The test consisted, among other things, in running the script below on each of the servers that we tried. The principle is simple: the script detects if it's dealing with an HTTP callback and in this case makes a inventory of the connected modules, then saves it in the data directory. In case of a regular connection, the script returns the said list.
include("yocto_api.php");
define ("DATAFILE",'data/inventory.html');
if (YtestHub("callback",100,$errmsg)==YAPI_SUCCESS)
{ if (YRegisterHub("callback",$errmsg)!=YAPI_SUCCESS)
{die('YRegisterHub failed :'.$errsmg);}
$data = sprintf("<table><tr><td>Last call: %s</td></tr>",date('Y-m-d H:i:s'));
$data .= "<tr><td>Serial</td><td>Model</td><td>Logical name</td></tr>";
$m = YfirstModule();
while ($m!=null)
{ $data.= sprintf("<tr><td>%s</td><td>%s</td><td>%s</td></tr>",
$m->get_serialNumber(),
$m->get_productName(),
$m->get_logicalName());
$m=$m->nextModule();
}
$data.='</table>';
if (file_put_contents(DATAFILE,$data)===false)
die("can't write ".DATAFILE);
die('done.');
}
?>
<HTML><HEAD></HEAD><BODY>
<?php
if (file_exists(DATAFILE))
{ Print("Device inventory:<br>");
printf(file_get_contents(DATAFILE));
} else Print("no callback done so far");
?>
</BODY></HTML>
</php>
The installation is very simple. You only have to save this script along with the yocto_api.php file at the root of the web site and to create by hand a data directory. You can find these two files here. You must also check that the script has write privileges in the data directory, but this was the case by default on all the servers that we tried.
Let's now see in details how to create a PHP server on these two free hosting sites that we found. Note that these sites are active at the time of writing, October 2016, if you read this post years after it is published, nothing guaranties that these sites still work.
AWARDSPACE
Creating the web site
To create a web site on AWARDSPACE, let's go on www.awardspace.com which, when writing this post, looks like this:
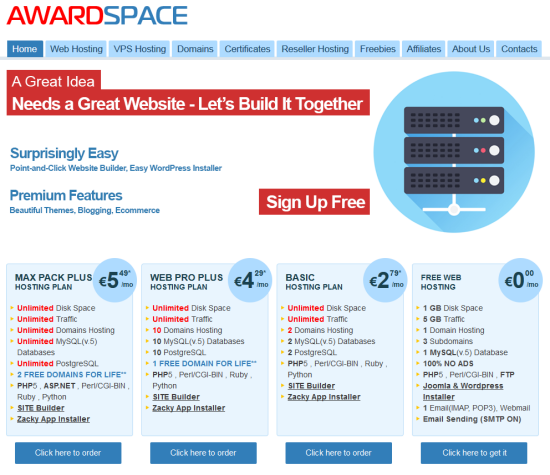
The AWARDSPACE welcome page, click on the lower right side
- Simply click at the bottom of the Free web hosting column at the right hand side
- We are then offered many options, let's not touch anything and click on continue
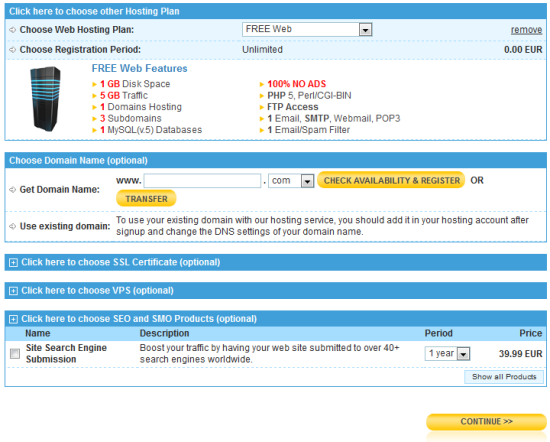
The option list: don't touch anything! - We are now requested to fill a form with name, address, contact email, and so on. We are also requested to choose a password. Be careful, the email address and password are needed later on.
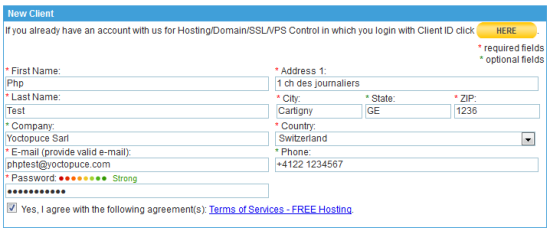
The actual registration formWhen all the fields are filled, including the captcha, merrily click on continue
- If everything goes well, we obtain a page informing us that our account was created and we received two emails at the address provided in the registration form. The first email contains a link to confirm/activate the AWARDSPACE account, the second one contains all the information we could need to manage our web site.
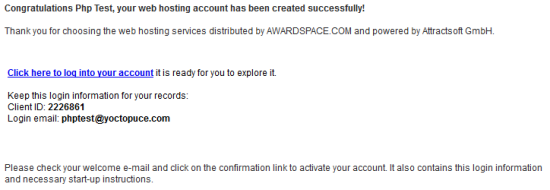
The confirmation page - When activating the account, we land on the console of our server. You can also access this console directly through the www.awardspace.com/login address. Note that you need the email address and the password defined when registering to connect yourself to this console.
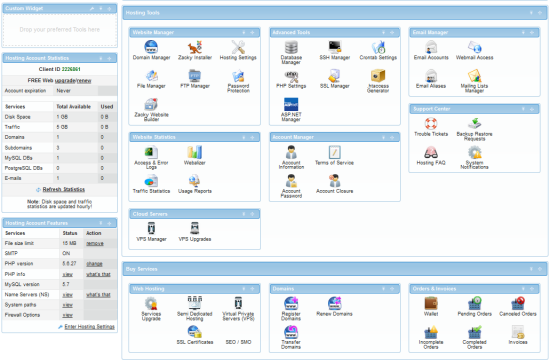
The main part of the console - When you are connected to the console, the first thing you must to is to create a domain name, click on domain manager in the Websitemanager section, lets select Create a Free Subdomain and type in a name and choose a sub-domain. In the present case, we selected yoctopucetest and atwebpages.com, our site address is therefore yoctopucetest.atwebpages.com. Let's finally click on Create.

Creating the subdomain
If the name we chose doesn't yet exist, the system should confirm the creation of the sub-domain. We are nearly there. - Now we must put the PHP script on the server. In the console, click on file manager in the Web site manager section. Rather logically, we obtain a file manager.
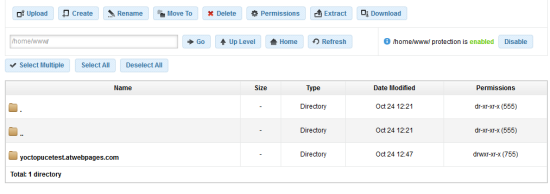
The file managerThe goal is to upload the PHP files of our test in the directory corresponding to our sub-domain, i.e. yoctopucetest.atwebpage.com. We go into this directory by double-clicking on it. Then we click on the upload button at the top of the file list, this opens a windows in which we can drag-and-drop the two files index.php and yocto_api.php, and then click on upload
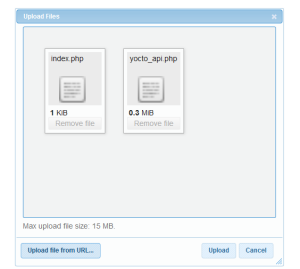
Uploading - Finally, we must create the data directory: simply click on create next to upload, which opens the creation window. Simply enter data on the first line and click on Create
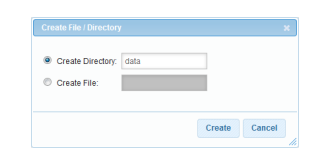
Creating the data directory
Let's check one last time that the PHP files and the data directory were actually created in the directory corresponding to the sub-domain name and not at the root before deciding that our site is truly ready. We can test this by trying our site URL: http://yoctopucetest.atwebpages.com/index.php: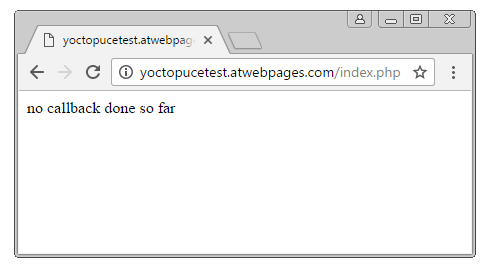
Our site is UP
The server answers with a page indicating that there wasn't any callback, which is not really surprising as we haven't yet configured our hub to make callbacks.
Configuring the Yoctopuce Hub
To configure the HTTP callbacks of a VirtualHub or of a YoctoHub, we connect ourselves on the said hub with a web browser and we open the configuration window corresponding to the hub. Then, in the outgoing callbacks section, we click on edit.
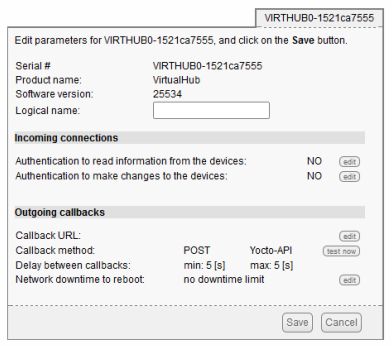
Configuring a Yoctopuce hub
Then we define a callback of the "Yocto-API callback" type pointing to the web site that we just created, that is yoctopucetest.atwebpages.com/index.php.
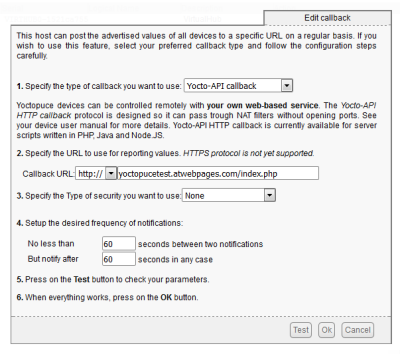
Configuring an HTTP callback
Finally, we click on the Test button. If everything goes well, we obtain a window displaying "done", otherwise we should obtain an error message describing the problem.
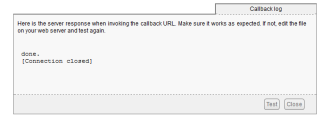
Test result
Note that the server can potentially complain about the initialization of $HTTP_RAW_POST_DATA, but it's not important, it doesn't prevent the system from working. When the test is passed successfully, we must save the hub configuration and if we go back on the URL of our web site, we obtain this time the list of the modules connected during the test callback, it works! we succeeded in building a PHP sever able to manage the Yoctopuce API.
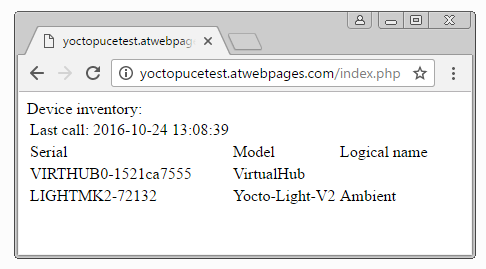
It works!
Biz.nf
To create a web site on the Biz.nf site, let's go to the www.biz.nf address

The biz.nf welcome page
And let's click on the Sign up fat red button. Even if the template is different, the interface is exactly the same as that of AWARDSPACE, we are asked the exact same information in the same order.
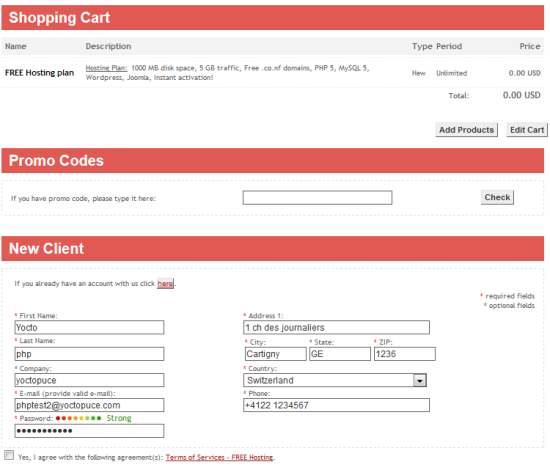
The interface is the same as that of AWARDSPACE
So we must follow the same path as for AWARDSPACE:
- Fill in the registration form
- Use the activation link that you find in the confirmation email
- Create a sub-domain in the console
- Upload the index.php and yocto_api.php files in the directory corresponding to the selected sub-domain
- Create the data sub-directory
- Configure the HTTP callback of the Yoctopuce hub
There you go. :-)
The issue with free access
At first, we selected three free hosting sites. The third one that we wanted to show you worked rather well when we started our tests. But when, two weeks later, we wanted to redo the operations to take screenshots, most of the features linked to file management didn't work anymore. Reluctantly, we therefore decided not to present this site. This small problem illustrates well the hazards of free hosting, nothing guaranties that your server stays reasonably stable.
The cPANEL case
A large proportion of the sites that we tested is based on cPANEL. And we noticed a rather curious behavior with some of the hosts using this technology. The site creation goes well, but when we first contact the created site, instead of directly serving the requested web page, the server sends a JavaScript script creating a cookie provoking a reloading of the page with a i=1 parameter on the URL. Which allows you to obtain the correct page. We don't know exactly what this cookie is used for. What we know for sure is that web pages served by this kind of server can be used only from a web browser able to manage cookies and to run JavaScript. In other terms, it cannot work with Yoctopuce hubs, and it will probably not work with any connected object either.
Conclusion
It is therefore highly feasible to mount a public PHP server without spending a dime. It's very useful to perform a few tests on the cheap without commitment. However, if you decide to start doing more serious/productive activities with a PHP server, we highly recommend that you find a host not too far from home and dig in your pocket. Thus, in case of problem, you can hope to have a support worthy of the name. Basic hosting is not that expensive: about EUR 100 per year. After all, there are people working to maintain these servers and workers need to be paid.


