![]() This week, in our "Yoctopuce for beginners" series, we are going to talk about connectors. Yoctopuce products are obviously all based on USB, but there are actually many ways to interconnect them, and it's far from being a trivial issue.
This week, in our "Yoctopuce for beginners" series, we are going to talk about connectors. Yoctopuce products are obviously all based on USB, but there are actually many ways to interconnect them, and it's far from being a trivial issue.
USB
As a basis, Yoctopuce products are designed to be connected directly to a computer by USB. For this, they all have a USB socket at the Micro-B format. To connect a Yoctopuce module, you therefore only need a simple USB cable, usually Type A to Micro-B, and a USB port on your computer.
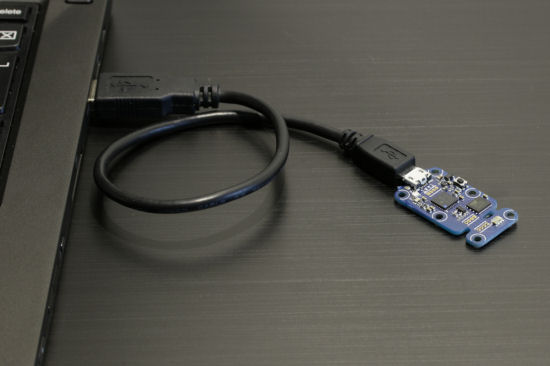
The simplest case: a USB A to Micro-B cable
Host, Slave, On The Go
Be aware that not all USB ports are equivalent, there are three types of them:
- Host: The host USB port is on the side of the machine driving the device, for example a computer which drives a printer. It usually follows the A format.
- Slave: The slave USB port is on the side of the driven device, for example a printer driven by a computer. It usually follows the B, Mini-B, or Micro-B format.
- On The Go: An OTG port can work in both modes: host or slave depending of the cable used. For example, smart phones often have and OTG port allowing them to be driven by a computer but also to drive a device. An OTG port follows most often the Micro-B format.
Yoctopuce modules behave as "slaves": you therefore need a machine with a Host or OTG USB port.
Cable length
The length of the electric wire has an important incidence on its performances. To make it simple, if you apply a 5V voltage at the end of a cable, you'll find a little less than 5V at the other end. This line-drop is not only proportional to the length of the wire but also to the current that goes through it. You must therefore avoid too long USB cables, especially if you intend to connect a module with a high power consumption. In practice, avoid USB cables above 2 meters.
Alternatives to USB cables
USB cables are undeniably very practical. However, their innocent air hides a large defect: they take up a huge amount of space. This is particularly obvious when you work with Yoctopuce modules of which the average size is 50x20mm, so more or less the size of a USB A plug. Therefore all Yoctopuce modules provide, behind their USB socket, pads allowing you to interconnect them in a more compact manner. These pads are made of four holes distant of 1.27mm, corresponding to, in the order: +5V, Data-, Data+, GND, so respectively the Red, White, Green, and Black wires of a USB cable. The square shaped pad corresponds to GND.
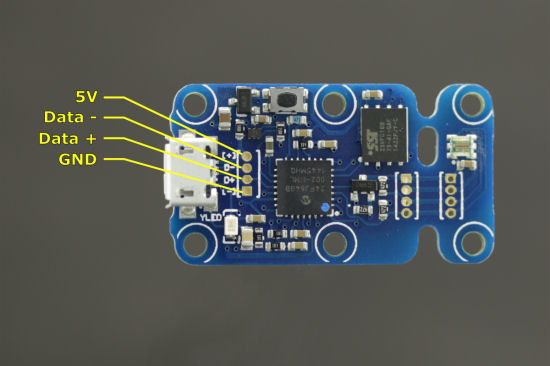
All the Yoctopuce modules have pads enabling an alternative connection
Connector to the 1.27mm pitch
You can naturally cut a USB cable and solder it directly to the pads, but it's a delicate operation. We recommend that you rather solder on the PCB a connector at the 1.27 or 1.25mm format, and to start from there with a cable with a plug corresponding to the connector. Note that you can use connectors to the 1.27mm pitch as well as to the 1.25mm pitch, with only 4 poles, the size difference is negligible.
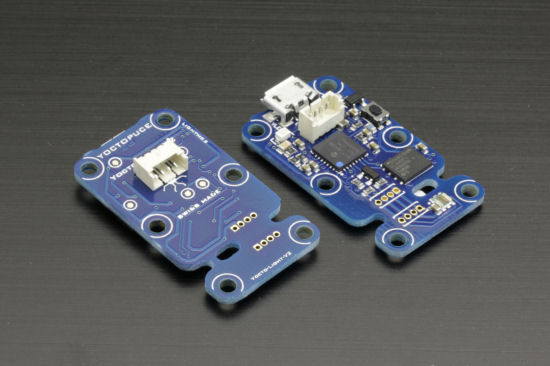
Using a connector at the 1.27mm pitch
Yoctopuce sells cables with standard 1.27mm connectors, but you can certainly find equivalent connector systems elsewhere.
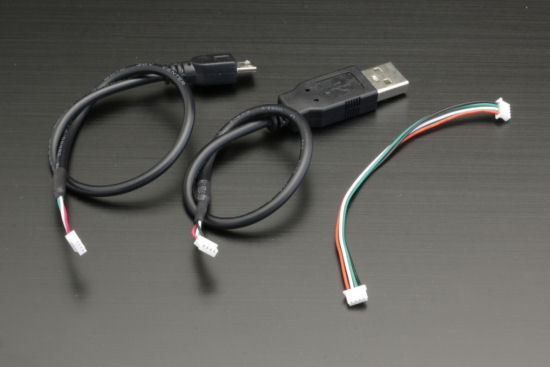
Cables corresponding to the 1.27mm connectors
"Board to Board" connectors and spacers
There is an even more compact alternative to 1.27mm cables: the board to board connectors which allow you to interconnect two boards together without using a cable, in particular when you want to connect a Yoctopuce device to a Yoctopuce hub. The holes are always positioned so that they are aligned from one board to the other. Thus, you need two board to board connectors at the 1.27mm format, a few spacers for stability and that's it. Yoctopuce sells suitable connectors and spacers, but you certainly can find them elsewhere too.

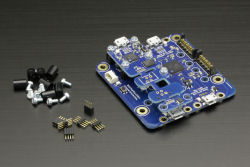
Board-to-board connectors
Modules than you can split
Some Yoctopuce modules are designed so that you can split them into two. It's the case for example of the Yocto-3D. The idea is to be able to separate the sensor part from the USB part.
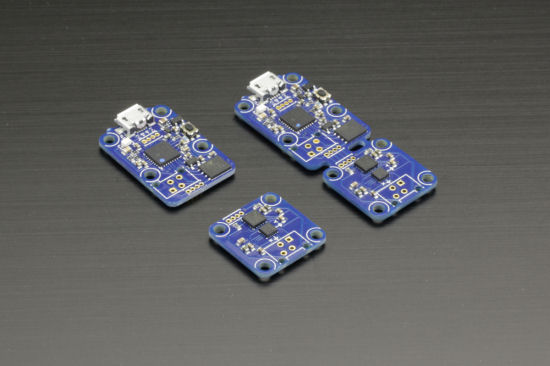
Some modules are designed to be split into two parts
Because of the USB cable, you should not put the USB part more than 2 meters away from the driving computer, but you can easily use a cable of about 10 meters between the USB part and the sensor part. To do this, split the module into two parts and wire the two parts. There are several solutions for this.
Threaded wires
On each of the two parts of a module that you can split, there is a pad at the 1.27mm pitch. You can naturally solder threaded electric wires, that is made of a multitude of small copper wires. It's quite doable, but rather tricky: you must put all the threads in each hole without creating a short, easier said than done.
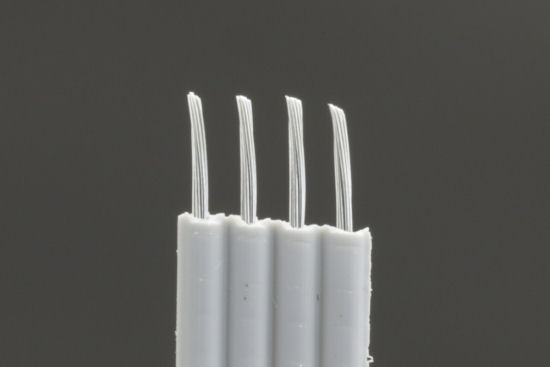
Threaded electric wire
Solid copper wire
Rather than threaded wire, you can use solid copper wire, where each wire is made of a single copper thread. It's infinitely easier to solder, but the cable is much more rigid that its threaded equivalent. Moreover, since 3M decided to stop producing its solid copper 1.27mm pitch ribbon cable, it has become very difficult to find retailers.

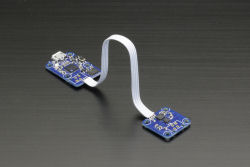
Solid copper electric wire use
Picoflex connector
You can use Picoflex connectors with some modules that you can split. It's a connector system belonging to Molex which has the advantage of being compact, while enabling a significant current to be carried: 1.2A per pole. These connectors, made of a black socket and a white plug allow you to build systems that you can easily disassemble.
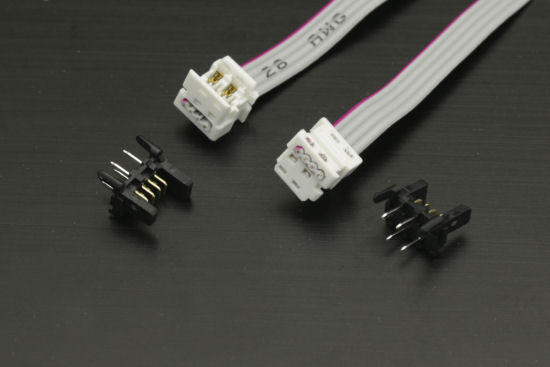
The Picoflex system
You can very easily make a cable of an arbitrary length as long as you have the appropriate pincer. Beware, while you can clip the socket very easily on the PCB, you must imperatively solder its contacts.
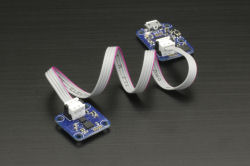
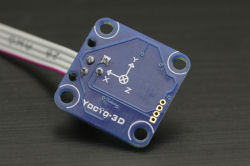
Picoflex wires use
The YoctoHubs
The YoctoHubs are a range of modules which allow you to do without a host computer and to connect one or several Yoctopuce modules directly to the internet by Ethernet, Wifi, or even GSM. The idea is to connect up to three Yoctopuce modules to one of these YoctoHubs. The connection between the YoctoHubs and the modules is based on the USB connectors, however the protocol between the hub and the modules is not USB but something simpler. This explains that a YoctoHub can drive only Yoctopuce modules. The subdevices can be connected with Micro-B to Micro-B USB cables, or with 1.27mm pitch connectors. Avoid however to put a subdevice more than a meter away from its hub.

The YoctoHubs use MicroB-MicroB cables
The YoctoHub-Shield
The YoctoHub-Shield allows you to expand the number of ports of a YoctoHub. It is connected to a YoctoHub with a Picoflex cable. You can thus chain up to 10 shields and significantly increase the number of ports of a hub. We'll have time to talk about this again in a post dedicated to the Yoctopuce hubs.

The shields use Picoflex connectors
Power source
When all your modules are interconnected, you must power them. For everything to work without surprise, you must conform to some basic rules.
Voltage
The nominal working voltage of a Yoctopuce module is that of USB, that is 5V. In practice, any Yoctopuce module works perfectly with a power between 4.5 and 5.5V. Don't go above 6V, it would destroy the module. Some Yoctopuce modules are however able to work with a voltage as low as 3V.
Consumption
The consumption of classic Yoctopuce modules varies between 25 and 500mA depending on the model. The YoctoHubs can consume up to 2A depending on the connected sub-modules. Beware, in principle, a USB device is not supposed to draw more than 100mA from a port of a non powered USB hub, and 500mA from a powered one. To help you size your power needs, each module can provide its own power consumption in real time.
Batteries
Yoctopuce modules don't necessarily need a true USB connection to work. For example, Yoctopuce sensors can internally record the data that they measure as long as they are powered. The easiest is to use a simple USB charger or even a USB battery. But you can also use 3 alkaline batteries, or 4 chargeable batteries, which provides you with nominal voltages of respectively 4.5 and 4.8V.
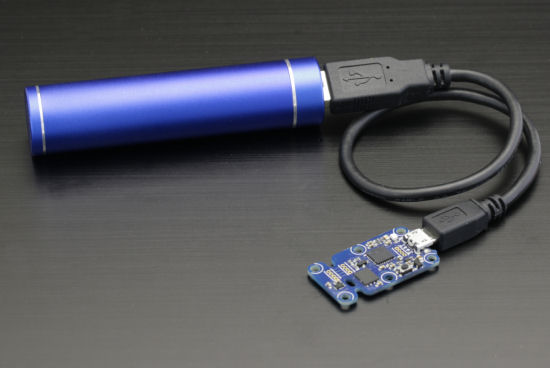
The Yoctopuce modules can work without a true USB connection
Batteries and USB link
Yoctopuce modules are powered through their USB port. This raises a small issue when you want to power a module with a battery, but also want to connect it from time to time to a computer without having to disconnect the power supply. There are several ways to solve the issue.
Quick and dirty
You can leave the USB power supply and the battery power supply in parallel. This works in most cases but it's not recommended because it hasn't been designed for this: if there is a too large voltage difference between the USB power supply and the USB power supply, you risk some unexpected behaviors.

Two power supplies in parallel, it works in most cases, but not recommended
Cutting the red wire
You can cut the red wire of the USB link, thus the power supply comes only from the battery. There is no risk. However, you can communicate with the module only if there is enough power remaining in the battery to make the module work.

Cutting the red wire on the USB side, easy and without risk
Using two diodes
You can protect both the USB power supply and the battery with two diodes. Thus your module is able to work even if the battery is empty. Be careful, however, as the diodes induce a voltage drop more or less proportional to the module consumption. Therefore this solution is not appropriate for high consumers.

Luxury solution: two diodes
Edit janvier 2018: We now sell the Mini-Battery-Supervisor which is an elegant solution to this problem.
Conclusion
Interconnecting Yoctopuce modules actually consists in a compromise between compactness and practicability. Classic USB cables are very practical, easy to connect/disconnect but have a tendency to generate systems where cables take up more room than the electronics itself. At the other end of the spectrum, connectors at the 1.27mm pitch take up a minimum of space but require a soldering iron to fix them.


