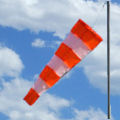
 Last week, we built an anemometer allowing you to measure wind speed by USB. This week, we describe the complementary tool: a wind vane allowing you to know the wind direction. With USB reading of course, otherwise it's not fun.
A wind vane is a steerable device, with a shape designed so that it moves spontaneously into the wind's eye. In short, it's a kind of arrow, mounted on an axle, and which moves by itself. Determining wind direction consists therefore in determining the absolute position of the axle on which the arrow is mounted.
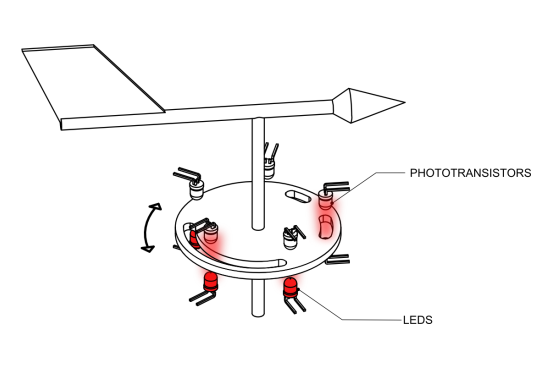
We're going to use an optical method.
As for the anemometer, we are going to use an optical method, a perforated disk which rotates between leds and phototransistors. The phototransistors are connected to the inputs of a Yocto-Knob. Each time a phototransistor is lighted by the opposite led, it becomes conductive. The Yocto-Knob can detect this conductive state. We associate bit 1 with the conductive state and bit 0 to the blocking state of each phototransistor. Knowing that a Yocto-Knob has five inputs, we can encode 25 = 32 positions.
We therefore need to arrange the phototransistors and the holes on the disk so that we can encode a maximum of positions in a minimum of space. It so happens that a given Bruce Spedding imagined a method, later improved by Alain P. Hiltgen and Kenneth G. Paterson, called "Single Track Gray Code". This method presents two noticeable features: first, generated codes differ only from one bit from one position to another. This is the principle of Gray codes, and this limits the risks of reading errors for intermediary positions. Second, the sensors are located on the same circular track, which enables us to build very compact encoders. The price to pay is that the number of codable positions is smaller than 2n. For example, with 5 phototransistors, we can encode only 30 positions. This provides a precision of 12░, which is largely enough when we need to determine wind direction.
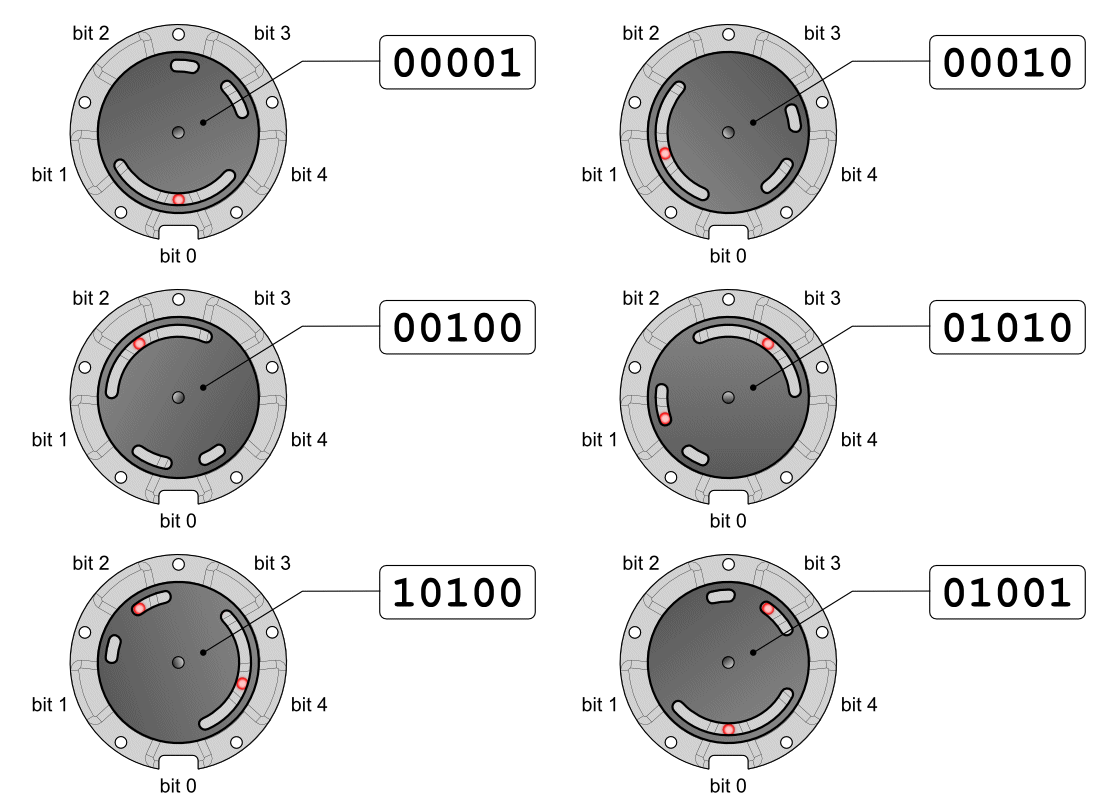
How the used optical encoding (Single Track Grey Code) works.
Wiring
Wiring is rather similar to that of the anemometer, except that we now have 5 phototransistors. We learned that the leds used with the anemometer were no longer manufactured, therefore we chose the L-7104SEC-J3 from Kingbright coupled with 200 Ω resistances. These leds are still powered from the USB 5V. The phototransistors are still SFH 310-2/3.
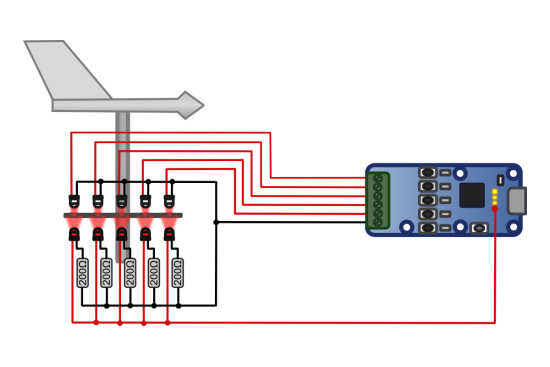
Led and phototransistor wiring
This time, seven wires must come out of the encoder. You might be tempted to place the Yocto-Knob inside the wind vane so that only the USB cable comes out. But it's better to keep the Yocto-Knob inside, safe from cold and from humidity.
Putting it together
Once again, we used our 3D printer to make the parts of our wind vane. We used the same assembly technique based on threaded inserts applied with a soldering iron.
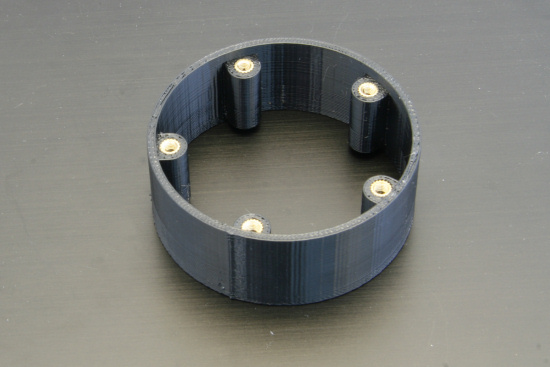
Threaded inserts are mounted on the parts, allowing us to screw them together.
The first step is to wire the phototransistors, the resistances, and the leds. It's a bit tricky, given the size of the parts, but we can do it. When we have soldered everything, we drowned everything in hot glue to prevent humidity issues (check that everything works first :-)
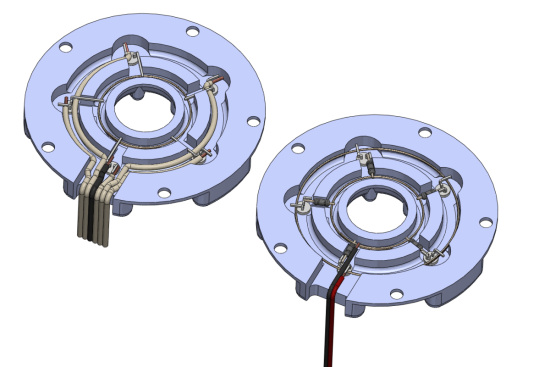
Connecting the leds and the phototransistors
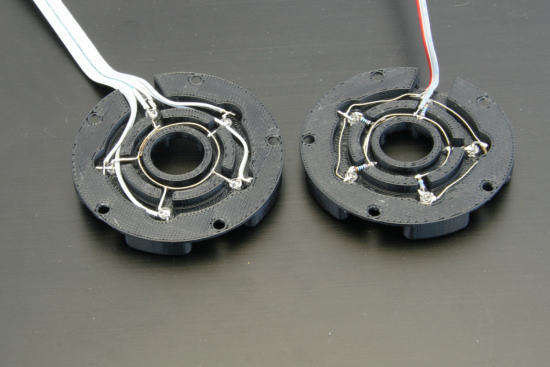
The same, for real
The parts of the body fit into one another, we use the same stainless ball bearings as for the anemometer.
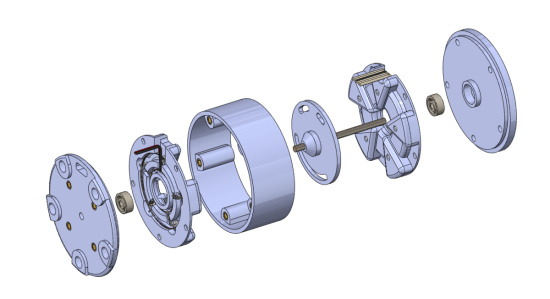
Assembling the body
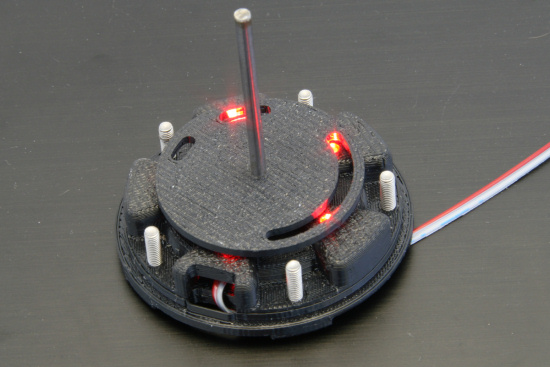
Testing the leds
Assembling the arrow is relatively easy, the horizontal rod is made of two parts glued together, thus sandwiching the vertical stabilizer. The arrow is blocked on the axle with headless screws. To prevent the measures from being corrupted in case of a not quite horizontal installation of the wind vane, we use metallic washers to ballast the arrow.
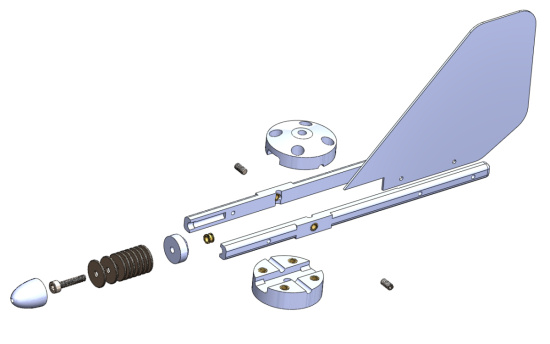
Assembling the arrow, ballasting is performed with metallic washers.
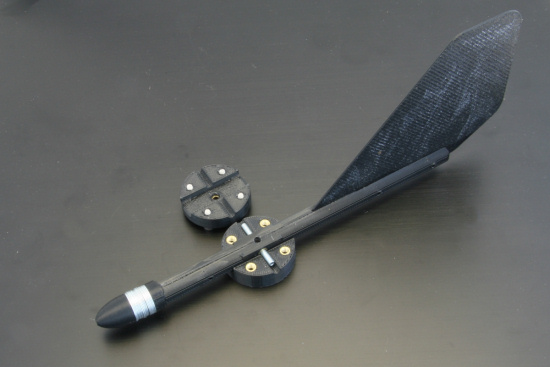
The complete arrow
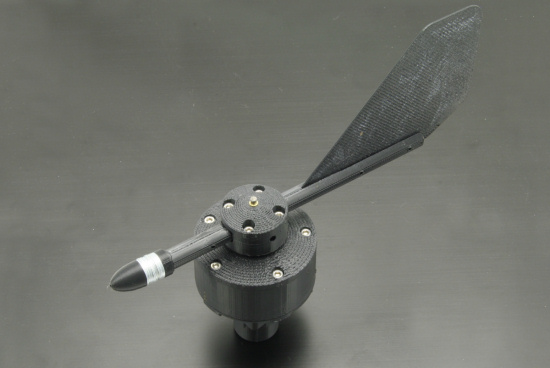
OK, the hardware part is done, let's take care of the software.
Programming
Programming is only slightly more complex than for the anemometer. At regular interval, we check the state of each input of the Yocto-Knob with the get_isPressed() function.Taking the state of each input into account, we construct an integer which serves as an index to find the direction in a lookup table. Here is a C# example.
int[] table = { -1, 0, 72, 12,144,132, 84,120,
216,348,204, 24,156,168,192,180,
288,300, 60, 48,276,312, 96,108,
228,336,240, 36,264,324,252, -1};
// retrieves the anButtons functions, this assumes inputs
// are named "bit0" .. "bit4"
YAnButton[] bits = new YAnButton[5];
for (int i = 0; i < 5; i++)
bits[i] = YAnButton.FindAnButton("bit" + i.ToString());
while (true)
{ int index= 0;
// checks for device presence
if (bits[0].isOnline())
{ // builds the index
for (int i = 0; i < 5; i++)
if (bits[i].get_isPressed() == YAnButton.ISPRESSED_TRUE)
index |= (1 << i);
// displays orientation using table lookup
Console.WriteLine(table[index].ToString());
} else Console.WriteLine("offline");
YAPI.Sleep(1000, ref errmsg); // waits for 1 sec
}
Make sure the pressed/released states are detected correctly, if needed you can calibrate the inputs with the Virtual Hub.
This wind vane doesn't have an absolute reference for the North direction. You can either install it so that it indicates 0░ when the arrow points North, or you can install it at random and add an offset in the direction computation to provide correct values.
Conclusion
You now know how to build the tools necessary to measure the speed and the direction of the wind with the help of Yoctopuce modules. A piece of advice, however. The Single Track Gray Code has been the object of a patent request in 1994. This is not an issue if you build a wind vane for your own usage, but if you intend to use this system to commercialize a product, make inquiries beforehand.
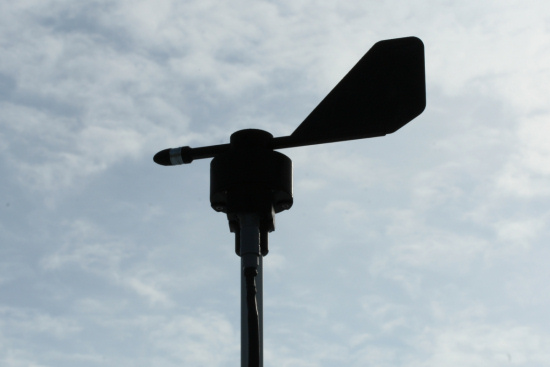
Your very own USB wind vane
You can download the files necessary to 3D print this wind vane on Thingiverse.


