![]() This week, we are going to tell you how we built an autonomous light beacon based on a Yocto-Color-V2. The idea was to take advantage of the pre-programmed sequences of this module to produce light effects which can be seen from far away.
This week, we are going to tell you how we built an autonomous light beacon based on a Yocto-Color-V2. The idea was to take advantage of the pre-programmed sequences of this module to produce light effects which can be seen from far away.
The idea was thus to use a Yocto-Color-V2, a dozen of 8-led NeoPixel sticks, and four batteries to build a kind of led rotating beacon where you can drive each led independently.
![]()
The two key components: a NeoPixel led stick and a Yocto-Color-V2
To solve the issue of the transparent enclosure, which is not very easy to make yourself, we started simply with a plastic spice container.
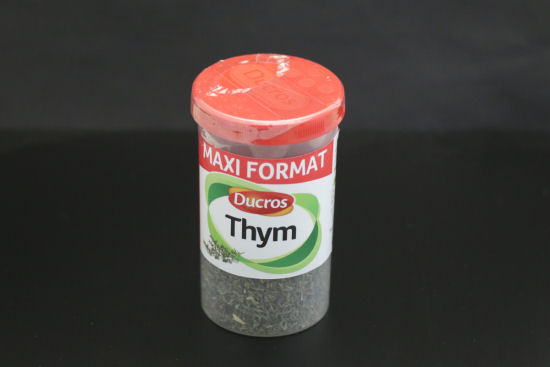
Why should we slave to build a nice box when you can use a thyme container?
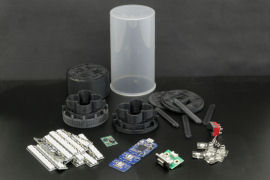
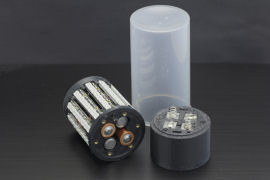
The internal structure was made with a 3D printer. It has two parts:
- a mount for the leds and the batteries;
- a small enclosure containing the electronics, the USB socket, and the switch.
The two parts are screwed together and can be disassembled to change the batteries. The 12 8-led sticks are simply chained one after the other and the input of the first stick is connected directly to the Yocto-Color-V2, nothing fancy.
![]()
![]()
The complete beacon
Power supply
The only thing which is a bit tricky is the power supply: we wanted a beacon able to work autonomously. To power it, we wanted run-of-the-mill batteries, rechargeable batteries tending to be always empty when you need them most. The problem is that 3 very simple batteries means only 4.5V, which is a bit short, while 4 batteries equals 6V or more, which would destroy the Yocto-Color-V2 processor and the NeoPixel leds. We therefore had to bring down this voltage from 6V to 5V. There are two solutions to do so:
The LDO
The LDO enables you to bring down a voltage by dissipating the energy in excess: this energy is transformed into heat and is therefore lost. This loss is more or less proportional to the voltage difference and to the required current. An LDO is thus recommended for applications requiring little current and with a low voltage drop.
The buck
A buck, or step-down converter, converts the energy instead of dissipating it. To make it simple, it converts the excess voltage into current. But it's not magical for all that: it uses part of the available energy for its own consumption, it moreover consumes power even when you don't draw current from it. In real life, a buck performance is rarely above 80-90%. These characteristics make it rather interesting for applications requiring an important voltage drop, transforming 12V into 5V, for example.
It so happens that we used a D24V10F5 buck from Pololu because it's what we had on hand. But in our case, an LDO able to support up to 2A would have been a much better solution.
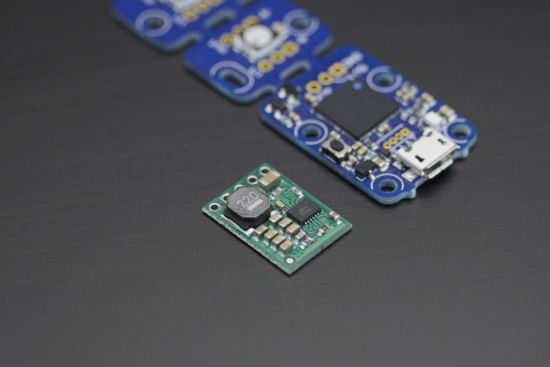
The D24V10F5 from Pololu
USB socket and switch
We moved the Yocto-Color-V2 USB port under the beacon with a connector soldered on a small PCB. To avoid the buck draining the batteries while the beacon is not in use, we used a DPDT switch to enable us to isolate the buck when the batteries are not in use.
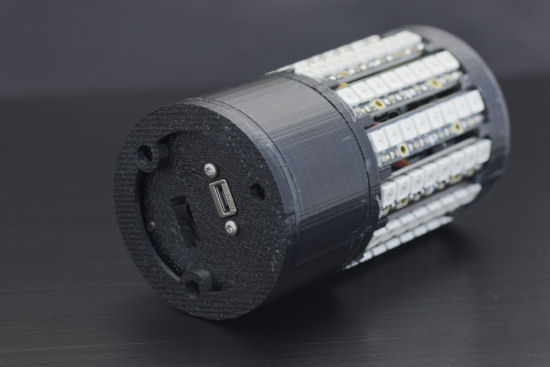
The bottom of the beacon
Depending on the switch position, the power supply comes either from the USB port or from the batteries through the buck. But the USB port works perfectly in both cases because ground, D+, and D- stay connected. For example, you can connect a YoctoHub-Wireless-g to it to remotely drive sequence changes.
![]()
The beacon diagram
Programming
A few lines of code are enough to pre-program sequences that are simple but spectacular. Here is the Delphi code to register and start a simple green rotating beacon:
SysUtils,
Yocto_api,
Yocto_colorLedCluster;
var
errmsg:string;
c:TYcolorledCluster;
i:integer;
begin
YregisterHub('usb',errmsg);
c:=YfirstColorLedCluster();
c.resetBlinkSeq(0);
c.resetBlinkSeq(0);
c.addRgbMoveToBlinkSeq(0,$00FF00,000);
c.addRgbMoveToBlinkSeq(0,$00FF00,150);
c.addRgbMoveToBlinkSeq(0,$000000,000);
c.addRgbMoveToBlinkSeq(0,$000000,450);
for i:=0 to 95 do
begin
c.linkLedToBlinkSeq(i,1,0,(i shr 3)*150);
c.linkLedToBlinkSeqAtPowerOn(i,1,0,(i shr 3)*150);
end;
c.set_blinkSeqStateAtPowerOn(0, 1);
c.saveBlinkSeq(0) ;
c.saveLedsConfigAtPowerOn();
c.startBlinkSeq(0);
end.
![]()
A green rotating beacon, but we could have done it in pink as well
Possibilities are almost infinite, we could even imagine an application running on a smart phone: the user would connect the beacon on the phone, select an animation, the phone would program the beacon, and the user would only need to disconnect the beacon and to start it.
And it works?
It works rather well. This simple gadget can prove useful if you need to put a (bright) glow in the night. Have a look for yourself.


