![]() Do you remember the Yoctopuce mailbox we customized to detect the postman? Well, the system was working reasonably well, but it had some flaws. We had to use insanely long and expensive USB cables, the ball-switch wires were too fragile to be put on an articulated part, and the system could only detect letters, not parcels (our mail box has two sections, one for letters the other for parcels).
Do you remember the Yoctopuce mailbox we customized to detect the postman? Well, the system was working reasonably well, but it had some flaws. We had to use insanely long and expensive USB cables, the ball-switch wires were too fragile to be put on an articulated part, and the system could only detect letters, not parcels (our mail box has two sections, one for letters the other for parcels).
So we decided to improve the concept using a Yocto-Light and a laser.
The main idea is quite simple: we want to install a light barrier across the two sections of the mail box. Since the top of the box is directly exposed to the rain, we plan to do this from the bottom of the box. We will install a laser under the mail box, the beam will travel across the two sections and will be reflected down to the Yocto-Light sensor by a mirror glued to the box ceiling. To allows the beam to travel freely in the box, small holes will be made in the bottom and in the middle shelf.
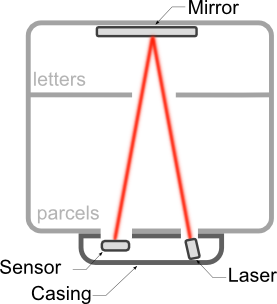
The idea is to install a light barrier in the mail box
Like most Yoctopuce sensors, the sensor part of the Yocto-Light can be moved far away from the main part. We just have to cut the board into two parts, and connect them with 4 wires. So we will only put the sensor part in the mail box, and the main part will stay in our dry and warmy lab.
We picked a cheap and easy laser. Such a small laser device costs less than 30 dollars, looks like just a small cylinder, 8mm large an 12mm long and only needs 3V to work. Unfortunately, the sensor part of the Yocto-Light works with 2.5V, so there is no way to power the laser from there. But since there is some 3.3V on the main board, we simply use a fifth wire to power the laser. OK, the theory is over, let's go for the application.
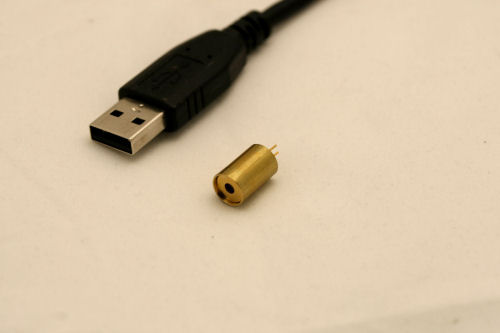
This tiny thing is a laser, including its own regulation electronic and optics. All it needs to work is around 3V.
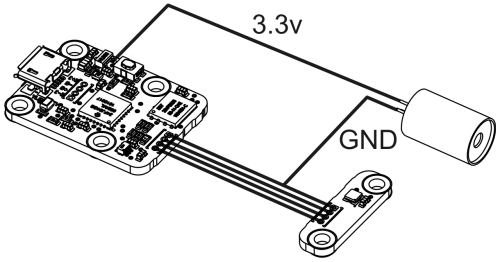
How to power the laser module
For the enclosure, lets use the 3D printer again to save time. We will print an enclosure that will be fixed under the mail box, and that will contain both the laser, correctly oriented, and the sensor part of the Yocto-Light. It will also include a mechanical system to adjust the sensor position to precisely match the reflected position of the laser. You may think that 3D printing puts this project out of your reach. Actually that's not really true: nowadays it is possible to buy a 3D printer cheaper than your dream TV set. If you don't want to sell your TV, you also can build a wood casing...
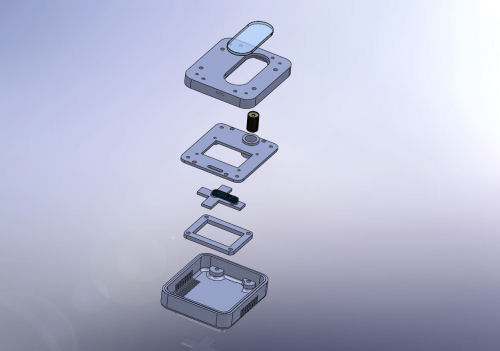
The enclosure, with adjustable sensor position
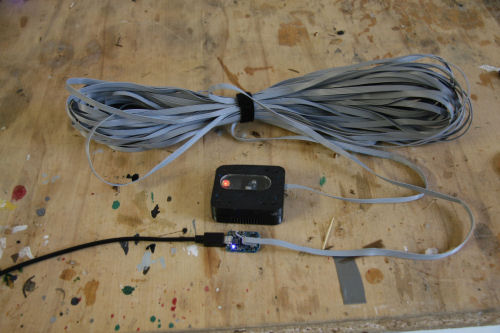
The enclosure once completed. Yes, the sensor is moved quite far away from the main board (25m actually)
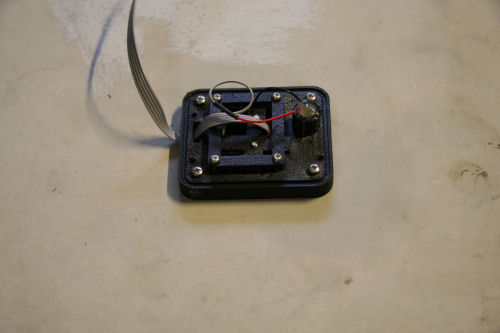
The enclosure is installed under the mail box. We only need to move the cross to adjust the sensor position, and then fix the lid
For the signaling part, we will use a Yocto-Color which will turn red when there is mail waiting to be picked. For the control software, we will use the same method we used for the weather station: a small PHP script. This way, we can make it run on the same computer which is already controlling the weather station. The code is trivial: we just read the sensor value and adjust the led color accordingly. To make the programming even simpler, we gave the logical names "mailbox" and "mailindicator" to the the Yocto-Light light sensor and to the Yocto-Color led.
include("yocto_api.php");
include("yocto_lightsensor.php");
include("yocto_colorled.php");
// connect to the local virtual hub
if (yRegisterHub('http://127.0.0.1:4444',$errmsg)!=YAPI_SUCCESS)
die($errmsg);
yDisableExceptions(); // No exceptions thanks
while(TRUE)
{
// retreive the sensor and the led indicator
$sensor = yFindLightSensor('mailbox');
$led = yFindColorLed('mailindicator');
// are they connected ?
if (($sensor->isOnline()) && ($led->isOnline()))
{
// if the light sensor is illuminated, this
// means there is no mail.
if ($sensor->get_currentValue()>100) {
$led->set_rgbColor(0x00FF00);
} else {
$led->set_rgbColor(0xFF0000);
}
}
sleep(1); // If you want to impress your friends use 1,
// If you want to spare your CPU use 60
}
?>
And here is the result:
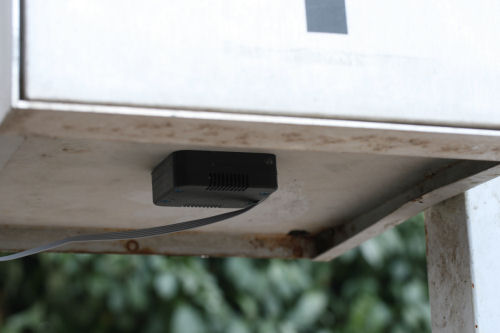
We're ready, let's wait for the postman...
You might think this is a lot of hardware just to turn on a light when there is mail waiting. But now, nothing prevents us to do more sophisticated things such as sending an email when there is mail waiting:-) ... with PHP it would be just a matter of adding one line of code.


