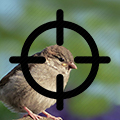
 This week, we received a Raspberry Pi High Quality Camera and to test it we decided to build a small photographic trap. The goal of this trap was to film and weigh a bird when it is eating but, as you are going to see, at Yoctopuce we are more gifted with electronics than with animals.
To implement this system, we used a Raspberry Pi3+ to which we connected the official Raspberry Pi High Quality Camera and a Yocto-Bridge. The Yocto-Bridge enables us to detect weight variations and therefore the presence of a bird, triggering the camera recording.
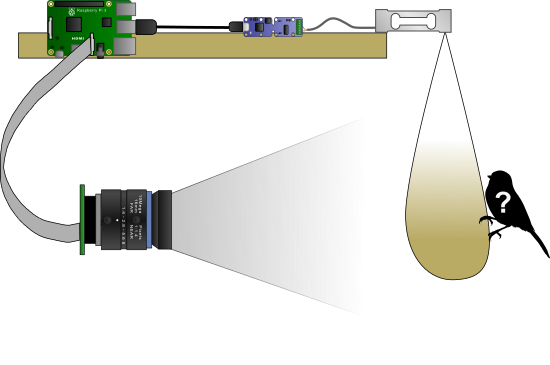
The photographic trap
The Raspberry Pi HQ camera
The Raspberry Pi High Quality Camera is sold in several parts. There is the sensor and different lenses which you can mount on the sensor. In our case, we used the 16mm telephoto lens.
The camera has neither autofocus nor automatic setting of the aperture. For some scenarios, this could be an issue, but it is not so for our trap as the camera doesn't move once the trap is set up. One must simple make sure to set the focus each time that we move the trap and the camera.
When the lens is mounted on the sensor, we must connect the camera to the Raspberry Pi with ribbon cable. This cable connects to the dedicated port in the middle of the Raspberry Pi. Note that you must use an adaptor if you use a Raspberry Pi Zero.
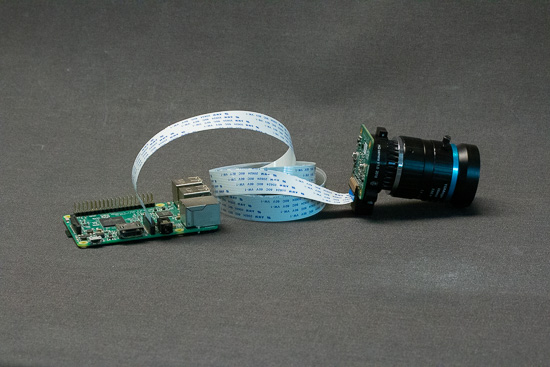
the Raspberry Pi High Quality Camera
When connected, we must enable the camera in the OS parameters with the command raspi config. The parameter to enable the camera interface is located in the Interfacing Options section. We can then check that the camera works with the command raspvid -f -t 0 which opens a preview window. This command is also very convenient to manually set the lens focus and aperture.
The Yocto-Bridge
To measure the weight of the bird, we use a shear beam load cell which we connected to the Yocto-Bridge. This type of cell is a "simple" metallic block which must be mounted on one end and the load to be measured set at the other end.
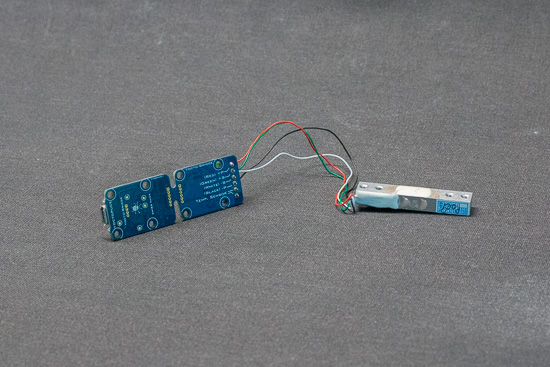
The load cell connected to the Yocto-Bridge
To connect the cell, screw the 4 wires in the Yocto-Bridge terminal. In our case, its trivial as the load cell uses standard colors for the four wires. We therefore only have to connect each wire following the marking at the back of the Yocto-Bridge.
When the load cell is connected, we must configure the Yocto-Bridge. To do so, we use the VirtualHub and we enter the parameters of our cell, that is the AC excitation, the maximum charge and the zero tracking.

The configuration parameters for our load cell
The application
When everything is in place, we "only have to" write the application which triggers recording when the system detects an additional weight.
We decided to write the application in Python because there is a ready-made library to drive the camera.
The Python library to drive the camera is very simple and well documented. Here is for example how to record a one second video with the "hello world" message superimposed.
camera = picamera.PiCamera()
camera.start_recording("myvideo.h264")
camera.annotate_text = "hello world"
sleep(1000)
camera.stop_recording()
The code of our application is relatively simple and it heavily draws on the Yocto-Bridge documentation example.
Note: For this application, we installed our Python library with PyPi. If you have never used our Python library, you can read our tutorial on the topic.
At the beginning of the application, we initialize the Yoctopuce API with YAPI.RegisterHub, we check that there is a Yocto-Bridge, we check that the excitation is on AC, and finally we tare the measured value.
from yoctopuce.yocto_api import *
from yoctopuce.yocto_weighscale import *
# Setup the API to use local USB devices
errmsg = YRefParam()
if YAPI.RegisterHub("usb", errmsg) != YAPI.SUCCESS:
sys.exit("init error" + errmsg.value)
# Retrieve any YWeighScale sensor
sensor = YWeighScale.FirstWeighScale()
if sensor is None:
die('No <product>Yocto-Bridge</product> connected on USB')
# On startup, enable excitation and tare weigh scale
print("Resetting tare weight...");
sensor.set_excitation(YWeighScale.EXCITATION_AC);
YAPI.Sleep(3000);
sensor.tare();
unit = sensor.get_unit();
if not os.path.isdir("videos"):
os.mkdir("videos")
The main loop retrieves the measured value every 0.1 second and starts recording if the weight is more than 5 grams. We continue to record as long as the weight is above 5 grams or for a maximum of 30 seconds. As we have the weight, we annotate the video with the current time and the measured weight.
while sensor.isOnline():
weight = sensor.get_currentValue()
if weight > 5:
print("Object on the scale take a video of it");
starttime = datetime.datetime.now().strftime("%Y-%m-%d_%H.%M.%S")
video_file = "videos/" + starttime + ".h264"
camera.start_recording(video_file)
count = 0
while weight > 5 and count < 30:
weight = sensor.get_currentValue()
prefix = datetime.datetime.now().strftime("%Y/%m/%d %H:%M:%S ")
msg = "%s : weight = %d %s" % (prefix, weight, unit)
camera.annotate_text = msg
print(msg)
count += 1
YAPI.Sleep(1000)
camera.stop_recording()
YAPI.Sleep(100)
This version of the application works but has some limitations. First, after a while, the recordings are going to fill the Raspberry Pi SD card and risk to saturate the disk. Second, the recording is triggered when the bird has landed on the scale. We are therefore missing a few seconds before the bird lands.
We have improve the code of this small application for the camera to work continuously and for the application to keep in memory the latest 5 seconds that were filmed. In this way, when a bird is detected with the Yocto-Bridge, we can retrieve the previous 5 seconds.
We also modified the application so that it automatically uploads the video on YouTube. When the video is correctly uploaded on YouTube, the local file is deleted and an email is sent.
Explaining in details the code of these two features would make this post hard to digest but, as we usually do it, we have published the complete code on GitHub: https://github.com/yoctopuce-examples/picam.
You can also see the documentation of the Python library to drive the camera and the documentation of the Google library for Python.
Yes but...
We implemented our application quickly. The longest part was understanding how the Raspberry Pi camera API and the Google API enabling us to upload a video on YouTube worked. Finally, we had a POC which worked perfectly well in our office.
Here is a test video, for example:
But this was without taking into account our lack of knowledge on birds... We tried 3 types of seeds, 4 locations, but nothing helped. After 4 days of trials, not a single bird landed on our feeder. And the weather forecast also came to put its little pebble in the gears, announcing 10 days of rain.
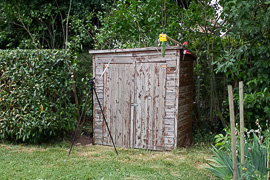
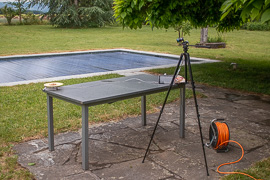
Different systems to put the seeds
To make it short, either the neighbors have better seeds than we do, or we have I have clearly underestimated the wariness of these little feathered animals.
We'll keep on trying with our experiment, one day we'll finally find something that they'll want. Until then, here are a few videos of tests that we performed with the system in position.
A "not bird":
Another "not bird":


