YoctoBox-Short-Thick-Transp : User's guide
1.1 Sizes 2. Assembly
2.1 Closing the enclosure 2.2 Wires going through 3. Fixing
3.1 Fixing clamps 3.2 Magnets 3.3 Screwing from the inside 3.4 Sticking 4. Precautions
4.1 Shocks 4.2 Magnets 4.3 Heat 5. Technical drawings
1. Introduction
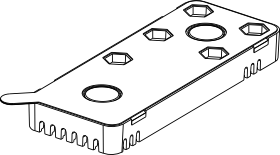
Yoctopuce "single width" enclosures are designed to host the single width1 modules of the brand. These enclosures are made of a base and a lid. The module is sandwiched between the two parts, and the whole is kept closed with screws and nuts made of plastic material2. These enclosures are available in many variants. This user's guide is common for all the models.
1.1. Sizes
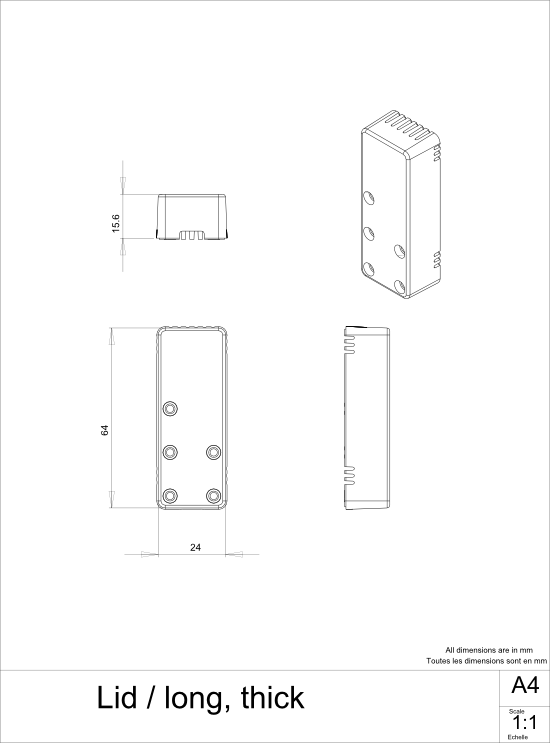
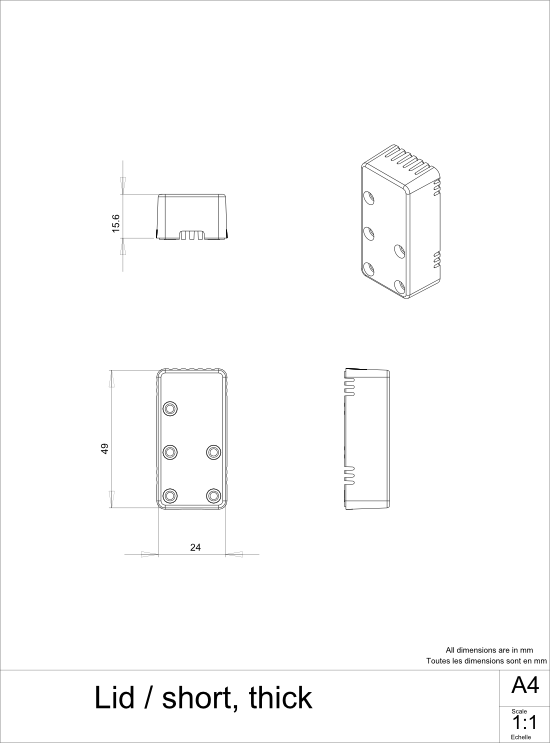
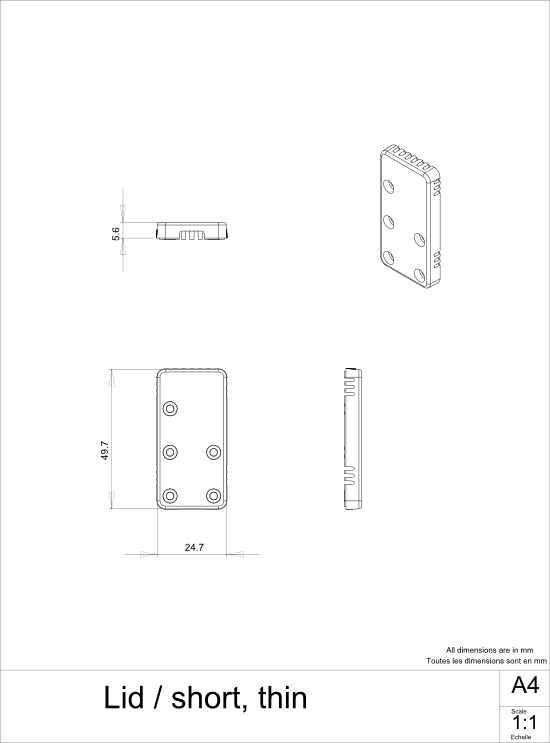
There are 5 enclosure sizes. They are obtained by combining two lid heights and three distinct base lengths.
- Long and thin, for modules with a maximum thickness of 6.2 mm and a maximum length of 60 mm;
- Short and thin, for modules with a maximum thickness of 6.2 mm and a maximum length of 45 mm;
- Long and thick,for modules with a maximum thickness of 16.2 mm and a maximum length of 60 mm;
- Short and thick, for modules with a maximum thickness of 16.2 mm and a maximum length of 45 mm;
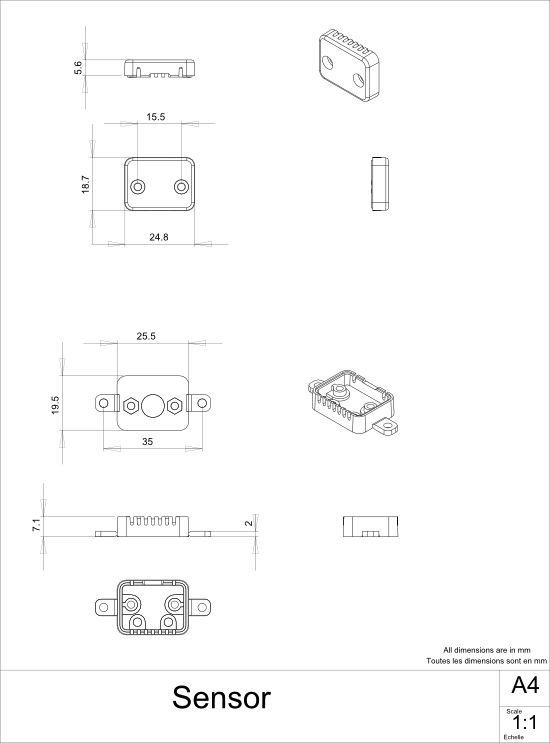
- Very short and thin, for sensor detachable parts (max thickness: 5.7 mm, max length:13 mm) . There is no thick enclosure for this length.

The 5 distinct enclosure sizes
The bases are available in different colors, among which a semi-transparent variant in PET3
The lids are in transparent acrylic glass (PMMA) and can include ventilation ears and/or holes to access terminals, depending on the type of modules they are intended for.
2. Assembly
2.1. Closing the enclosure
Assembling the modules into the enclosures is as easy as can be: the module is sandwiched between the base and the lid, the whole is kept closed with M2.5 size screws and nuts. You only need to pile in order the base, the module, and the lid; put the screws in the lid and the nuts in the base; and screw. Beware not to tighten the screws: The acrylic glass of the lids is a breakable material and may fissure if too strong mechanical constraints are applied. Content yourself to screw until you feel a mechanical resistance. If you are afraid for the screws come loose by themselves (for instance if the enclosures is fixed to a vibrating support), put a drop of thread sealant before you place the nuts in position.
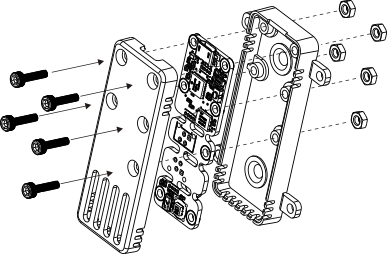
Assembling an enclosure
2.2. Wires going through
Some modules need to be connected to the outside with wires. It is the case for Yocto-PowerRelay modules, for instance. In this case, you only need to cut the ventilation ears at the end of the lid with cutting pliers in good condition.
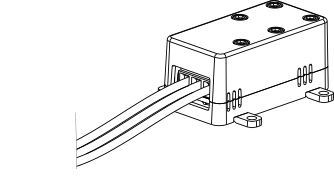
Ventilation ears can be cut out to allow wires to go through
3. Fixing
The enclosures are designed to provide a maximum of fixing possibilities.
3.1. Fixing clamps
The enclosures have fixing clamps which allow you to fix them against a support area with the help of screws with a 3 mm diameter.
Fixing with clamps and screws
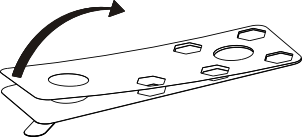
These fixing clamps can be easily removed. They are precut so that you can break them without leaving ugly markings. To do so, simply fold the clamps under the base by 180° and, in this position, start moving them laterally.
Fold the clamps under the base to break them free from the enclosure.
For bases in dark plastic on which the break could leave a slight clear marking, you can use a model maker side cutter4.
3.2. Magnets
The enclosures are provided with permanent magnets glued in the base, which allow you to stick the enclosures on any flat ferromagnetic surface (machine frames, metallic beams, refrigerator doors, ...).
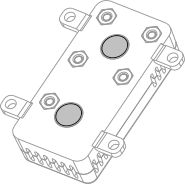
The enclosure base contains magnets.
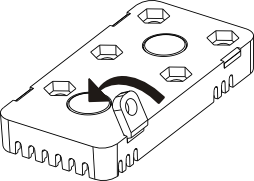
The magnets can be removed from the case by vigorously pushing them from the inside of the base with a relatively pointed tool. The bottom of the base is intentionally very thin at this location. When you have removed the magnets, be careful not to leave them lying around, they are particularly strong and may severely harm small children if swallowed.
Magnets can be ejected from the the inside of the base.
Because theses magnets use a patented technology, Yoctopuce is not allowed to export those to United-States, Canada and Japan. Therefore, enclosures exported to these countries do not have magnets.
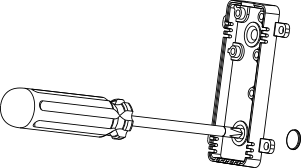
3.3. Screwing from the inside
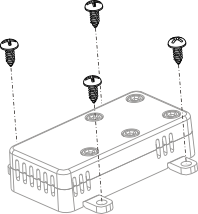
When you have removed the magnets, the enclosure can be screwed from the inside against a support area. Drill a 2 to 3 mm hole in the center of the thin walls (bottom of the hollows) and screw the base with a countersunk screw going through this hole (head diameter: 6 to 7 mm).
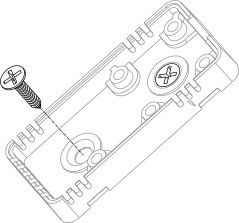
Bases can be fixed from the inside.
A piece of advice: remember to put the nuts to fix the lid in position in the base before fixing the base on its support. You can keep them in place before screwing down the lid with some adhesive tape.
Screwing the enclosure from the inside is the most robust method to fix an enclosure permanently.
3.4. Sticking
The enclosures are sold with a double sided adhesive. It's a glue film sandwiched between two protection layers. Start by removing the shiny plastic layer, apply the sticky side which was thus revealed on the bottom of the base, press strongly on the whole surface, remove the second protection layer, and then stick the enclosure on a flat and clean surface.
The adhesive power is full after about 24h. Even after this delay, this fixing method is not as robust as screwing.
Remove the shiny protection layer.
And stick the other part under the base. Your enclosure is now adhesive.
4. Precautions
4.1. Shocks
These enclosures are not conceived to resist to mechanical constraints. Do not let them drop, they could fissure and the clamps could break.
4.2. Magnets
These enclosures contain powerful magnets which can be relatively easily removed. If you remove the magnets from an enclosure, make sure that they cannot be swallowed by young children. Ingested magnets have a tendency to get stuck in the folds of the intestines or colon, preventing their evacuation by natural means. Most cases of magnet ingestion find their outcome on an operating table.
4.3. Heat
The precision of the measures of Yoctopuce modules containing heat sensors can be influenced by the enclosure. Indeed, the module processor emits a little heat which can accumulate in the enclosure and thus bias the measures. We recommend that you place the enclosure so that the sensor is not on the heat evacuation path. If precision is critical, move the sensor part away in the appropriate mini enclosure.
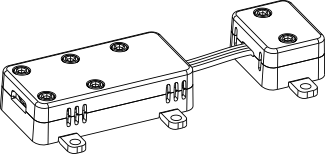
Detachable sensors can be placed in dedicated enclosures.
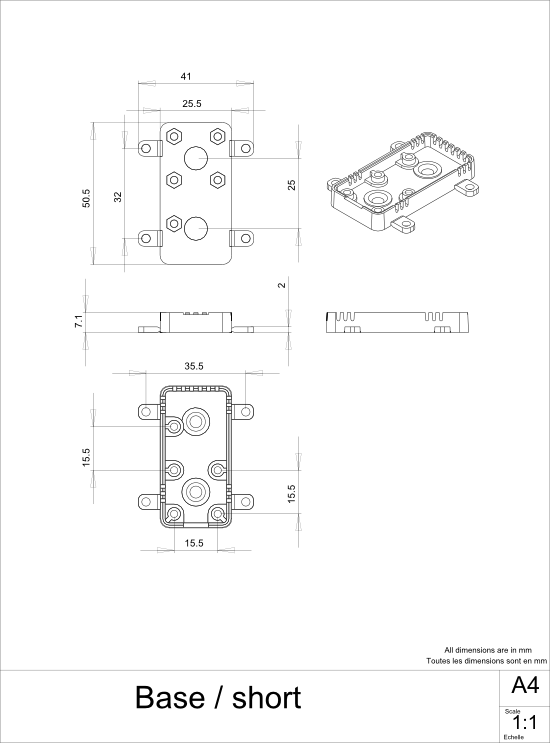
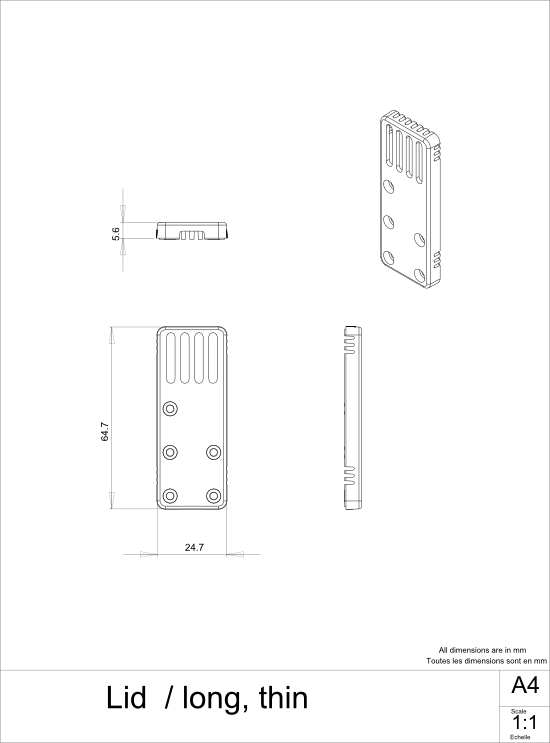
5. Technical drawings

- By "single width", we mean modules with a width of 20mm. ←
- Until fall 2017, simple width enclosures were shipped with metallic screws. Switch to plastic screws was decided to improve the enclosure insulation. ←
- Raw materials used to manufacture the enclosures and cited in this guide are subject to change. If you want to make sure of the exact material used for a given order, please contact Yoctopuce by email. ←
- For example, Tamiya reference 74001 ←
