![]() Last week, we built a water rocket launcher. This week, we deal with the sister issue: the water rocket itself. And because at Yoctopuce we can't help putting USB modules everywhere, we built a USB water rocket...
Last week, we built a water rocket launcher. This week, we deal with the sister issue: the water rocket itself. And because at Yoctopuce we can't help putting USB modules everywhere, we built a USB water rocket...
Water rocket anatomy
Usually, a water rocket is nothing more than a simple soda bottle with a few accessories such as a hose nozzle, fins, a tube, and a nose cone.

Water rocket anatomy
It is also best to plan for a recovery system, such as a parachute which slows down the fall of the rocket. With a recovery system, you won't have to rebuild the rocket after each launch. Such a system also greatly reduces the risk of hurting passersby.
There are many different methods to build a water rocket, here are some of the techniques we used. Many are borrowed from model making where we must build light and strong.
The motor
The centerpiece of a water rocket is the motor. By luck, it's the easiest part to build: simply take a soda bottle, glue to it a hose nozzle and fins.
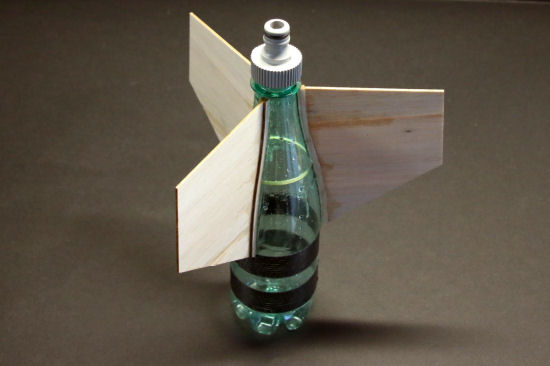
A water rocket motor
The fins are cut in balsa wood and glued with a glue gun. We reinforced the bottle with carbon fiber to prevent it from bulging too much when pressurized. We pressurize it to up to 10 bars.
The tube
The tube is used to make the body of the rocket longer. This is necessary for flight stability. If your rocket is too short, its trajectory is aleatory. You can find on Internet many formulas to compute rocket stability, but you can also trust your instinct. A well proportioned rocket is likely to fly well.
The ideal is to use a tube with an internal diameter only very slightly larger than the bottle diameter, in order to for the bottle to be stuck in it. This tube must also be light and rigid. Finding a tube with all these characteristics is not necessarily easy, so we made one ourselves with carbon fiber. We won't go into details, but it mainly consists in rolling resin coated carbon fabric around a pipe protected by a plastic sheet. When the resin is hard, we remove the pipe and that's it.
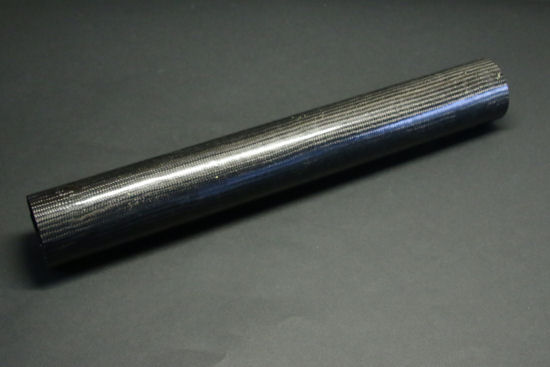
A home made carbon fiber tube, 65x500mm, 45 grams
The nose cone
The nose cone is essential for aerodynamics. However, it doesn't need to be very durable. Unless the rocket crashes, the nose cone won't be subjected to any mechanical constraint. Its shape is difficult to obtain. We created ours with a lost mold. The mold is a plastic sheet thermo-shaped on a form built with a 3D printer. The inside of the mold is papered with a thin veil of Kevlar coated with resin. When the resin is hard, we "peel" the mold, and we are left with a kind of hood in the shape of a nose cone, very thin and very light.
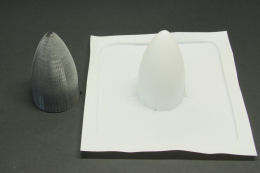
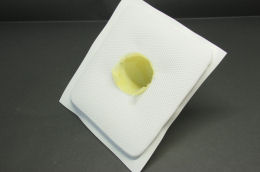
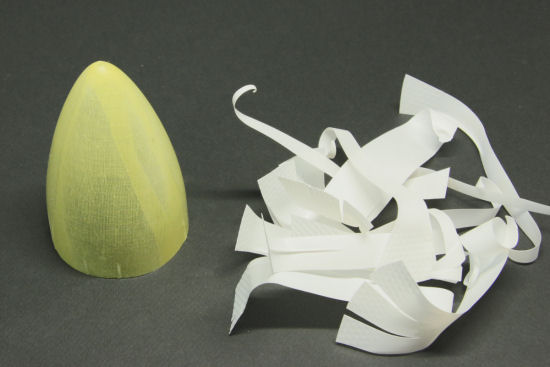
Making a nose cone with the lost mold technique
The parachute
We reach the real hard part of water rockets: how to deploy the rocket parachute, preferably when the rocket trajectory is at its apogee. There is a widely used technique which consists in using a spring toy motor as a timer. We opted for a more technological approach, based on two characteristics of Yoctopuce modules:
- Yoctopuce modules don't need a real USB connection to work. They only need to be powered. Some of them, such as the Yocto-Relay, don't even need a 5V power source, a low 3.3V is enough.
- Yoctopuce relays feature a delayedPulse function which makes them wait for a given duration, switch for another predefined duration, and finally switch back to their idle state.
We created a small compartment with a hatch in the rocket tube. A small rack is used to lock and unlock the hatch at will. This rack is actuated by an electric micro gear motor, and this motor is driven by a Yocto-Relay. The Yocto-Relay contains two relays and there is a wiring enabling the motor to run in both directions.

You only need two relays to make a motor run in both directions
For the Yocto-Relay to remain powered during the flight, we added three tiny ni-cd batteries in parallel on the Yocto-Relay power supply. It's an unorthodox technique, but it works very well because the rocket will be powered for a very short time.

Complete wiring of the rocket
The Yocto-Relay, which is inside the rocket, is connected to the YoctoHub-Wireless of the launcher by a tiny plug which barely holds. During the launching stage, the YoctoHub-Wireless sends a delayedPulse command to the Yocto-Relay, and then frees the rocket. When launching, the rocket pulls on the plug, disconnecting it from the launcher. When the delayedPulse delay has expired, the Yocto-Relay actuates the motor, unlocking the hatch.
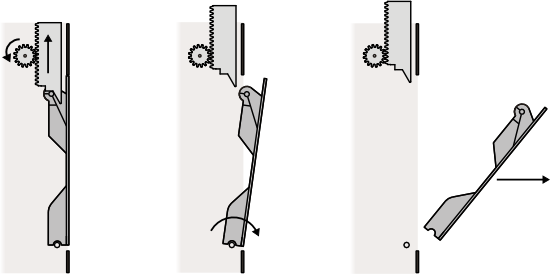
Operation of the hatch (sectional view)
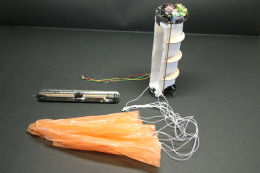
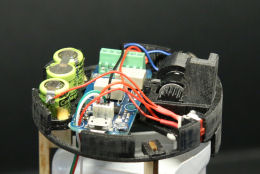
The parachute system
We attached the hatch to the parachute. Thus, when the hatch is unlocked during the flight by the Yocto-Relay, relative wind tears it off, dragging along the parachute which has no option but to open.
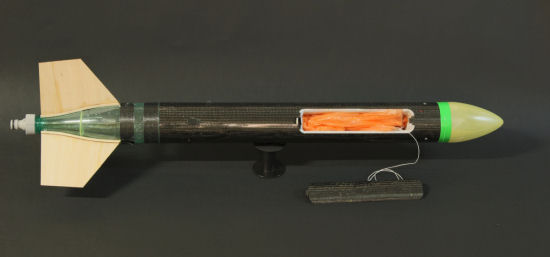
A Yoctopuce water rocket, with its parachute. 80cm, 170g.
Launch control
We configured the YoctoHub-Wireless in the launcher to work in ad hoc mode, and therefore to create its own wifi network. The control software is a web-app stored on the YoctoHub-Wireless file system. In this way, you only need to connect your smartphone on the launcher wifi network and to download the control software to be ready to launch our rocket.
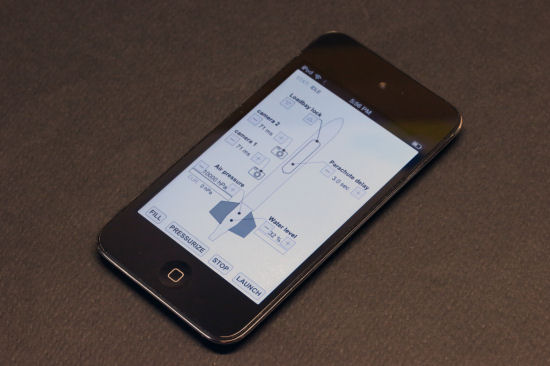
You can control the launch from any smartphone able to connect itself to an ad hoc network
Although very convenient, this architecture suffers from an important vulnerability: the control software runs on a smartphone connected to the launcher by a wifi connection. If we simply switches the compressor on and wait until the pressure is high enough to switch it off, we are heading for disaster. Indeed, if the smartphone loses the connection in the pressurization stage, the compressor goes on pumping until something breaks. To avoid this, the correct process is to use the pulse function of the relay driving the compressor to ask it about once per second to switch for 1.5 second, and this until the required pressure is not reached. In this way, in case of connection loss, the relay comes back to its idle state at worse 1.5 seconds after the connection loss, and the compressor stops.
Well, here we are, we talked about everything, we only need to try :-)

5.4.3.2.1

We have a liftoff
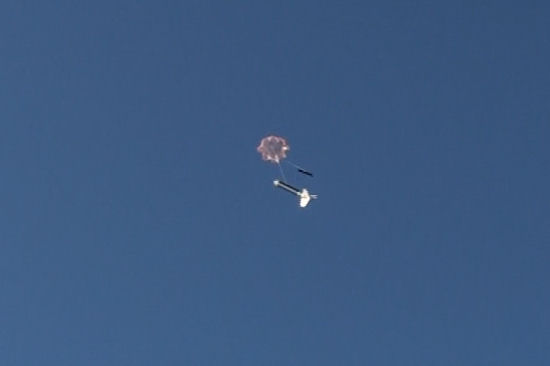
Successfuly deployed recovery system
While being usually a hobby for kids, water rockets can very easily become dangerous as soon as we try to make them efficient. The energy that they contain can propel them several tens of meters high. It's neat, but it means that if something breaks, this same energy is going to scatter fragments fast and far. Be careful.


