 The #1 application for most USB sensors is certainly to record the measures and draw them in a graph. We have already provided examples in previous blog posts on how to draw measure graphs in several programming languages, but so far you always had make a program of some kind to do this. Today, we show you how to leverage a public cloud-style service named Cosm (www.COSM.com) to graph your sensors without writing a single line of code. You will just need to download the latest and greatest version of our VirtualHub, and configure it to upload data to www.cosm.com. Follow the guide...
Step 1. Create a Cosm account
Go to www.cosm.com, and create an account (click Sign Up on the upper right corner). You only have to provide an e-mail address, and the desired username and password. When you receive the activation e-mail from Cosm, just click on the link in the mail to activate your account.
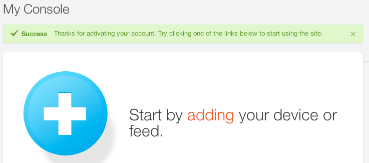
Cosm account activation successful.
Step 2. Create a Cosm data feed
Click on the big "adding" link to create your data feed. This opens a choice with some predefined types of data feed. Choose "Something else".

Select 'Something Else' to define a custom feed
You will now configure this new feed. The first question is where to find your data.
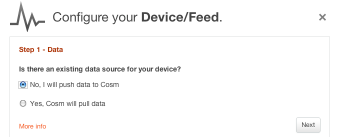
Select feed data source
Keep the default option "No, I will push data to Cosm" and press Next. You can now give a name to your feed
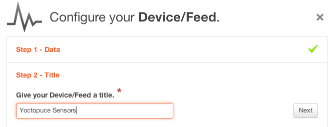
Choose a title for your data feed
Enter a name for the feed like "Yoctopuce sensors" and press Next. You can now enter keyword tags if you want.
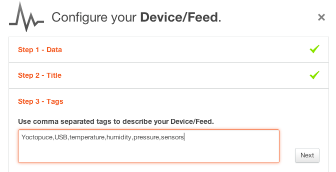
Enter keyword tags if you want
Provide keyword tags if you want and press Next.
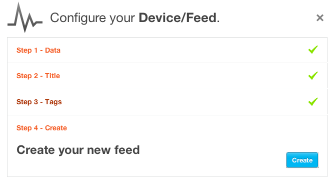
You are done
Click on "Create" to create your feed. A short message will confirm the availability of your feed, including the feed ID.

This is your feed ID
Keep your feed ID at hand for later use.
Step 3. Create a Cosm API key
Now you need to create an API Key, i.e. the token that will allow your VirtualHub to upload data to your feed. On the upper right panel, click on "Keys".

Link to configure your API keys
You will see that you currently do not have any key available.

Link to configure your API keys
Click on the link "create one" to create a key. Give a name to your key, and specify the privileges that you want to provide to the users of this key.
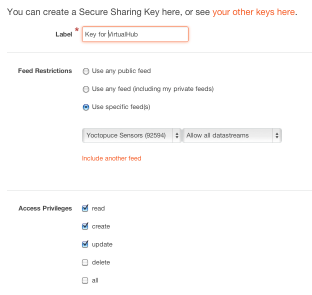
Setup the privileges to give to this API key
The screenshot above shows the recommended settings for uploading data from the VirtualHub. When you are done, click on the "Create" button. A short message will confirm the creation of your key, show it to you.

This is your API Key
Select the whole content of the key in the text field, and copy it to your clipboard for later use.
You are now ready to start configure your VirtualHub to upload data to Cosm.
Step 4. Configure the VirtualHub to use Cosm
Start the VirtualHub if not yet done and open a browser to http://127.0.0.1:4444 (or whatever the IP address of your VirtualHub is).

Yoctopuce VirtualHub main view
Click on the "Configure" button next to the VirtualHub. In the lower section of the configuration window, you will be able to configure outgoing callbacks.

Outgoing callback configuration
Click on the "Edit" button. The callback configuration window offers many options to allow the integration with all kind of web services. But don't be afraid, at the top of the callback configuration window, you will find a shortcut for a simpler Cosm-specific configuration panel.

Link to Cosm easy configuration panel
Simply click on the "click here" link shown above.
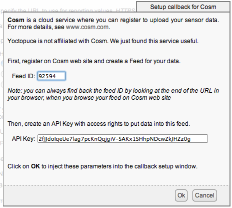
Callback configuration for Cosm
Paste the API key that you had previously copied from Cosm, and enter as well the Cosm Feed ID. If you lost your Feed ID, you can always go to your Cosm Console using the link on the upper right panel of Cosm web page, and then click on the feed title to browse its details. This will point your browser to an URL like https://cosm.com/feeds/92594, where 92594 is your Feed ID.
When you are done, press Ok to return to the generic callback configuration window, where all values will now be configured properly for Cosm:
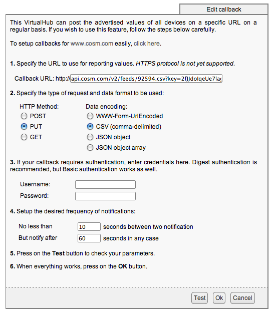
Callback parameters generated for Cosm
Step 5. Test your settings, and save them
Click on "Test" to verify your callback. If everything works as expected, you should get the following output:

Successful connection to Cosm
If you have provided a wrong API key, you will get instead:

Error message when the API key is wrong
Click on the "Close" button to close the test window, and click on "OK" to keep your callback settings. Finally press "Save" to close the VirtualHub configuration window keeping your changes (if you press "Cancel" at that point, all change to the settings will be reverted).
You are now done. By the time you read this sentence, the VirtualHub has probably already uploaded your first data point to Cosm.
Step 6. Enjoy !
If you go back to Cosm web site and reload your feed, you will see that data streams have been automatically created for all Yoctopuce sensors that you have connected.
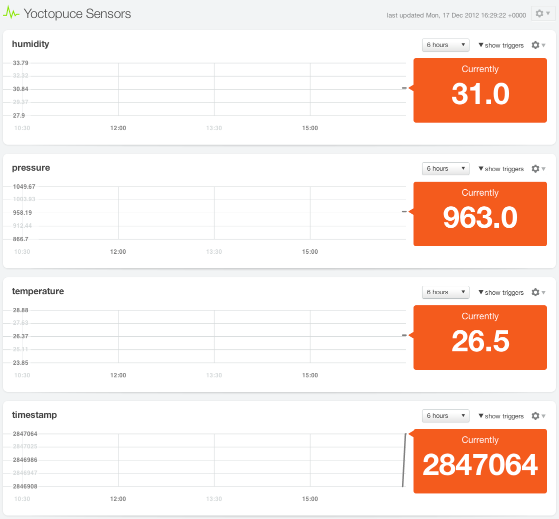
Data streams have been created automatically
If you wish, you can now edit your feed to add units for each sensor, by clicking on the small gear next to the feed title.

Drop-down menu to configure the feed
Here is the kind of output that you will get after some time. Note that Cosm provides ways to customize the graph.

Temperature data collected after some time
The name of the individual data streams is provided automatically by the VirtualHub: if you have specified a logical name for individual sensor functions, that name will be used for Cosm. Otherwise, the serial number or logical name of the module will be used, followed by the function id.
At the bottom of the feed edit page, you can also add location data to your feed and configure the visibility of your feed (public or private). If you spend some time to discover Cosm, you will see that you can even configure it to automatically trigger webhooks whenever the measured values meet some conditions. Why not link that to your Zapier account ? Have fun...


